KNOWLEDGE
Case StudiesBlogsEventsSupport & Starting
Support Articles & HubSupport Videos (Youtube)Try Leadoo Free (Leadoo Lite)Partners & Careers
PartnershipsCareersSecurity & Privacy
Security at Leadoo AIGeneral Terms & ConditionsData & GDPRKNOWLEDGE
Case StudiesBlogsEventsSupport & Starting
Support Articles & HubSupport Videos (Youtube)Try Leadoo Free (Leadoo Lite)Partners & Careers
PartnershipsCareersSecurity & Privacy
Security at Leadoo AIGeneral Terms & ConditionsData & GDPRNeed to set or update the lead notification settings for your bot? Read on!
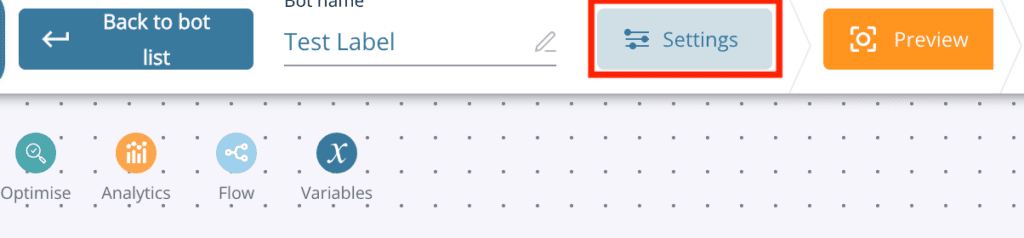
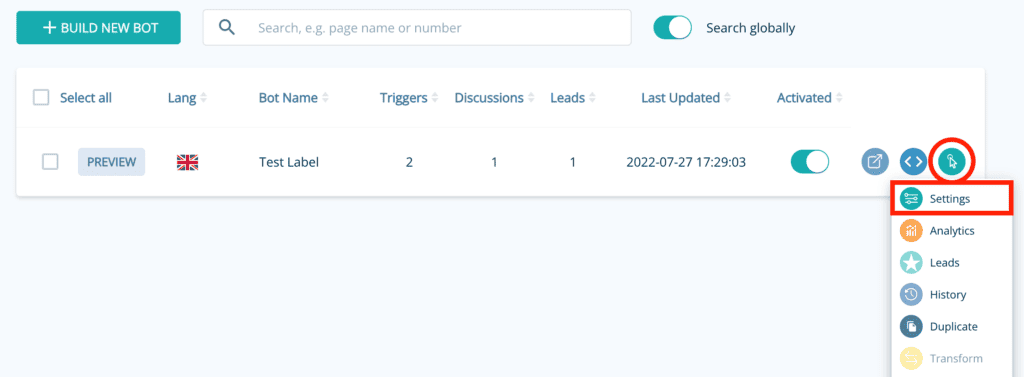
Lead notifications are triggered by settings in each bot for ultimate control. Open bot settings either in the Visual Bot Builder or by clicking the actions button from the bot listing.
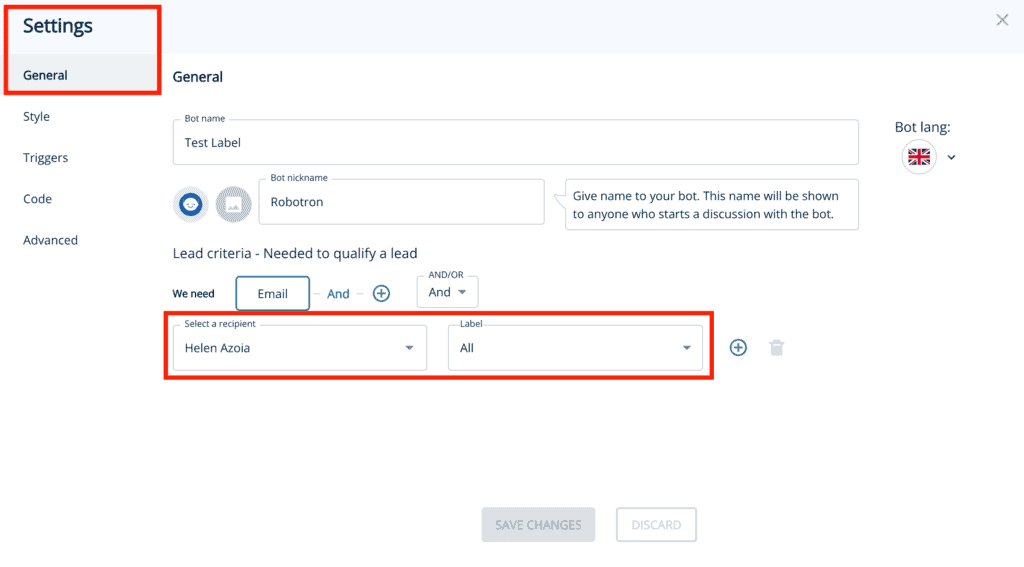
On the general tab, you’ll see the option to select a recipient. You can select from a list of users on your account or manually add an email address you’d like to send notifications to by typing into the box.
You can add one person or multiple people to receive lead notifications. To add more people, just click the “plus” button and select more people from the drop-down.
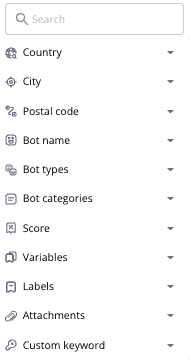
By default, the recipient will receive all leads. If you want to be more conditional about who receives what type of notifications, i.e. support requests go to the support team and sales enquiries to the sales team, you can use labelling.
Contact your Customer Success Manager at Leadoo or reach out to our general support line – [email protected]
On Lead settings you can define what information you want to include on your lead emails by selecting different sections.*
*Note, that all the information is not always available, in which case the field will not be included in the email even if selected.
You can also define Email subject and intro text. That way you can make the email subject more clearer to the lead recipients. Ie. You can add the email subject to contain name and company of the person that contacted you. You can use following macros:

If you use outlook we recommend you to use Outlook optimized email templates.
And if you have issues copying the message from lead emails select ”Include a plain .txt to lead info with the lead email”

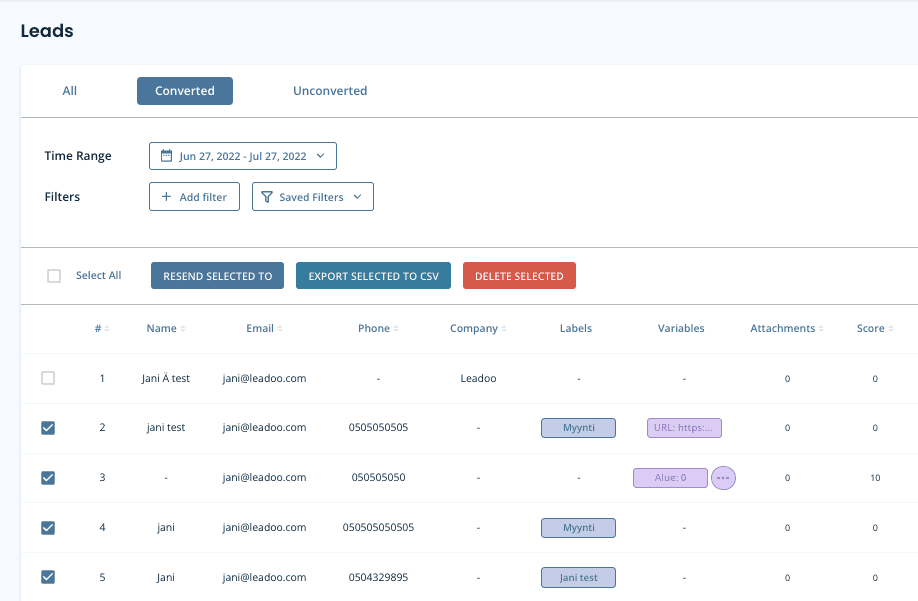
If you have set-up lead notifications on your bots, you will receive an email when a new lead is converted. All your leads are also stored on the platform under the leads tab, you can also filter them to find the exact leads you want.
You can either view Converted leads (default), Unconverted leads or All (has all bot conversations)

First you need to select leads that you want to resend. After selecting one or multiple leads -> click ”RESEND SELECTED TO”. After that choose from these options:
Email recipients defined in the bot settings (bot specific)
New email address (you can type in the email address)
Integrations (lead is sent to the integration that has been previously set up)
First you need to select leads that you want to export. You can either select one by one or select all. You can export leads to CSV and then open up the file in excel, google sheets or some other platform. CSV has all lead details and the bot conversations in it.
First you need to select leads that you want to delete. You can either select one by one or select all. After that click ”DELETE SELECTED”*
*Note that deleted leads can’t be restored to the platform
On Lead settings you can define what information you want to include on your lead emails by selecting different sections.*
*Note, that all the information is not always available, in which case the field will not be included in the email even if selected.
You can also define Email subject and intro text. That way you can make the email subject more clearer to the lead recipients. Ie. You can add the email subject to contain name and company of the person that contacted you. You can use following macros:
If you use outlook we recommend you to use Outlook optimized email templates.
And if you have issues copying the message from lead emails select ”Include a plain .txt to lead info with the lead email”
Questions?
Contact your Customer Success Manager at Leadoo at [email protected]
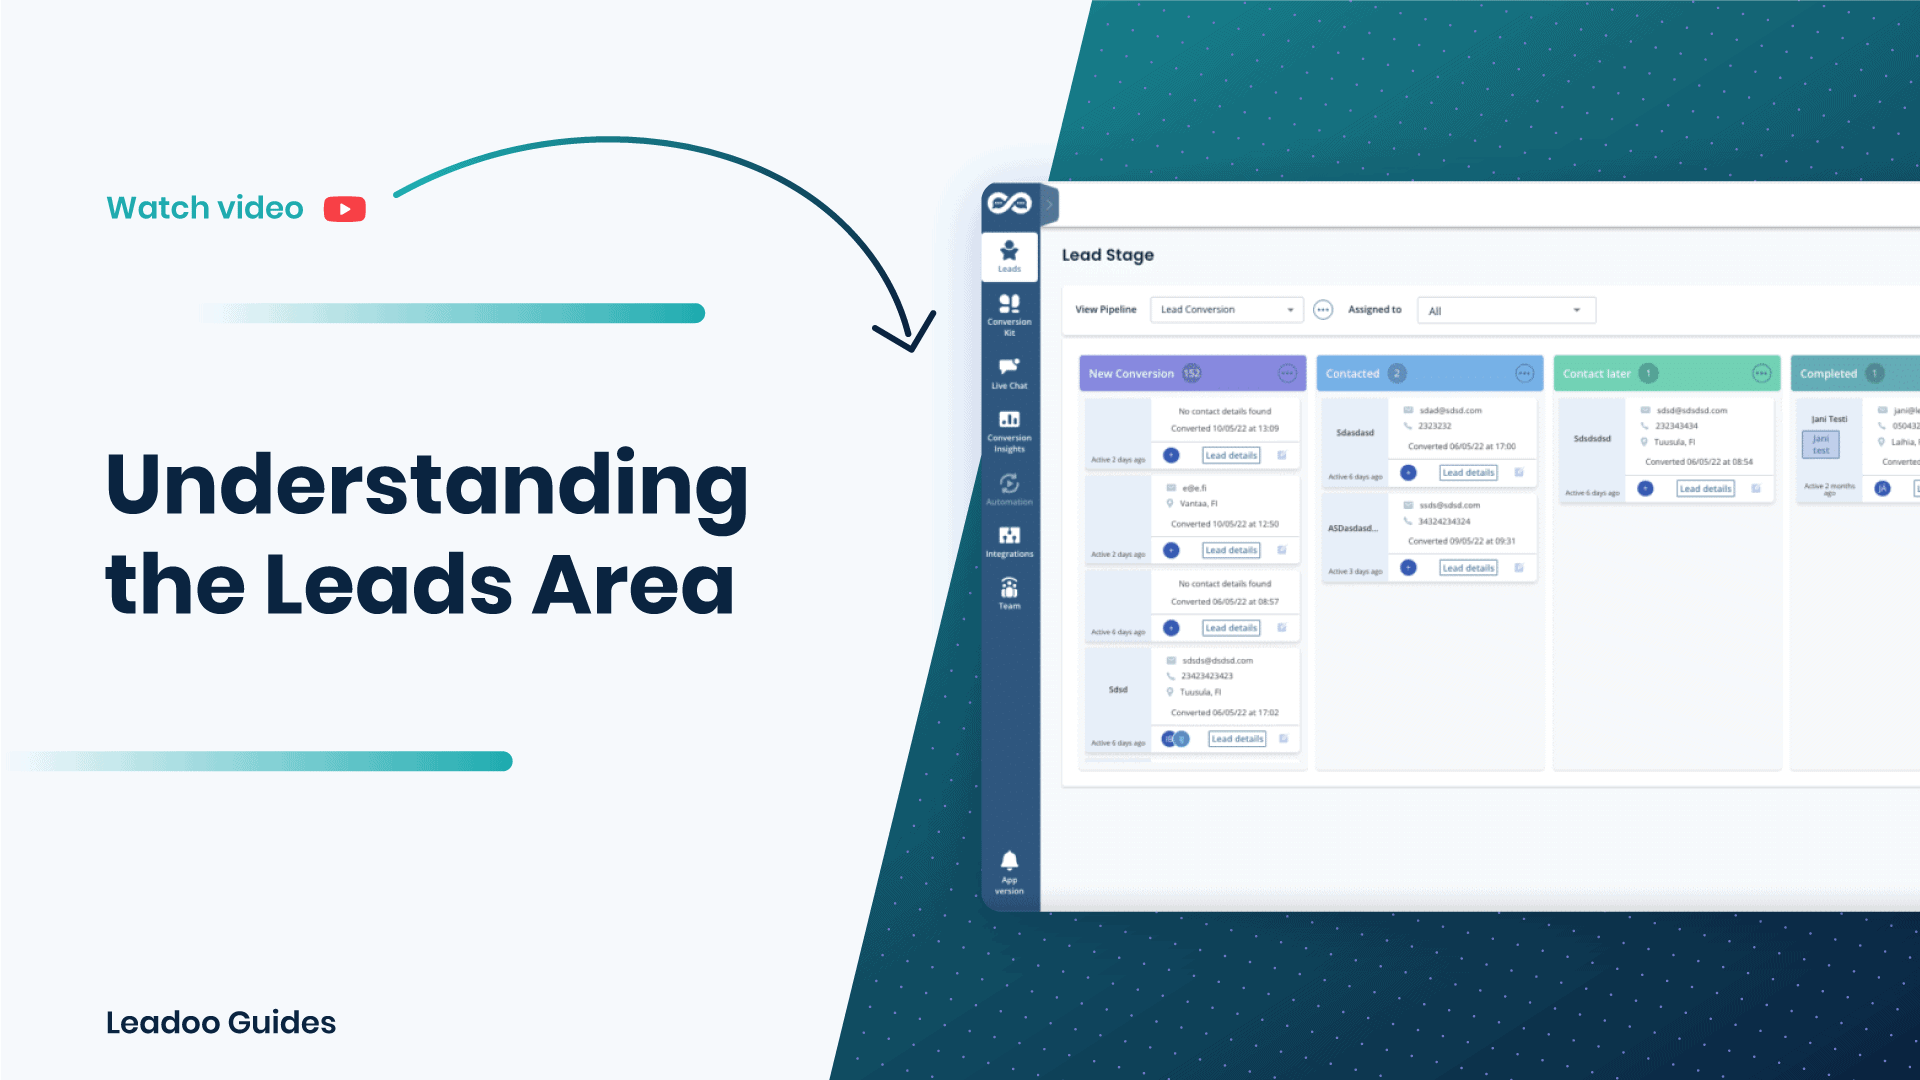
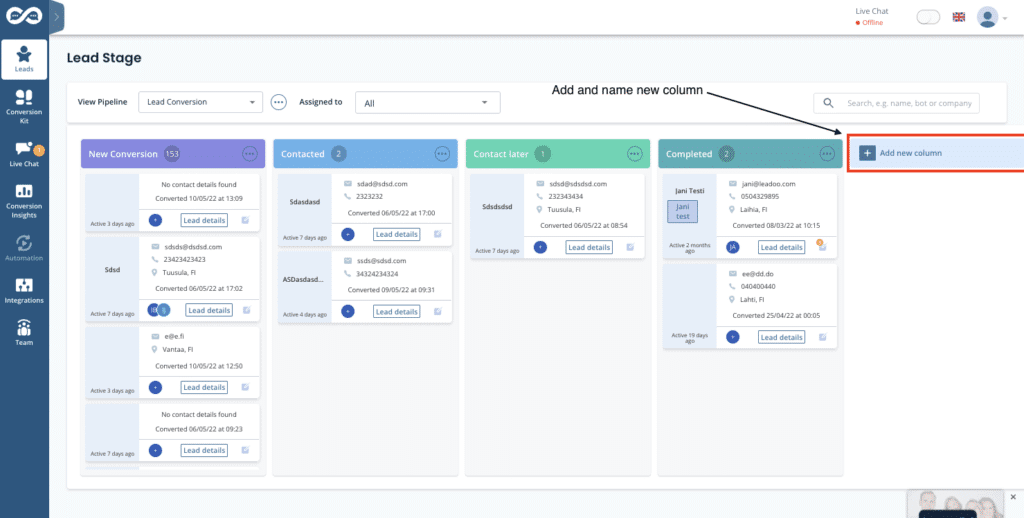
Lead stage is like a mini CRM within Leadoo’s app. You can create custom pipelines for example for sales and follow the progress of different leads. Pipelines can contain as many steps as you need and you can name them to match your process. That way you can have an accurate view of your sales funnel.
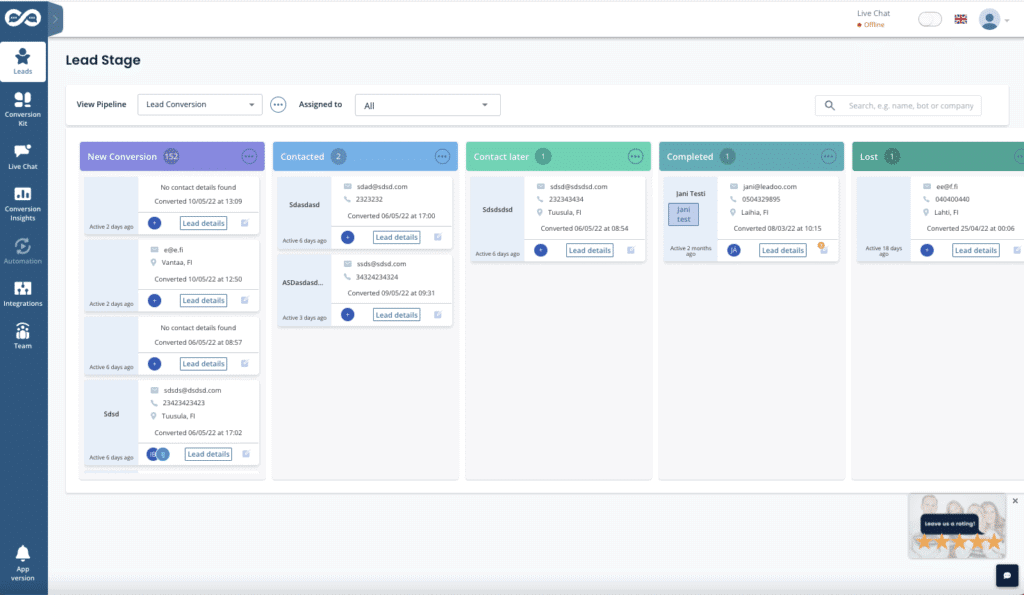
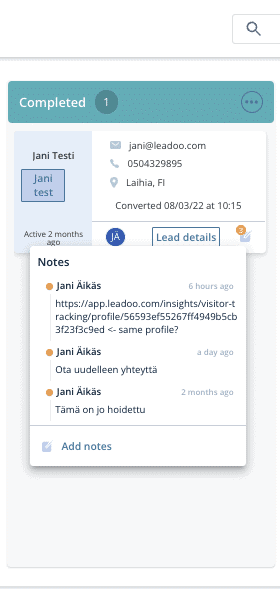
When a new lead is converted from Leadoo’s conversion tool, it will be automatically added to the first step of your pipeline. From there you can assign it to a specific person (Leadoo user) or have a user manage all incoming leads. You can leave notes on a specific lead card for all users to see if you have something to comment about the lead. When the sales process progresses you can move the lead card forward on your pipeline.
Lead details and comments will be visible through the process with time stamps stating the time the comments were added.
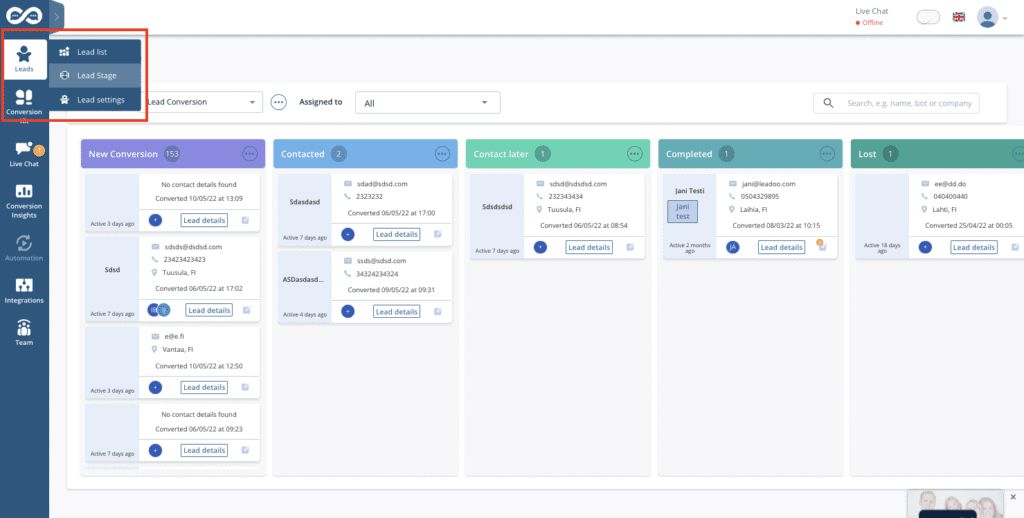
Lead Stage can be found from the left hand side menu under ”Leads” option. If it is not visible, please contact your Leadoo Customer Success Manager and they will assist you to enable the feature.
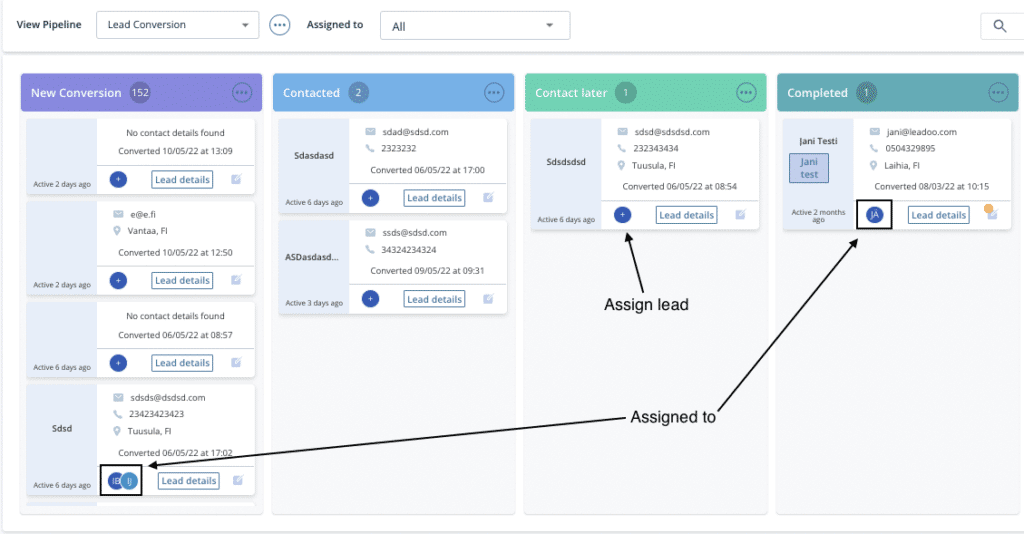
You can assign a lead to a specific user by clicking the ”+” icon on a lead card. This opens up a dropdown of all the users to whom a specific lead. Select the user you want to assign the lead to. One lead can be assigned to multiple users.
From the top of the Lead Stage view you can search specific leads that are assigned to a specific user. It’s also possible to look for specific leads based on e.g. name, bot or company name.
You can rearrange/sort columns by clicking the three dots on the top of each column, then selecting ”Rearrange/sort” and then selecting which order you want the leads to be presented to you.
All the filters mentioned above can be used at the same time.

Contact your Customer Success Manager at Leadoo at [email protected]

