KNOWLEDGE
Case StudiesBlogsEventsSupport & Starting
Support Articles & HubSupport Videos (Youtube)Try Leadoo Free (Leadoo Lite)Partners & Careers
PartnershipsCareersSecurity & Privacy
Security at Leadoo AIGeneral Terms & ConditionsData & GDPRKNOWLEDGE
Case StudiesBlogsEventsSupport & Starting
Support Articles & HubSupport Videos (Youtube)Try Leadoo Free (Leadoo Lite)Partners & Careers
PartnershipsCareersSecurity & Privacy
Security at Leadoo AIGeneral Terms & ConditionsData & GDPRThe Leadoo calendar node is a great way to create a sense of urgency within your visitors, leading to higher conversion rates and a better user experience. But how does it work?
The calendar node has two functions, first is a live calendar booking that syncs directly with your own calendar (Google, Outlook and Office365) so that prospects or customers can book in with directly. The second is a way for visitors to indicate a date and time that they would prefer, but it can also be great for asking about project start dates etc.
Let’s start with the live booking feature but before you add the calendar node make sure that you have connected your calendar in the platform, you can do this from the My Account area. Here’s an article to help you get connected. Now you’ve got your calendar linked, you’re ready to go!
To use the live booking function, simply add a calendar node to the canva and click on calendar booking, you’ll notice that this changes the settings. From here you’ll need to select which calendar you’d like to connect (you can choose multiple) and update the meeting title and details if you wish. The title, description, duration and location will all be pulled in from the settings in the My Account area so you normally don’t need to change these!
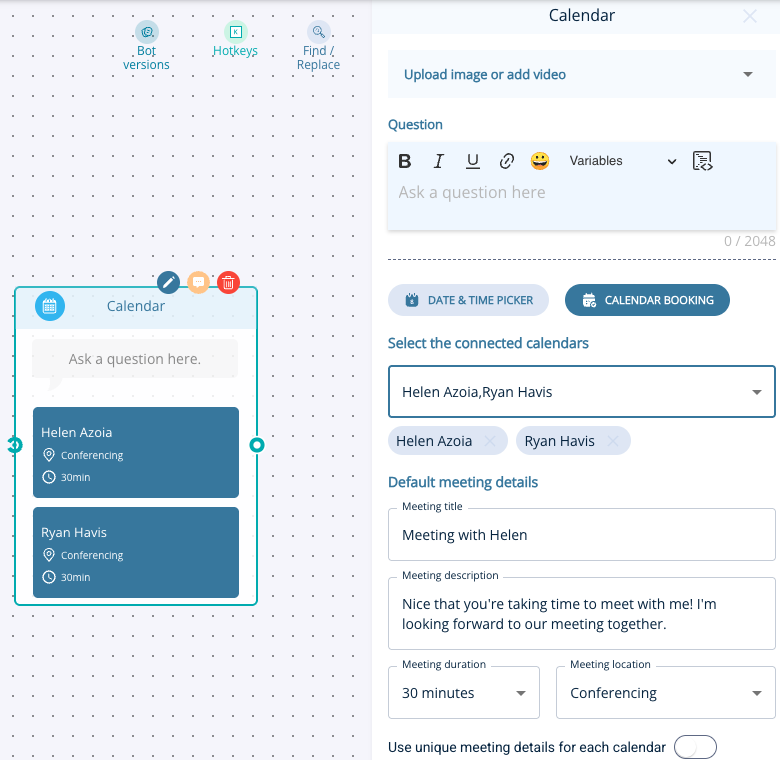
If you’re adding multiple calendars the default meeting details will use the first calendar you added but you can easily change this by toggling on the option to use unique meeting details for each calendar. This will allow you add another level of customisation for the meetings, you’ll be able to use variables to include personalisation options like name and company name etc.

Once you’ve done this you can preview the flow to make sure you’re happy! Here’s a few screenshots of what it will look it. You’ll see that the visitor is prompted to add their email to confirm the booking, but you can also ask for contact details before sending them to the calendar node and it won’t ask for their email again.
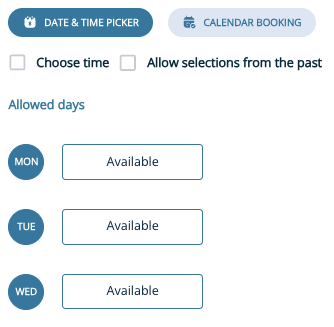
The other option when adding a calendar node is to use the offline scheduler which is essentially a date and time picker for the visitor to select. This is great when asking for times they prefer to the contacted, when their project is starting or when they could start a new job.
To get started you’ll need to decide on whether or not they can pick a time as well as a date. If you allow a time to be select you can customise the availablity to create set windows. For example you can allow 9am – 5pm everyday or create certain windows of availability on set days, check out the screenshots below for some inspiration.
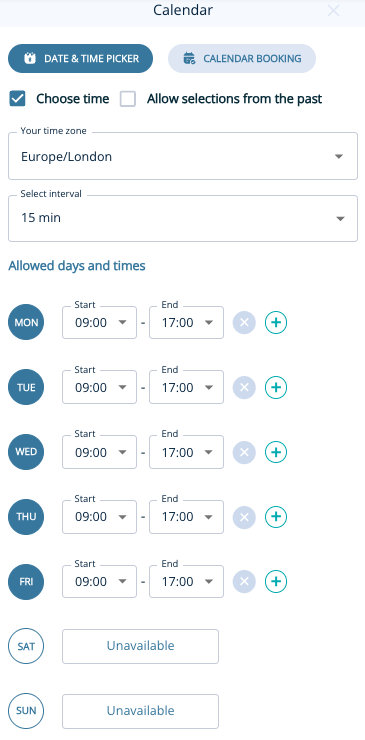
If you’ve chosen to not allow a time to be selected, you’ll simply need to decide on which days you wish to be available.
Leadoo won’t track any users by default, only after cookie consent has been given by the end-user.
You’ll notice that with this option the visitor won’t need to give their email address to confirm because they are not booking directly into you calendar, so it’s generally a good idea to ask for their details before the calendar node!
And that’s all there is to it!
Leadoo AI Sales Alerts brings you Company Identification’s incredible insights straight to you without the hassle of logging in.
Company ID tracks visitor interactions, revealing annual revenue and industry specifics. Dive into a wealth of data, including interactions, conversations, and conversion points, all at your fingertips. Save filters for pinpoint accuracy in identifying the hottest prospects.
Sales Alerts means no more logging in; receiving automatic email notifications with targeted filters in real-time. It’s your shortcut to staying ahead in capturing those hot prospects.
Not familiar with Company Identification yet? Find out all about it here.
Our CPO & Founder Mikael da Costa walks you through it below. Prefer written steps? Keep scrolling.
We’ve given you plenty of control to personalise exactly when and how often you can trigger an alert. But, here’s a step-by-step guide to getting started.
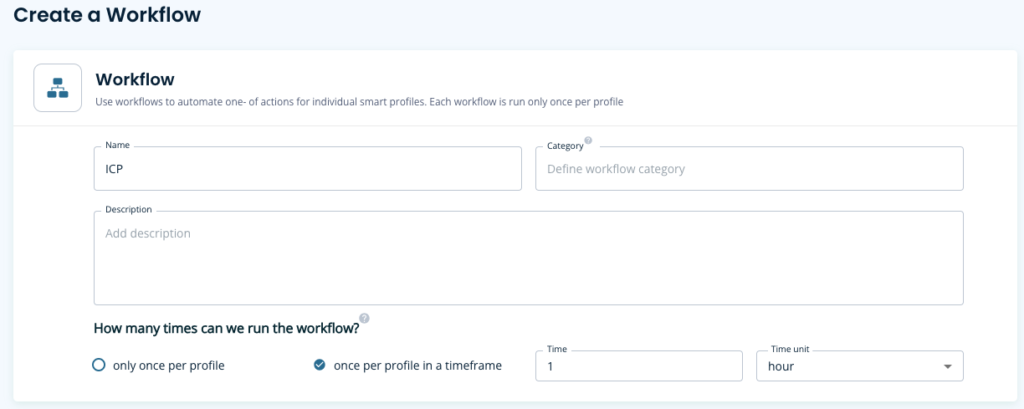
Let’s set up a workflow that alerts you when a company that meets your ICP lands on your site.
Workflow Setup
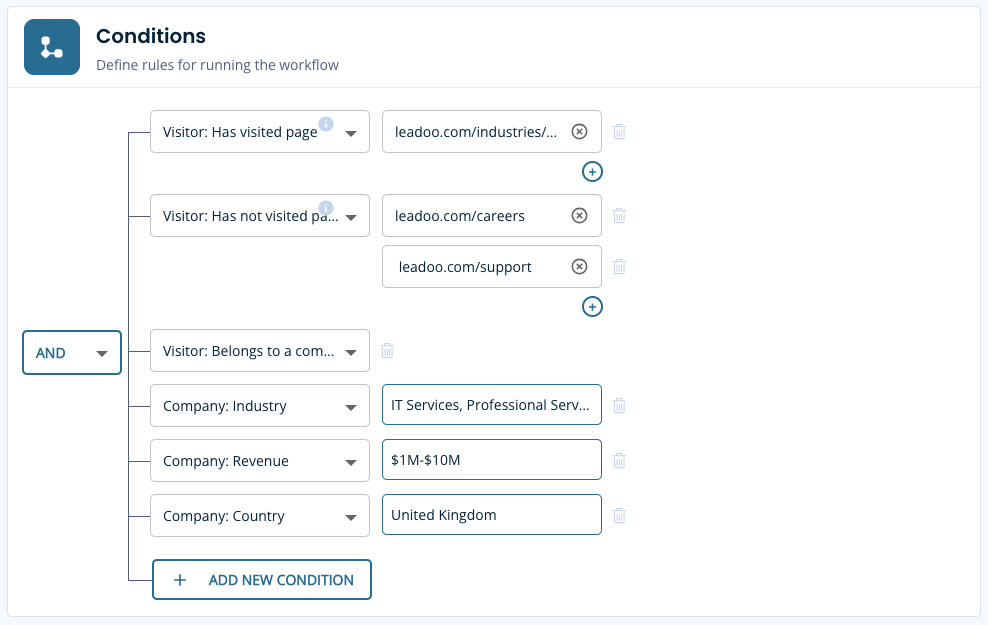
Filter Criteria
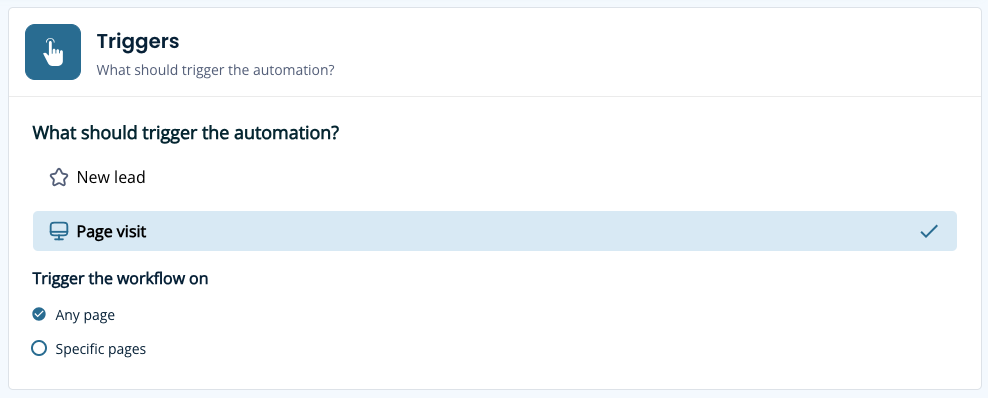
Define conditions based on visitor actions, company industry, revenue and country then, filter this against high-intent pages
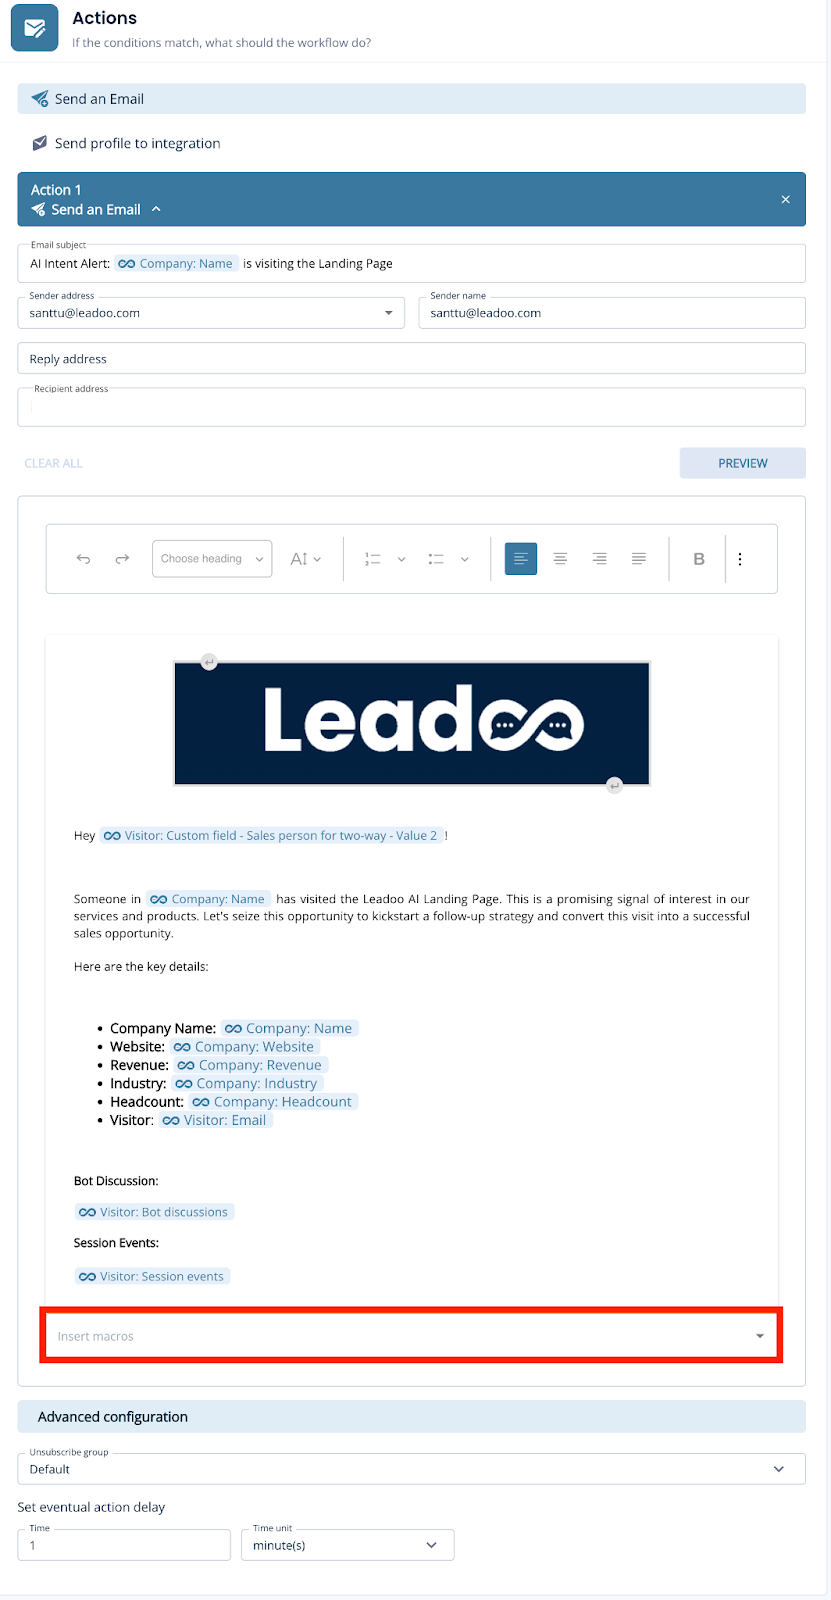
Setup the Notification
Create a notification email to any user on your account with ease. Build your email using the earlier conditions as macros for quick reference. Then you’ll be all set to receive timely email alerts whenever a prospect meets your defined conditions.
Here’s an example you can follow:
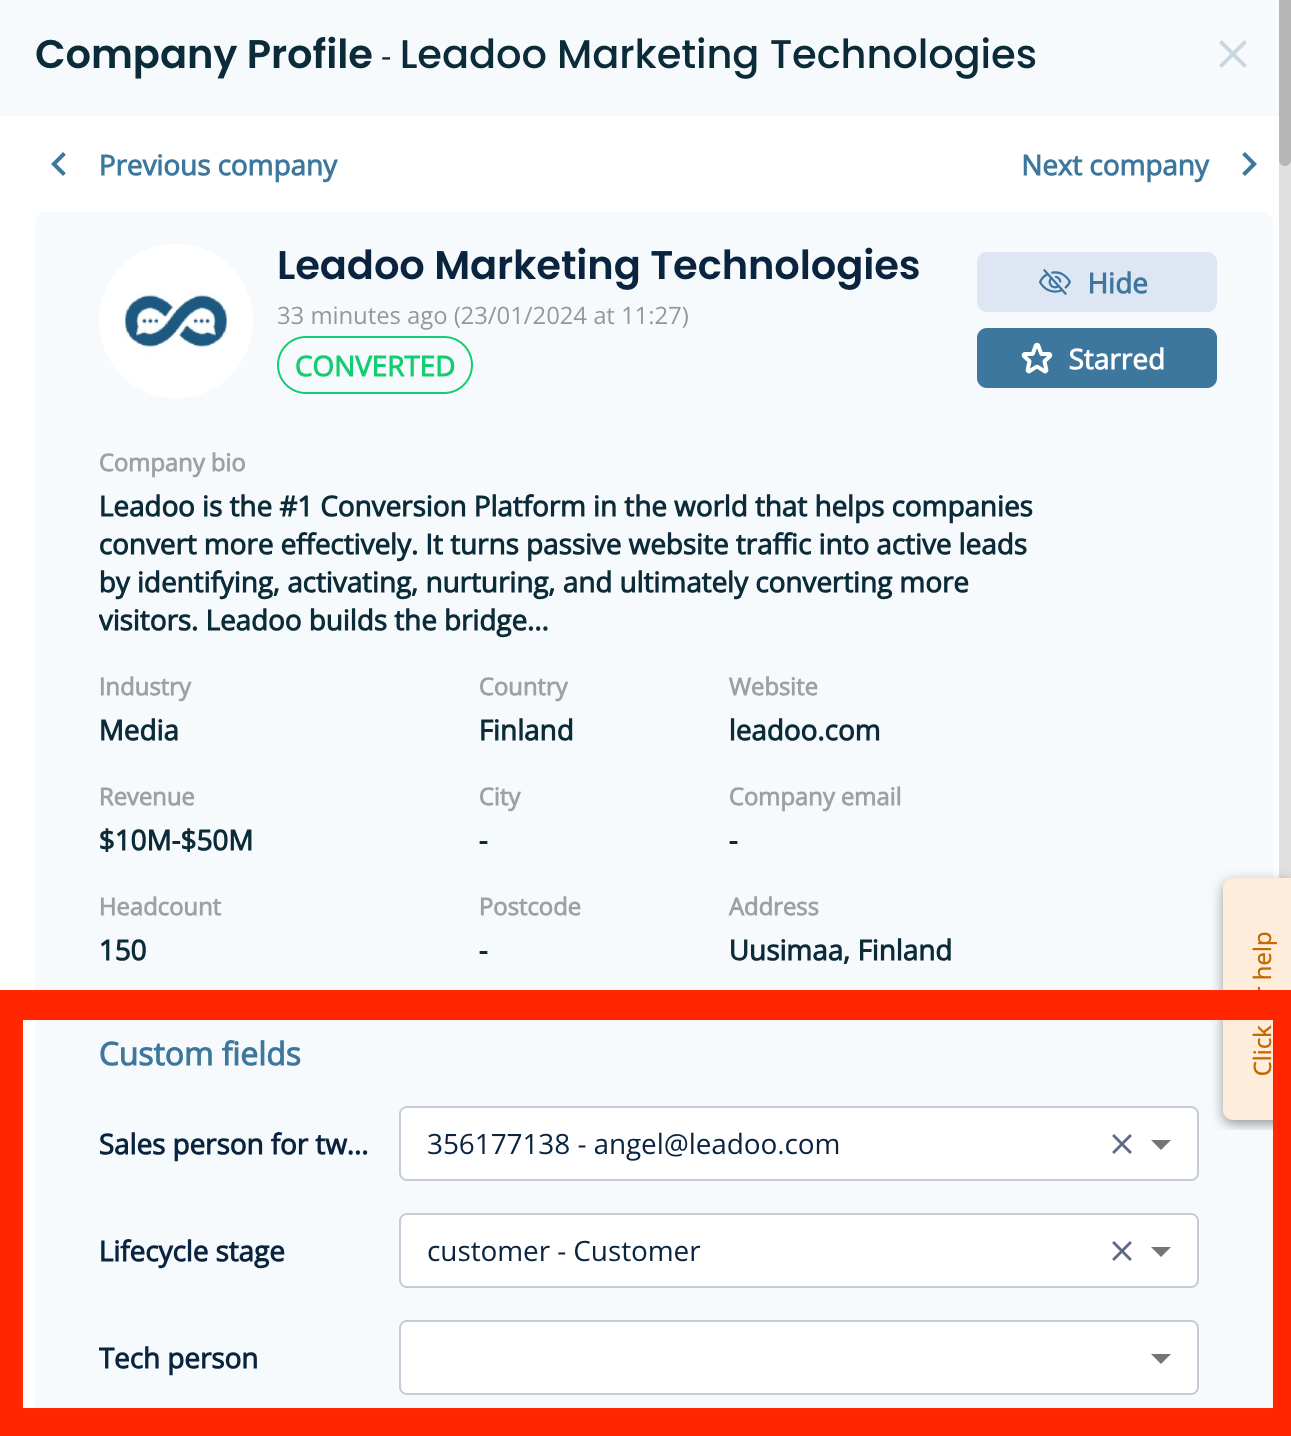
What if the customer is already a prospect or customer?
That’s where our 2-way integration comes into play and ensures seamless notifications to the right salesperson without unnecessary pings.
To do this you’ll need to have an integration already set up and be able to share additional information with us such as:
You’ll then be able to filter Sales Alert notifications more intelligently and sync the data into the platform like below.
To explore the benefits of 2-way integration, reach out to your Onboarding Manager or Customer Success Manager today.