KNOWLEDGE
Case StudiesBlogsEventsSupport & Starting
Support Articles & HubSupport Videos (Youtube)Try Leadoo Free (Leadoo Lite)Partners & Careers
PartnershipsCareersSecurity & Privacy
Security at Leadoo AIGeneral Terms & ConditionsData & GDPRKNOWLEDGE
Case StudiesBlogsEventsSupport & Starting
Support Articles & HubSupport Videos (Youtube)Try Leadoo Free (Leadoo Lite)Partners & Careers
PartnershipsCareersSecurity & Privacy
Security at Leadoo AIGeneral Terms & ConditionsData & GDPRIf you are currently using our livechat application and have noticed that the sound notifications are not working properly, we would like to clarify that this is not an issue with our application. Instead, it appears to be a browser-related problem.
To resolve this issue, we recommend following the instructions provided on thetroubleshooting sound issues in Chrome for Chromebook, Mac, Windows, and Ubuntu users. By following the steps outlined in the article, you can attempt to resolve the sound issue on your browser and ensure that you receive sound notifications for our livechat application.
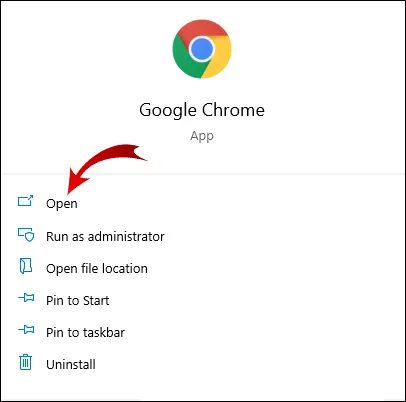
1. Launch Chrome
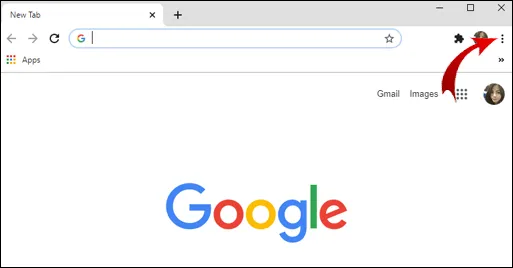
2. Click on the three dots (or three horizontal lines) in the upper right-hand corner of the browser.
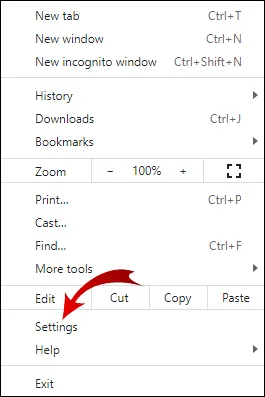
3. Go to the Settings
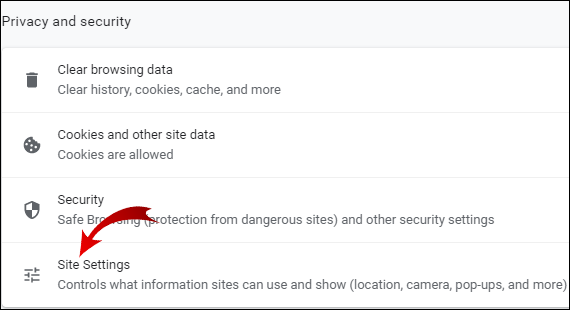
4. Now, under the Privacy and security tab, click on Site settings.
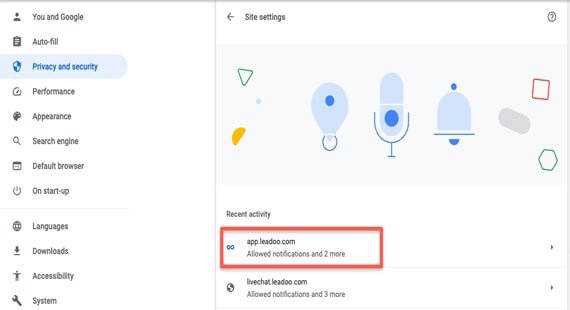
5. Find app.leadoo.com
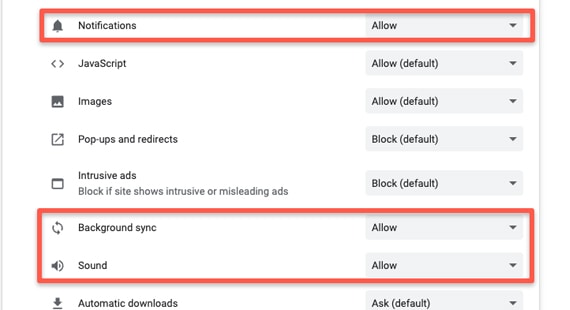
6. Find “Notifications”, “Sound” and “Background sync”. Then set all of them to “Allow”
1. Open Firefox
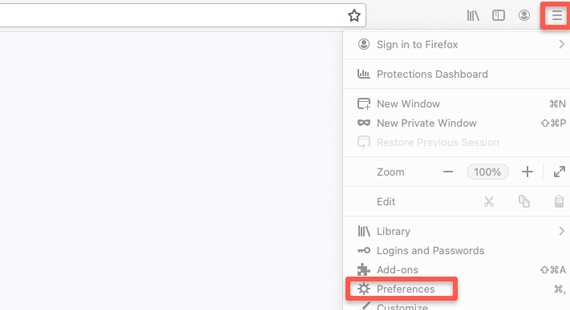
2. Select settings -> Privacy & Security
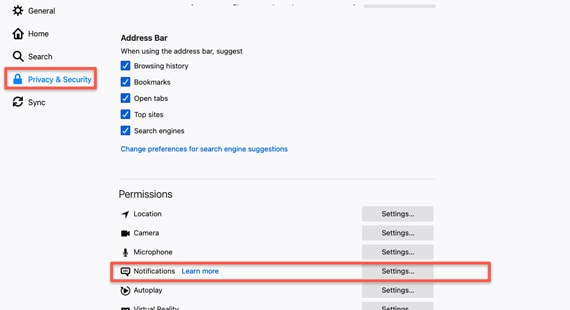
3. Search for App.leadoo.com and allow notifications


Did you get an invite from your team to start using Leadoo as a livechat agent? Here’s everything you need to know about using Leadoo LiveChat from setting up your account to hosting your first live conversations!
In order to see and operate LiveChats you need to…
So make sure you have set the LiveChat toggle active. The toggle can be found from the right-hand corner of the screen.
You know you are active when the toggle has turned BLUE.
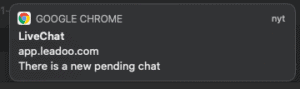
Once the toggle is activated, visitors can start a conversation and send messages to you through the livechat. Whenever a visitor has written you a message, you will see a notification popup and hear a sound.

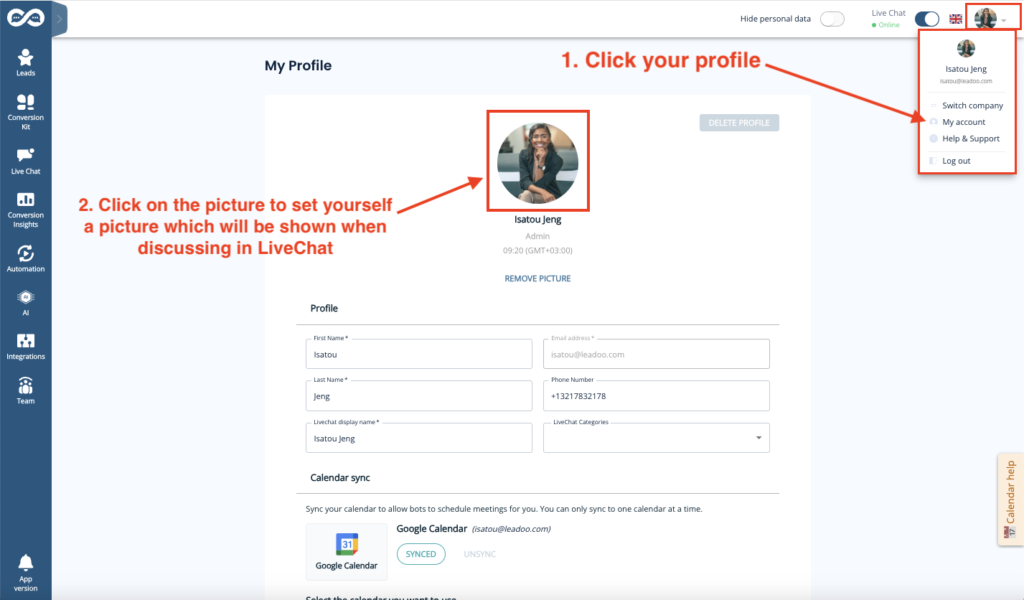
If you wish, you can change your notification preferences in your Profile.
Make sure you’ve allowed notifications from your browser and System Preferences
How to make sure you’ve allowed notifications:
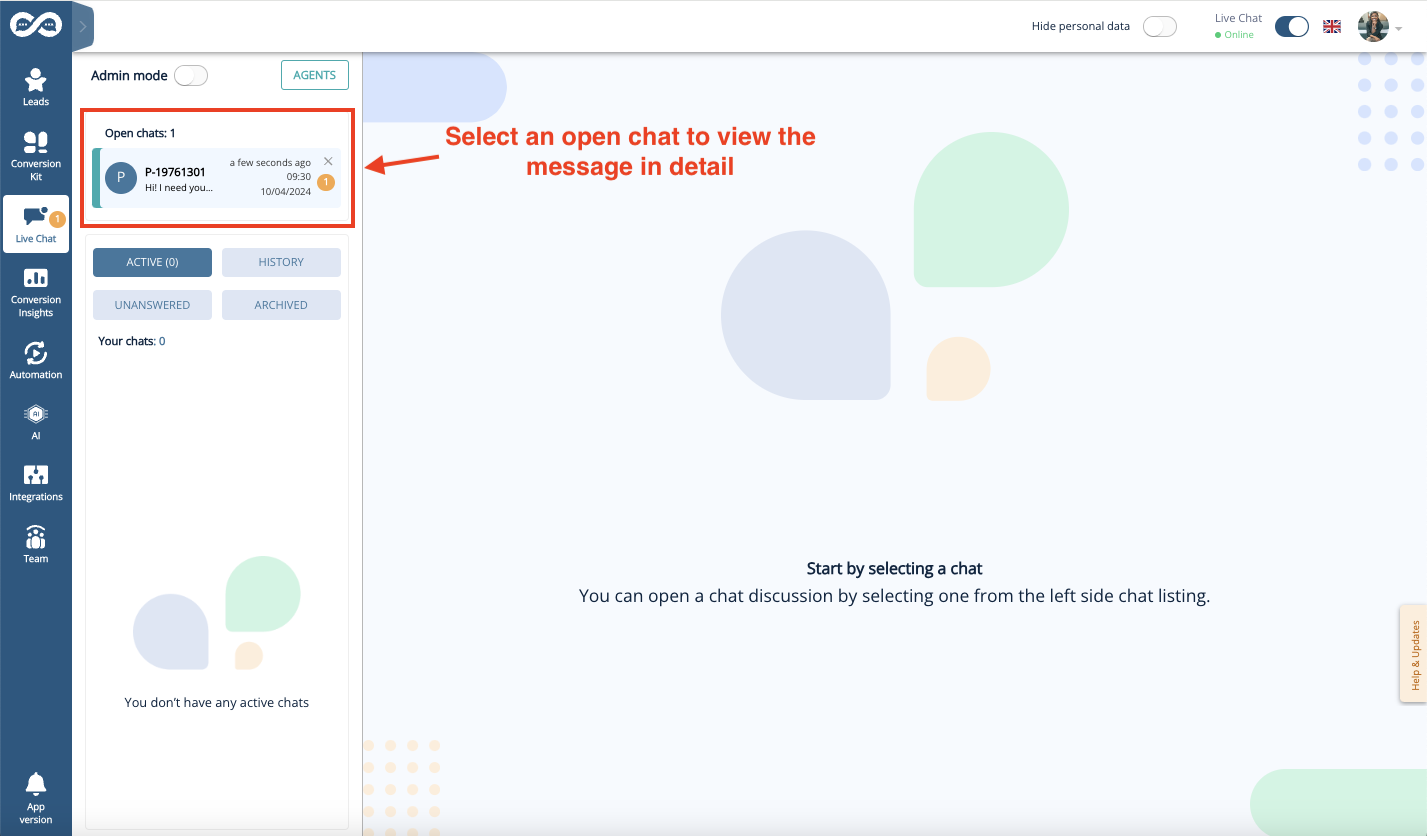
To see all active chats that are available for you, click the pending chat pop-up notification or find the Live Chat tool from the left-side menu bar inside Leadoo.
You can find the pending chats in the Open chats -section of the Live Chat page. Open chats are visible to all LiveChat agents who are online and responsible for the same LiveChat Category as you. Responsibilities for different categories can be managed by the Leadoo Admin user of your team.
Select an open chat to view the pending messages in detail.
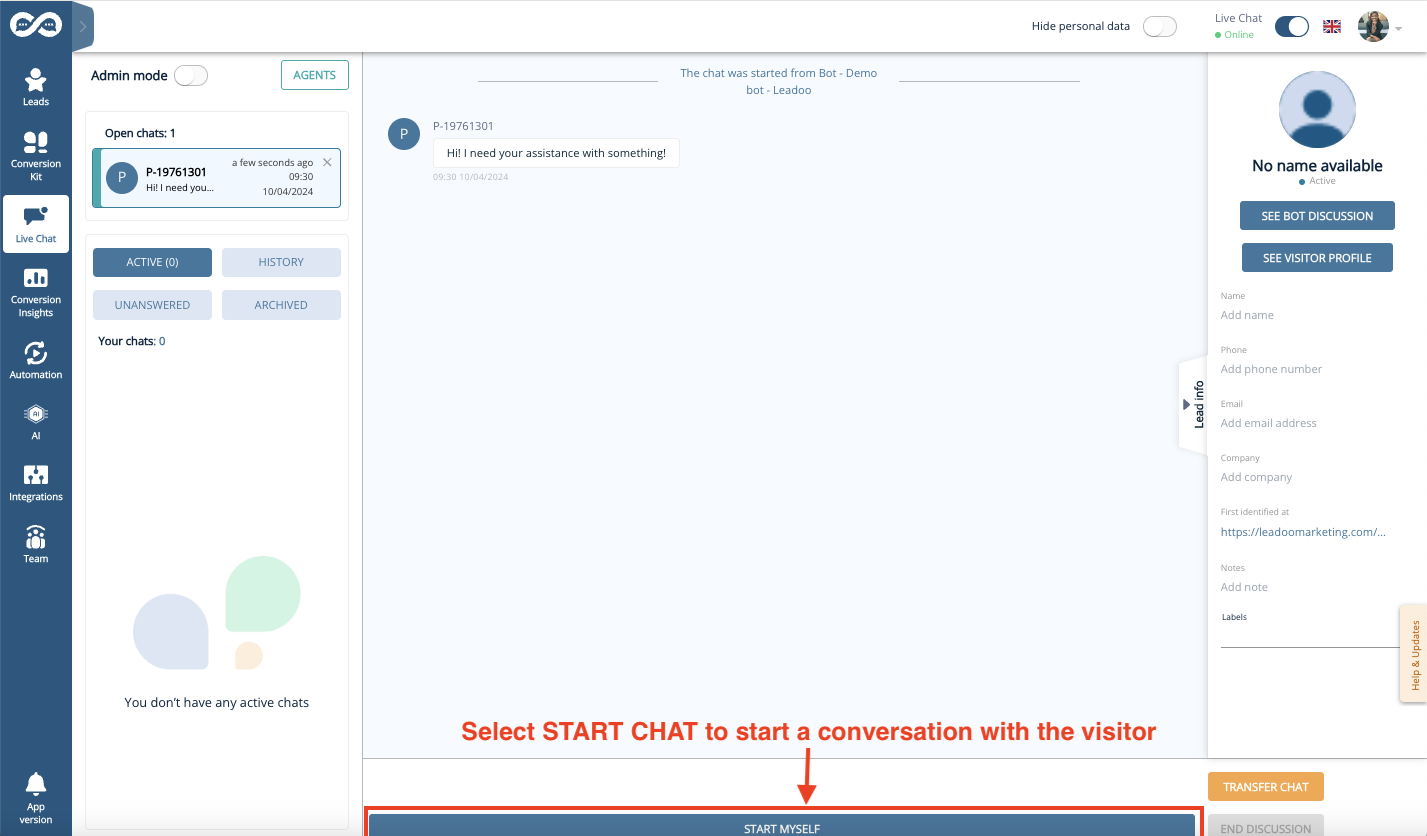
You can start chatting with active visitors by clicking “Start Chat” in an opened conversation. This removes the chat from the open chat pool and assigns it to you.
When you chat with the LiveChat users, you can choose to either write freely to the Open text field or use Predefined messages.
You can also create and manage your own personal quick answers visible only to you by clicking the “Predefines” button.
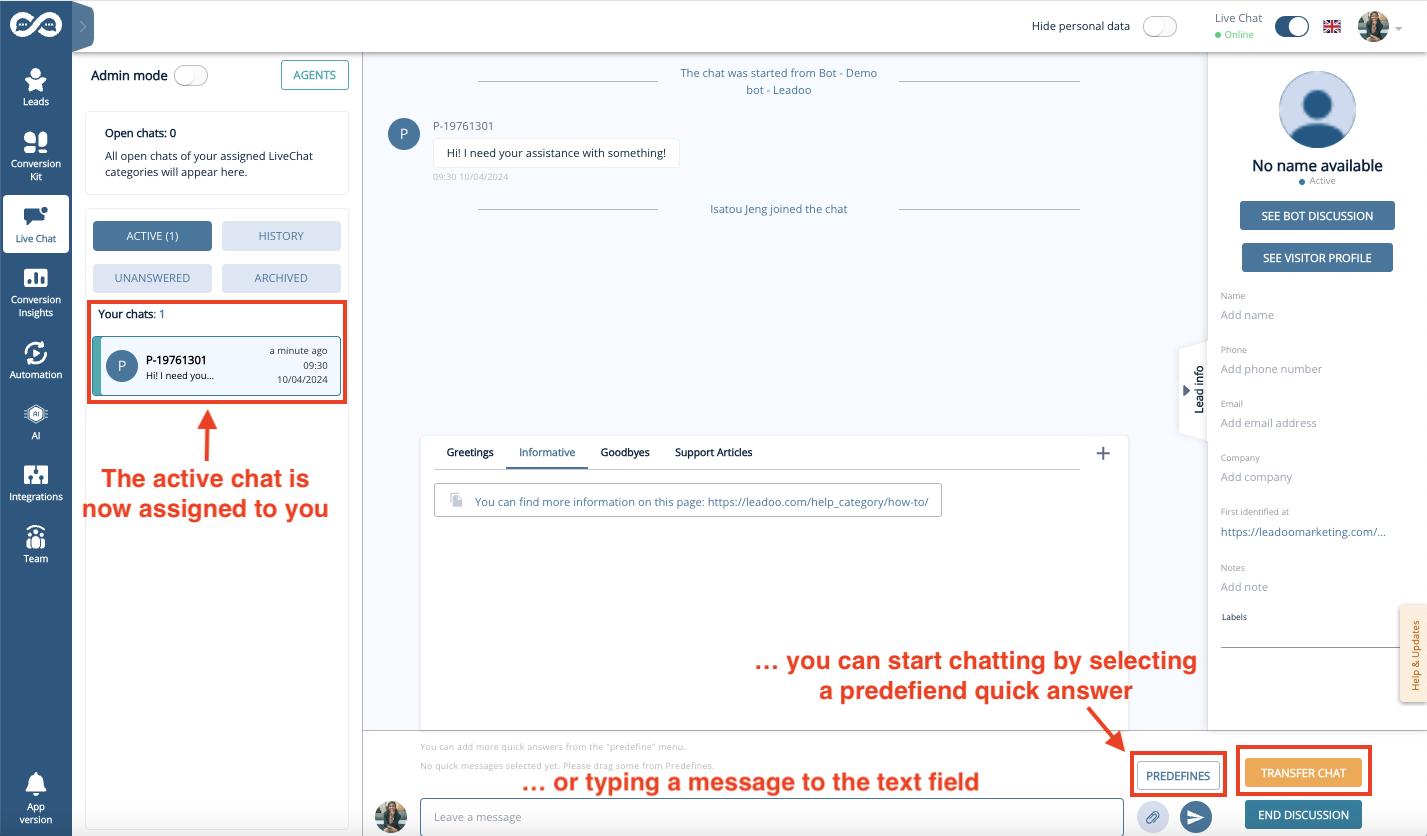
“Transfer chat” allows you to assign the chat to another agent who is online – or to return the chat back to the open chat pool where it is again visible for all agents. This can be useful e.g. if the visitor asks a question that you don’t know the answer to.
![]()
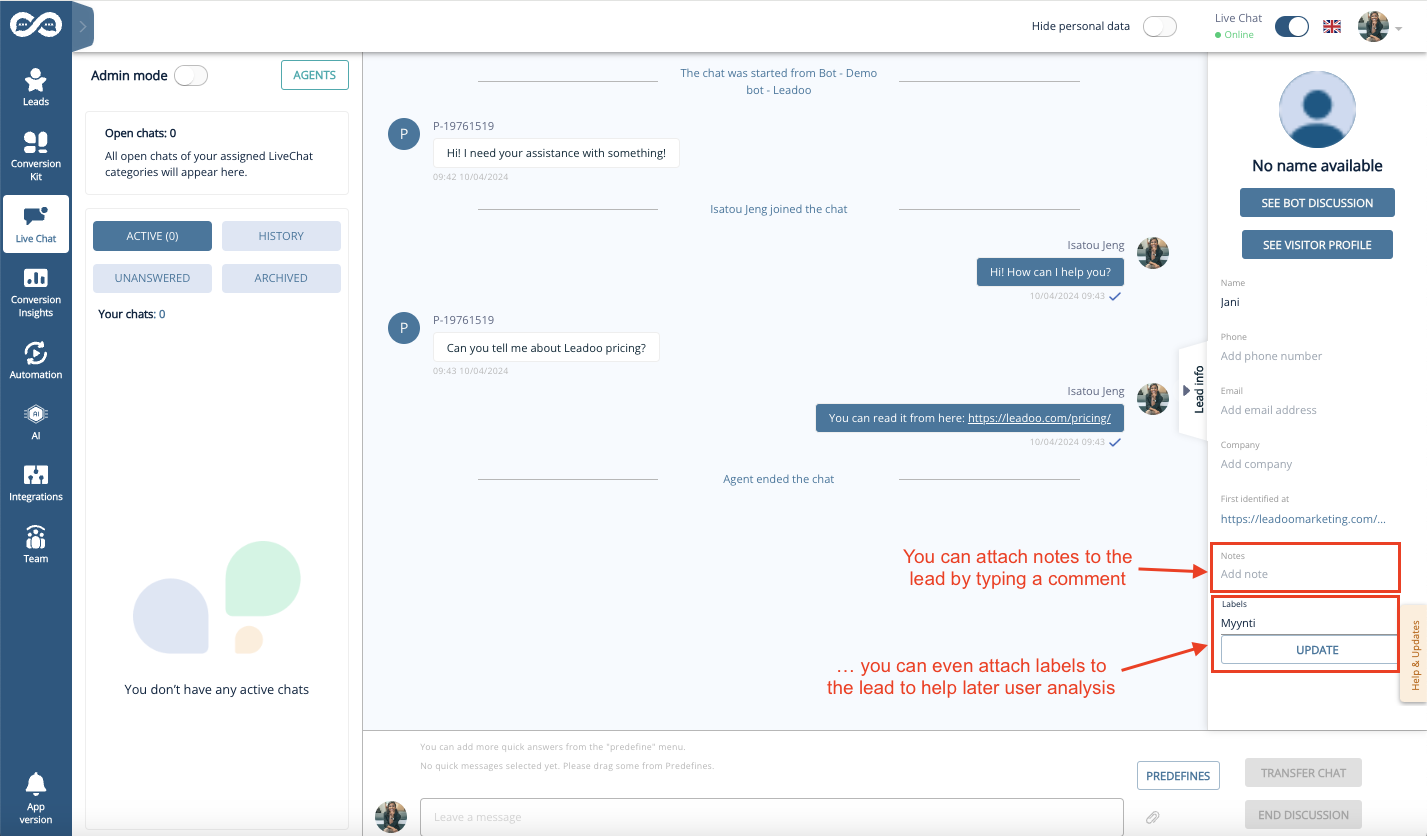
If you manage to get some contact details from the livechat user, it makes sense to save them as a lead for later use.
The visitor information can be updated by typing into the fields within the “Lead info” -section shown on the right. Remember to click the “Update” button when you are done typing the user info to the fields to save the changes!
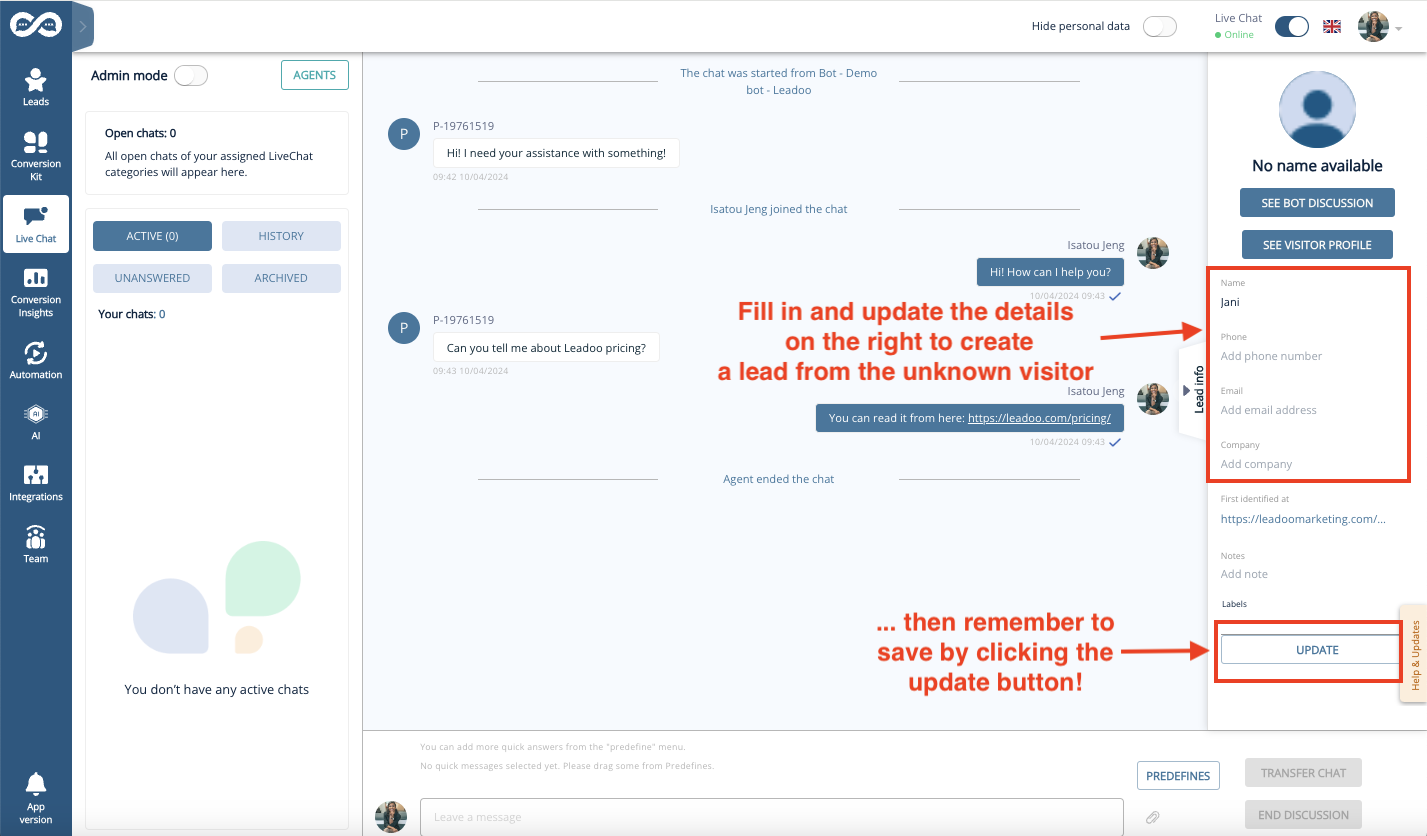
You can even attach notes and labels to the lead – for example to identify the lead type or to put down other interesting details that can be useful later when moving the lead down the funnel.
The Leads created will be sent to the Lead Notifiers indicated in the settings of the Chatbot. The chatbot settings are managed by your Leadoo Admin user.
You as an Agent will not receive a copy of the sent Lead by default, unless you ask your Admin to add you as a Lead Notifier in the bot.
Once the conversation is ended, click on the “End discussion” button to transfer the conversation from your active livechats to history.

Note! When you have clicked on End discussion neither you nor the visitor on the other end can longer write to the chat window.
Not a Leadoo user yet? Request a demo
To ensure Safari does not block the audio for the Leadoo application please configure your sound settings using the below steps.
To update your Leadoo application Safari sound settings first Log into your Leadoo account using your Safari Browser.
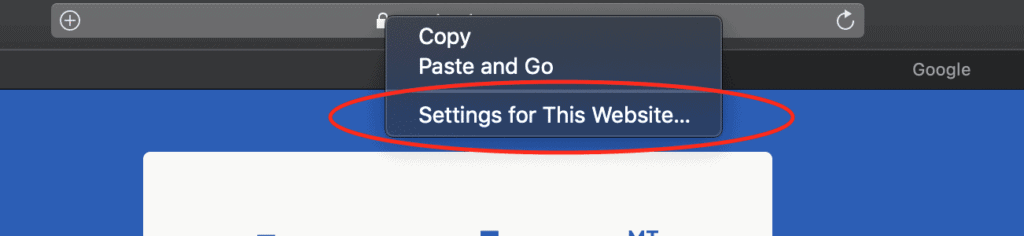
Next, select the lock icon in the URL address bar. Then click Setting for This Website”.
Next, click on “Auto-Play” on the permission screen.
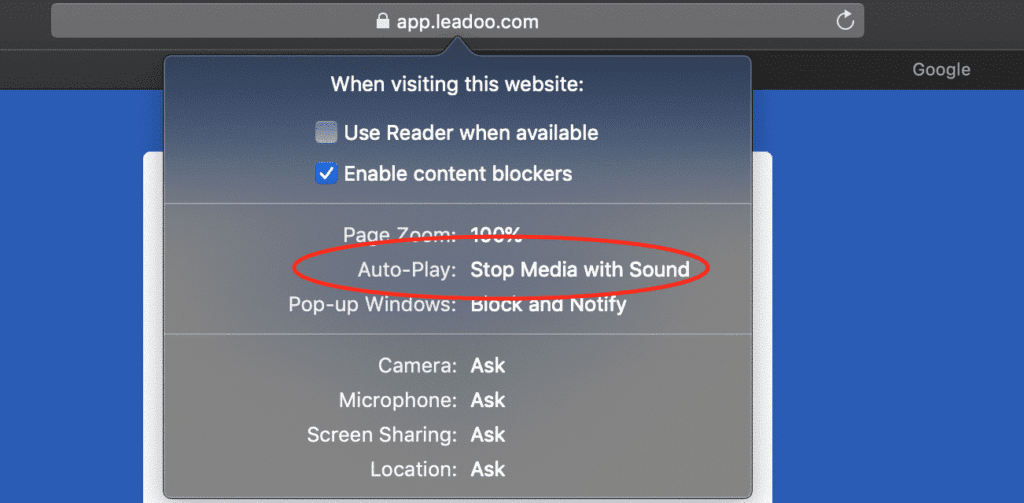
Now adjust settings by selecting “Allow All Auto-Play”.

To ensure Chrome does not block the audio for the Leadoo application please configure your sound settings using the below steps.
To update your Leadoo Google Chrome sound settings first Log into your Leadoo account using your Google Chrome Browser
Select the lock icon in the URL address bar.
Make sure Notification is set to allow.
Then click the Site settings located on the bottom of the drop-down.

Next, scroll down to your Sound setting and select the drop-down and adjust the setting to Allow.

To ensure Firefox does not block the audio for your Leadoo application please configure your sound settings using the below steps.
To update your Leadoo application sound settings first Log into your Leadoo account using the Firefox Browser.
Next, select the lock icon in the URL address bar. Then click the “Connection Secure” extension.

Click the “More Information” located at the bottom of the window.

Select the “Permissions” tab located on the top of the settings screen. You can now untick the Autoplay default setting and click “Allow Audio and Video”.
Make sure that Send Notifications is set to Allow.

To ensure Edge does not block the audio for the Leadoo application please configure your sound settings using the below steps.
To update your Leadoo application Edge sound settings first Log into your Leadoo account using your Edge Browser.
Next, select the lock icon in the URL address bar. Then click Site Permissions.
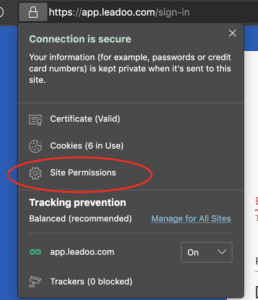
Switch to the Site Permissions from the sidebar menu.
Scroll down and choose the Media autoplay option within Site permissions.
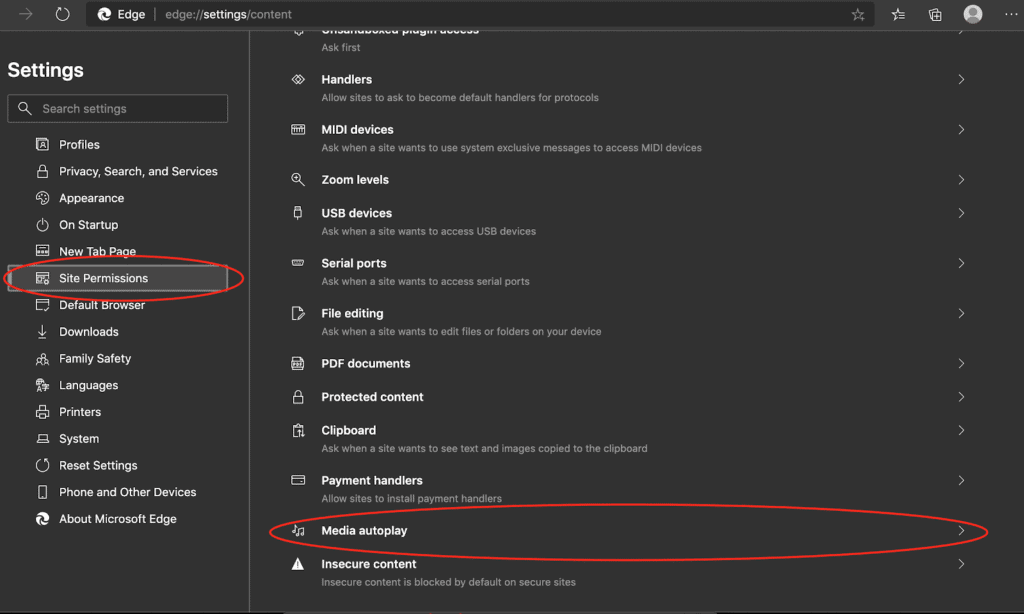
Select the drop-down and adjust the setting to Allow.

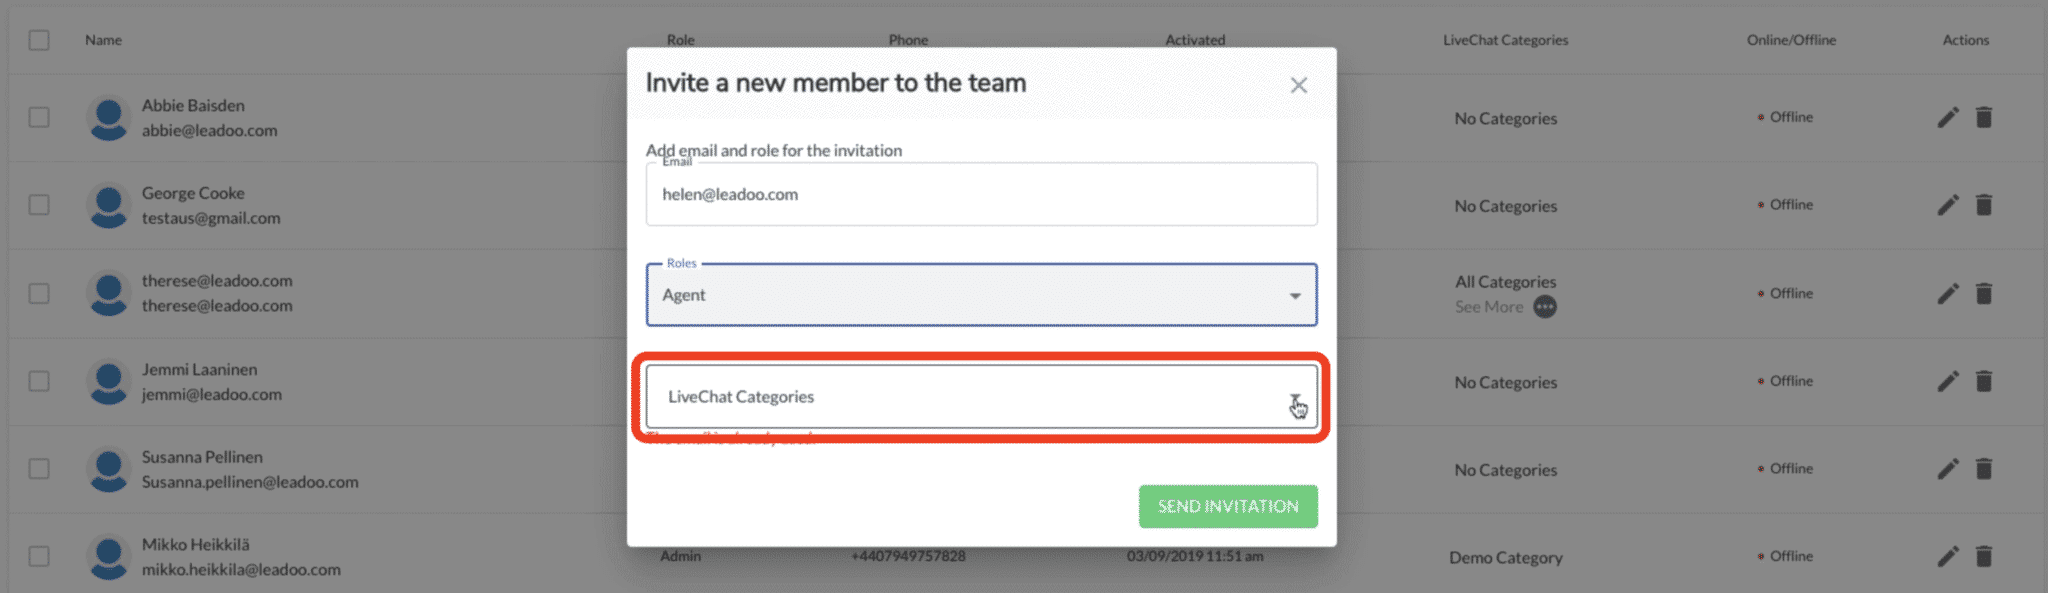
To start using Leadoo Live Chat, you want to first add your agents as team members.
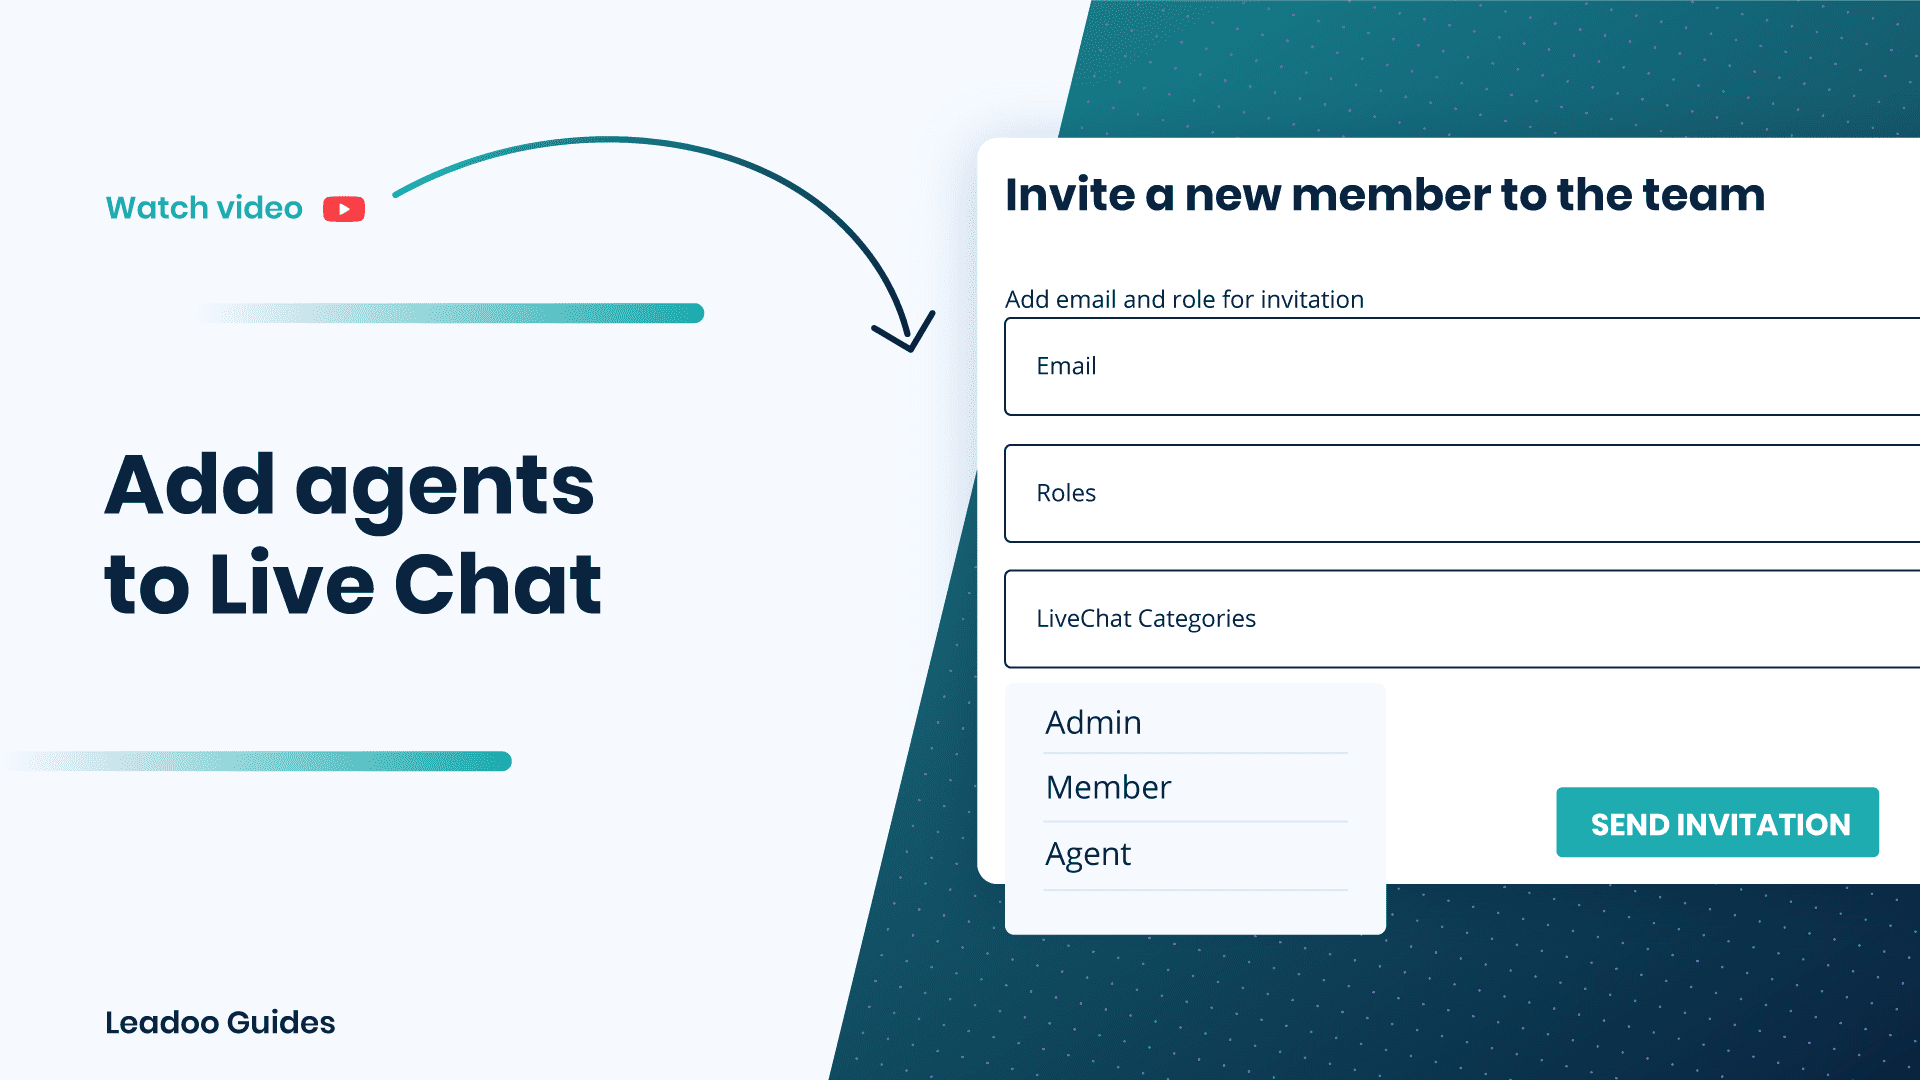
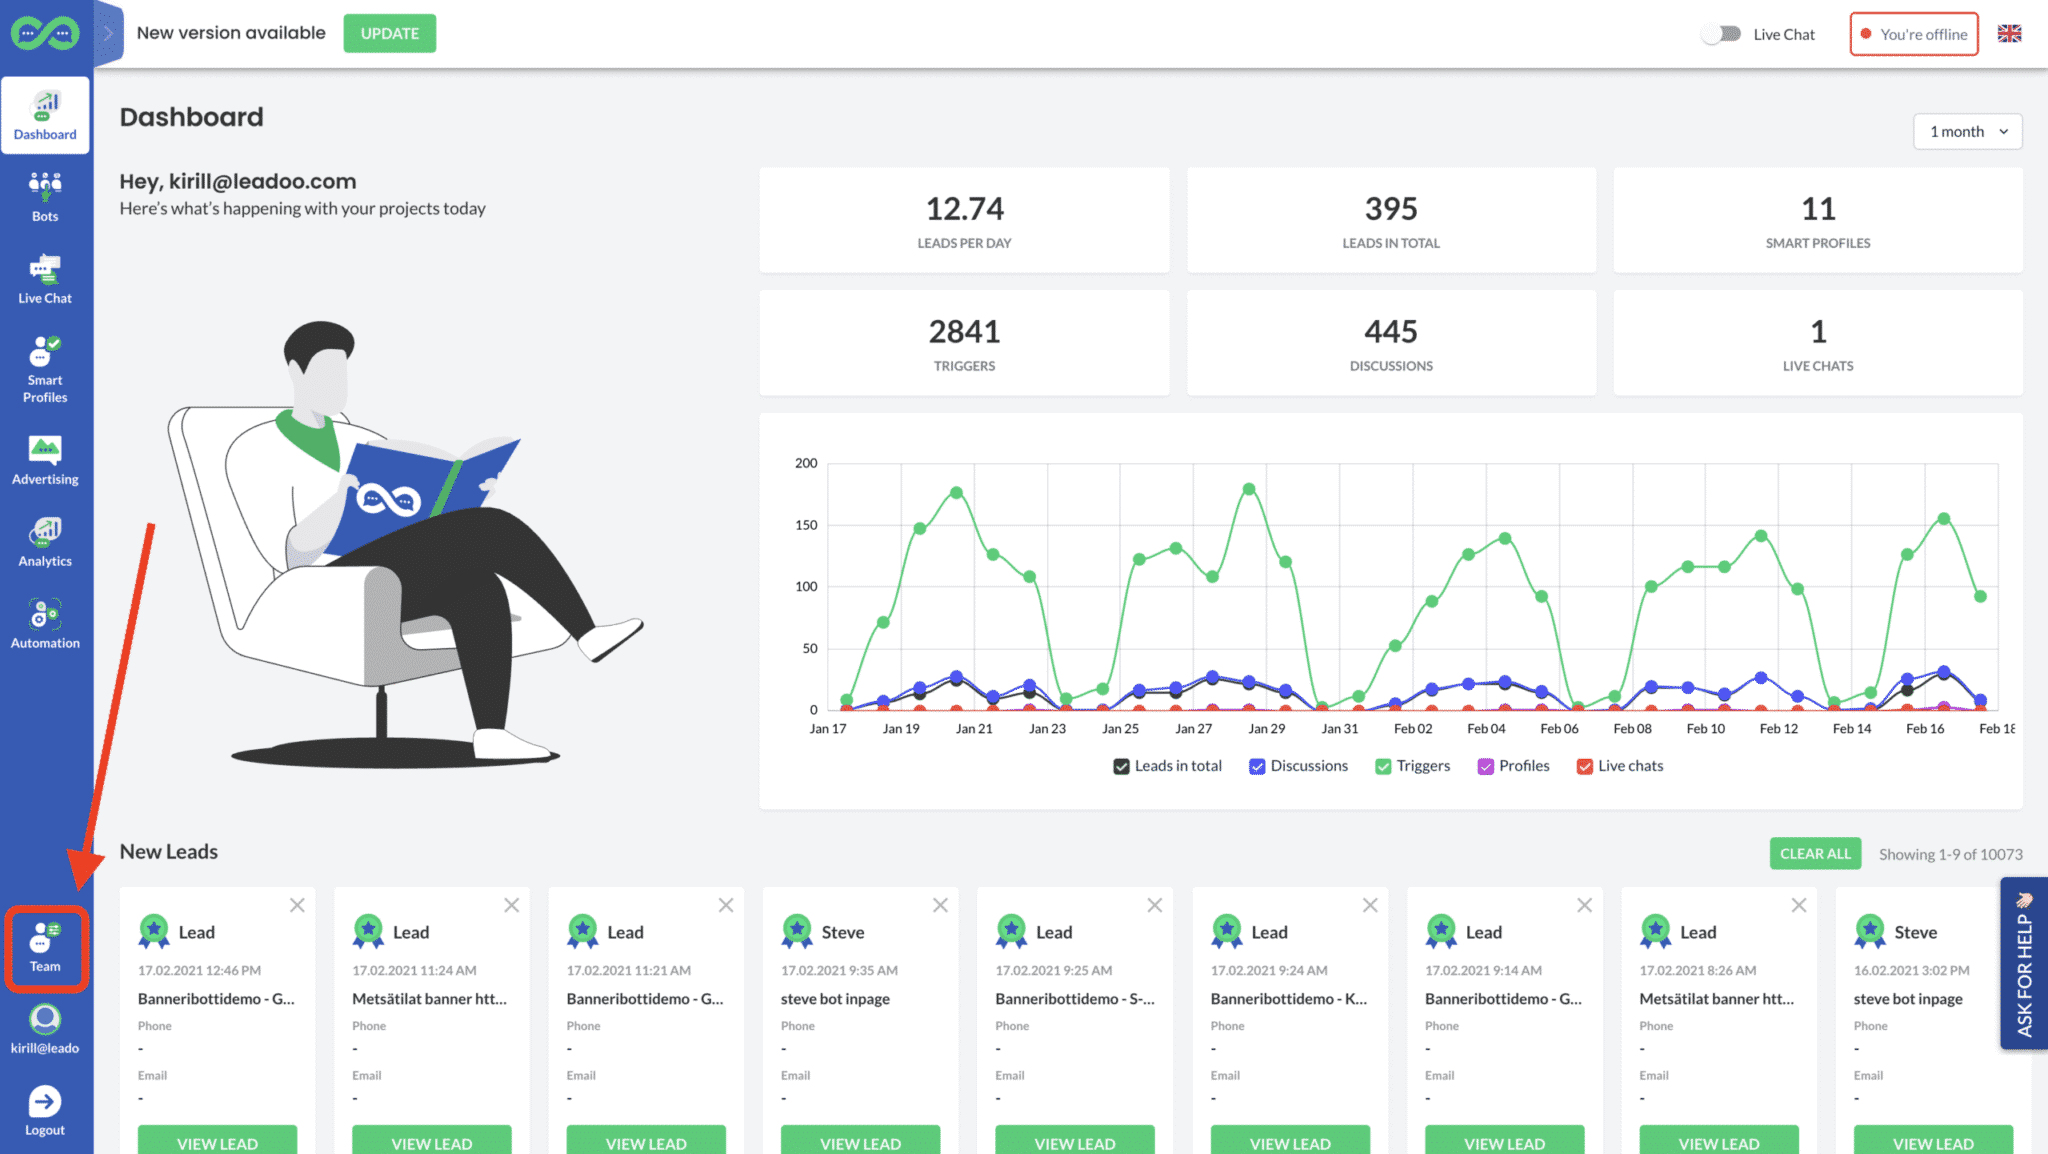
To add live chat agents, click the “Team” button.
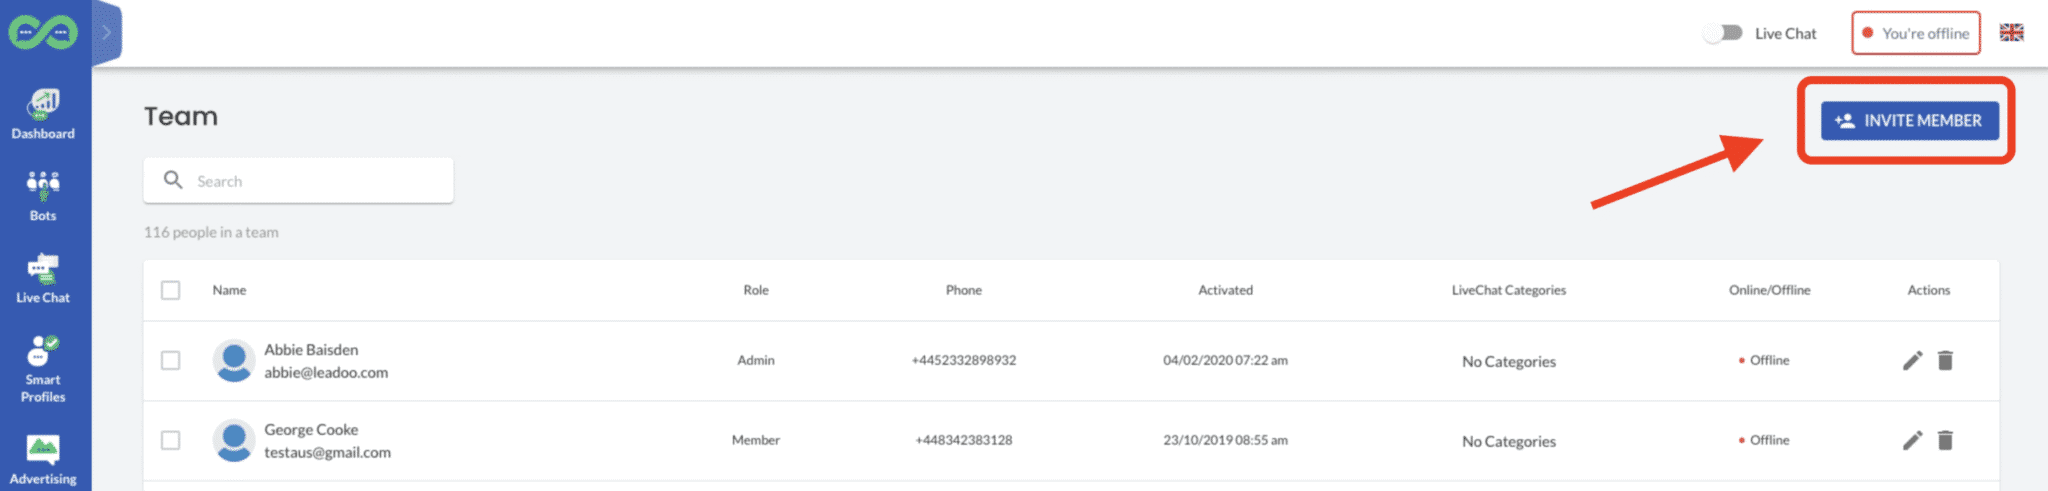
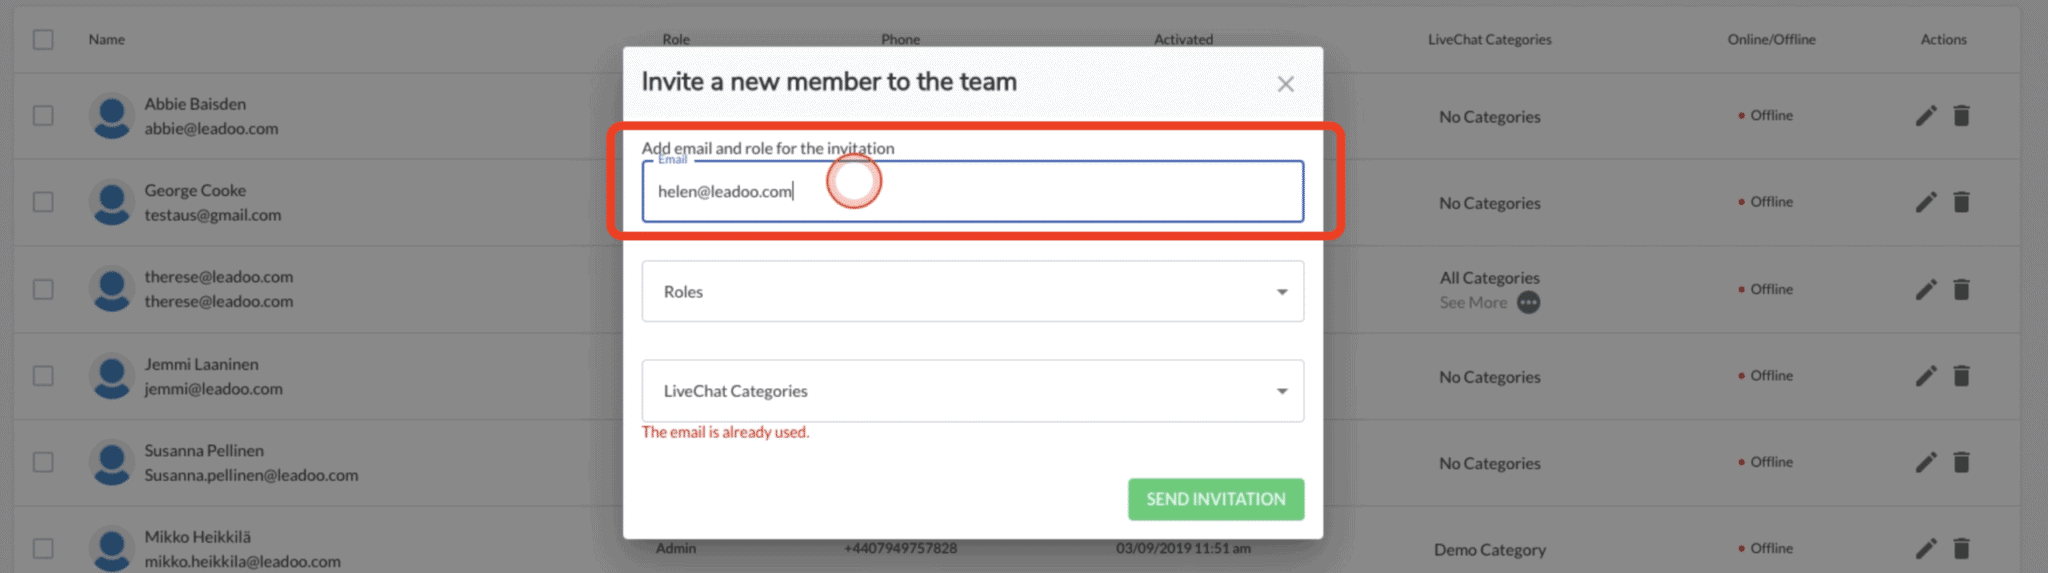
Then select “Invite member”.
You want to add the email addresses of each new live chat agent separately.
Then select “Agent” from the dropdown list. This means that that person will only be able to access Live Chat in your account, and no other areas.
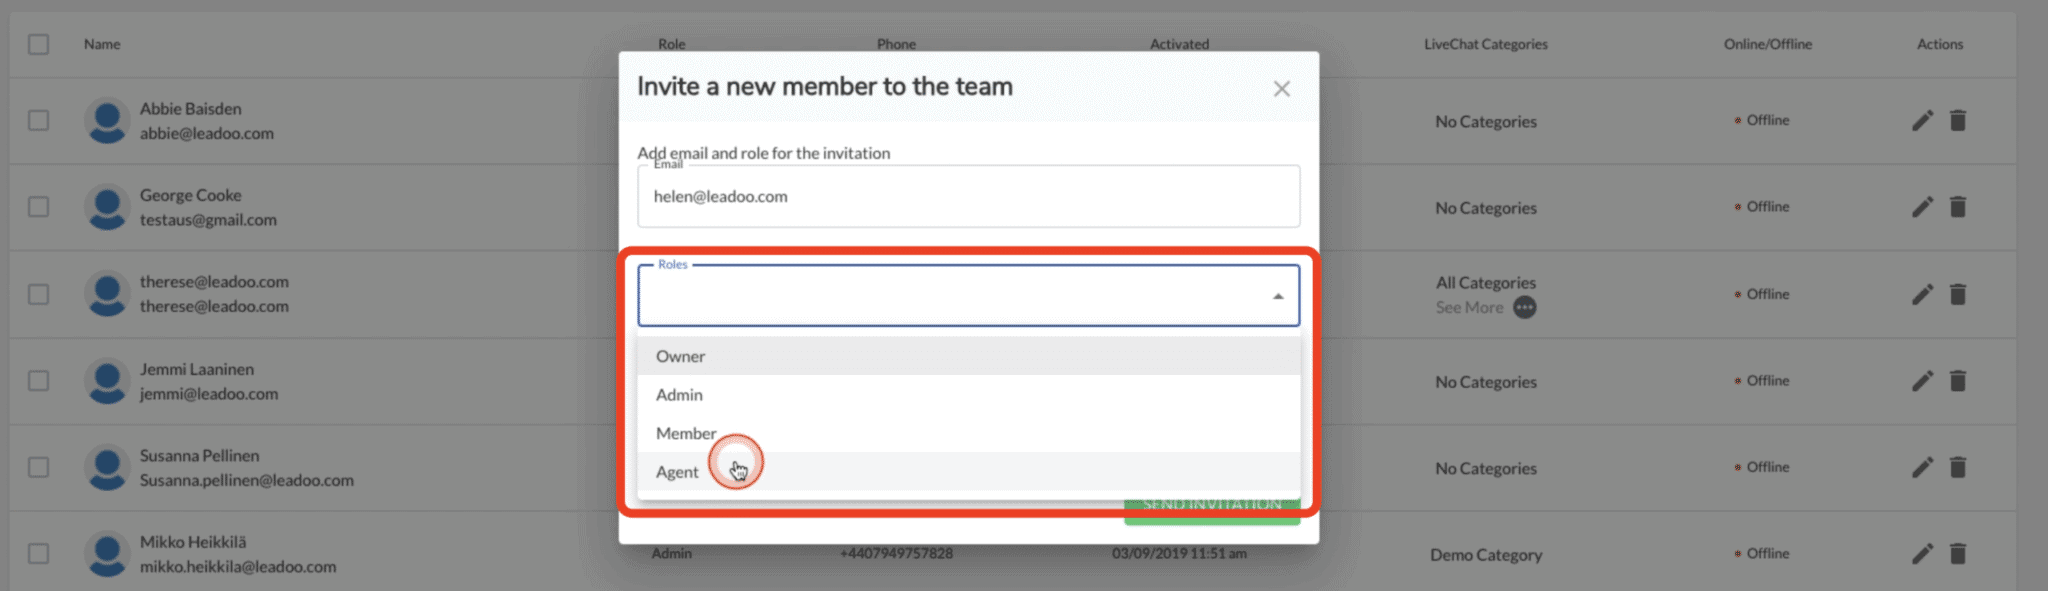
You also want to make sure that you select Live Chat category that the agents should have access to. Once you’ve done this, you can send invitation. That person will then receive a notification in their email account to activate. Then they’ll be able to start using Live Chat as an agent.