KNOWLEDGE
Case StudiesBlogsEventsSupport & Starting
Support Articles & HubSupport Videos (Youtube)Try Leadoo Free (Leadoo Lite)Partners & Careers
PartnershipsCareersSecurity & Privacy
Security at Leadoo AIGeneral Terms & ConditionsData & GDPRKNOWLEDGE
Case StudiesBlogsEventsSupport & Starting
Support Articles & HubSupport Videos (Youtube)Try Leadoo Free (Leadoo Lite)Partners & Careers
PartnershipsCareersSecurity & Privacy
Security at Leadoo AIGeneral Terms & ConditionsData & GDPR
The first important differentiator of Leadoo Bots is that they are designed by a human. AI technology is useful and an important tool but a human can still spot the difference. You have deep knowledge of your industry as well as your customer’s needs and interests. It’s important that you show them this expertise and our customer success agents are there to help design the perfect bots for your business.
The second important aspect is that our Leadoo bots are context and content-sensitive. This means that the chatbot is embedded in a specific page or piece of content, and can replace your call to action or landing page to start a conversation with a client about what they are reading. This way, the trigger for the client is highly relevant and comes at the right moment.
Before you start working with Leadoo you’ll discuss with your Account Executive what type of integration you may need.
We offer 2 levels of integration
But, how do you know the difference and which one should you choose? Here’s a brief idea.
Still not sure what option you need? Take a look at a record in your CRM system and see which fields are mandatory or conditional for automation. If you have any custom fields which need to be completed that you will probably need a complex integration.
If you have our Essential package you can most likely upgrade your integration for a one-off amount. Just ask your Onboarding Manager or Customer Success Manager about it.
Most integrations are set up using our in-app integration tool. Before starting any integrations make sure you know what information you need to map across, where it needs to be mapped to and whether there are any mandatory fields that we need to be aware of.
If you are technically confident and setting up a simple integration you can use our guide and templates to set it up yourself.
You can find more information about that here – Setting up an integration to CRM using templates
You can also book a session with one of our Integration Engineers. They’ll help you set everything up but remember, we need you to run tests to make sure you’re getting all the information you need in the right place.
You can book your session with Otto here – https://mypage.leadoo.com/otto
When you have your meeting with an engineer they’ll start by setting up the decision tree like this:

Next, you’ll start mapping the fields from Leadoo to your CRM system which looks like this.

This is where we can see what fields are in your CRM system and what data we need to map to them, so a good working knowledge of your CRM is important during this meeting. If you’re not familiar with the configuration of your system make sure you invite someone along who is.
Once this is complete it’s testing time!
Make sure everything is coming through as it should, if not be clear about what isn’t populating so we can test and fix it.
For complex integrations, the testing process can take up to a week after the set-up. For simple integrations, this should be completed on the same day.
Whilst in your meeting your engineer will send a test via the integration tool. If you need to test outside of the meeting you can use the bot hyperlinks to do so.
Navigate to the bot you want to test then click the <> Add to site on the right-hand side.
Click the hyperlink button and then copy and paste the link into your browser.

Complete the bot with information as if you were a visitor and check what data comes through to your system.
Once we’ve made sure that everything is populating correctly, your integration is complete!
And remember, Admins on your account can access this integration anytime, but if you need assistance please reach out to us for help.
If you have any questions about integrations reach out to the Leadooer you’re currently working with.
1. Start by navigating to the “Integrations” page.
2. If this your first time creating an integration, you will be asked to generate an API-key. Click the highlighted “here” or open the “Integration settings” to access the API key.
(If you already have an API-key do not regenerate it. It will break existing 3rd party integrations. Skip to #5)


3. Click “Generate API key”
4. Navigate to https://app.leadoo.com/integrations/list by clicking the “Integrations”
5. To create a new integration, click the “Add new integration”.
6. You’ll land on the Triggers & Conditions page which lets you control which leads should be processed by the integration. For example you can filter the leads based on their labels. By default all the leads will be processed. We recommend that you don’t modify the settings unless necessary. -> Click “Continue”

7. You’re now offered the option of creating a template integration or a custom on from scratch. This instruction focusses solely on templates, so click on “From a template“
8. Select your desired system from the templates.
Authentication
1. Click the Pipedrive Application under the “Application Connectors” dropdown and click “Authenticate Now“
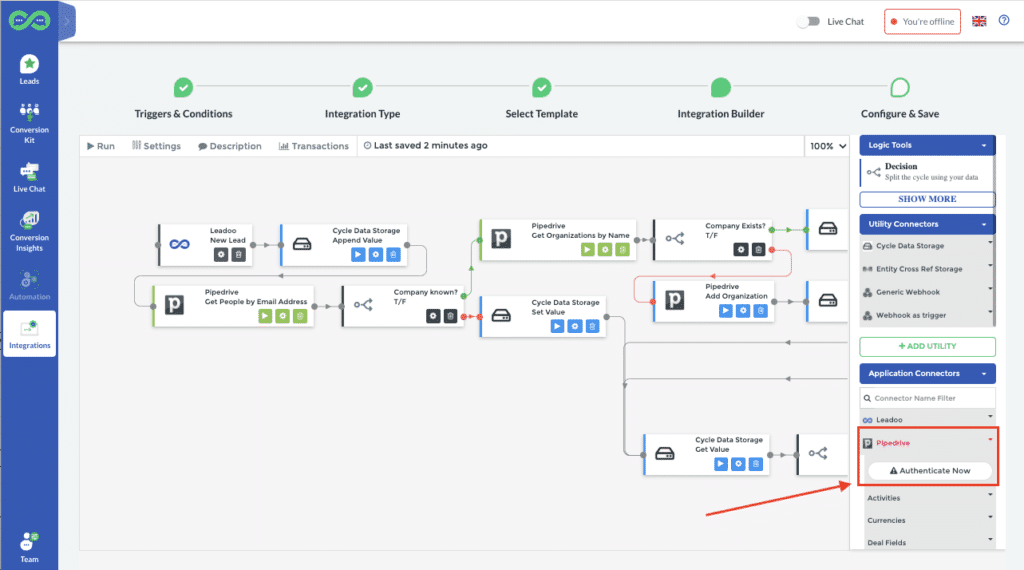
2. You will be taken to the Pipedrive authentication page, which will require you to input the API key for your Pipedrive user/organization.
3. Add the API key and click “Next“
4. The Pipedrive connector should now be authenticated, and you should have been taken back to the Integration builder
5. Complete the setup by following the instructions in the “Field mapping” section.
1. Click the “Step setup” (Cog wheel icon) on the “Add Deal” method/node.

2. You’ll see different field mappings that are predefined. Scroll down to “Stage ID” and click open the dropdown next to it. Now select “Lookup“
Select the Pipeline you want the leads to be added to, and then the Lead stage. F.e: FIN Pipeline -> Meeting scheduled
Note: You will need to do this for both methods/nodes.
3. If you want, you can assign an owner for the organization by filling out the “Owner ID” in the “Add Organization” method/node.
4. After the IDs have been added, click “Next“
5. Add a name for the integration. You can also add an optional description. In the “Recipients” field you can define the different emails that will receive integrations error messages (Default is Leadoo accounts Owner). Separate the emails by a comma. (f.e: [email protected] , [email protected])
6. Click “Save and Finish“. Make sure you activate the integration by clicking the slider when viewing the integrations list. (https://app.leadoo.com/integrations/list)
Please ensure you’re using an account that has sufficient access rights e.g. Admin. 1. Click open the Application from the “Application Connectors” dropdown.
2. Next, click on “Authenticate Now“.
3. A “Sign-in” button should appear, click it and sign in using your credentials.
4. You will be requested to Authorize the Leadoo Application. Accept.
5. After a successful authentication, you will be returned to the integration builder, and you can now finalize the integration.
1. Click on the “Set Setup” -button (Cog wheel icon) on the “Create Note Engagement” node(1)

2. The Notes require an owner to be assigned for them.
3. To add the owner, find the “Owner ID” field and click on the dropdown and select “Lookup“. You’re now able to see different users from your organization in Hubspot.
4. You can also do the change above for the “Create Note Engagement” for the “Update Contact” branch (2). The owner will be set based on the existing contact owner by default.
5. When you’re ready, click “Next“
6. Add a name for the integration. You can also add an optional description. In the “Recipients” field you can define the different emails that will receive integrations error messages (Default is Leadoo accounts Owner). Separate the emails by a comma. (f.e: [email protected] , [email protected])
7. Click “Save and Finish“. Make sure you activate the integration by clicking the slider when viewing the integrations list. (https://app.leadoo.com/integrations/list)
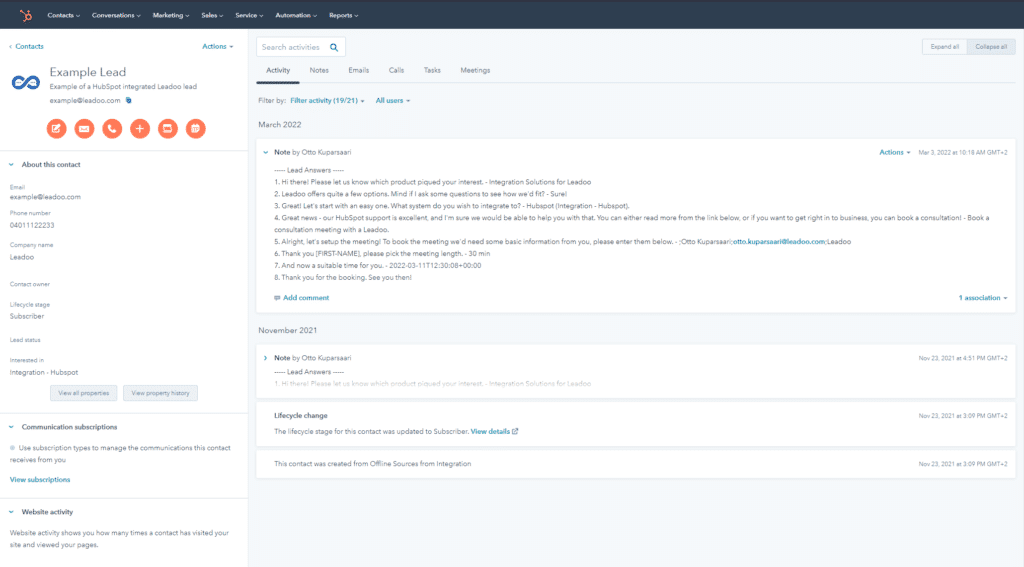
What the lead looks like on Hubspot:
1. Click on the “Step Setup” -button (Cog wheel icon) on the “Create Contact” node.
2. Open the “Owner ID” dropdown and select “Lookup“. After this, select the person you want the contacts to be assigned to.
Note: By default the owner will be assigned based on the user that was used to authenticate the integration.

3. When you’re done, click “Next“
4. Add a name for the integration. You can also add an optional description. In the “Recipients” field you can define the different emails that will receive integrations error messages (Default is Leadoo accounts Owner). Separate the emails by a comma. (f.e: [email protected] , [email protected])
5. Click “Save and Finish“. Make sure you activate the integration by clicking the slider when viewing the integrations list. (https://app.leadoo.com/integrations/list)
Additional resources:
https://docs.leadoo.io/docs/integrate-integration-tool
https://docs.cyclr.com/field-mapping
https://docs.cyclr.com/adding-custom-fields
https://docs.cyclr.com/connector-scripting#scripting
Leadoo is fully integrated to Google Tag Manager, meaning that custom events can be triggered for every interaction any visitor does with Leadoo chatbots. Here’s how to implement Google Tag Manager to work with Leadoo.
Go to Conversion Kit -> General bot settings -> Advanced
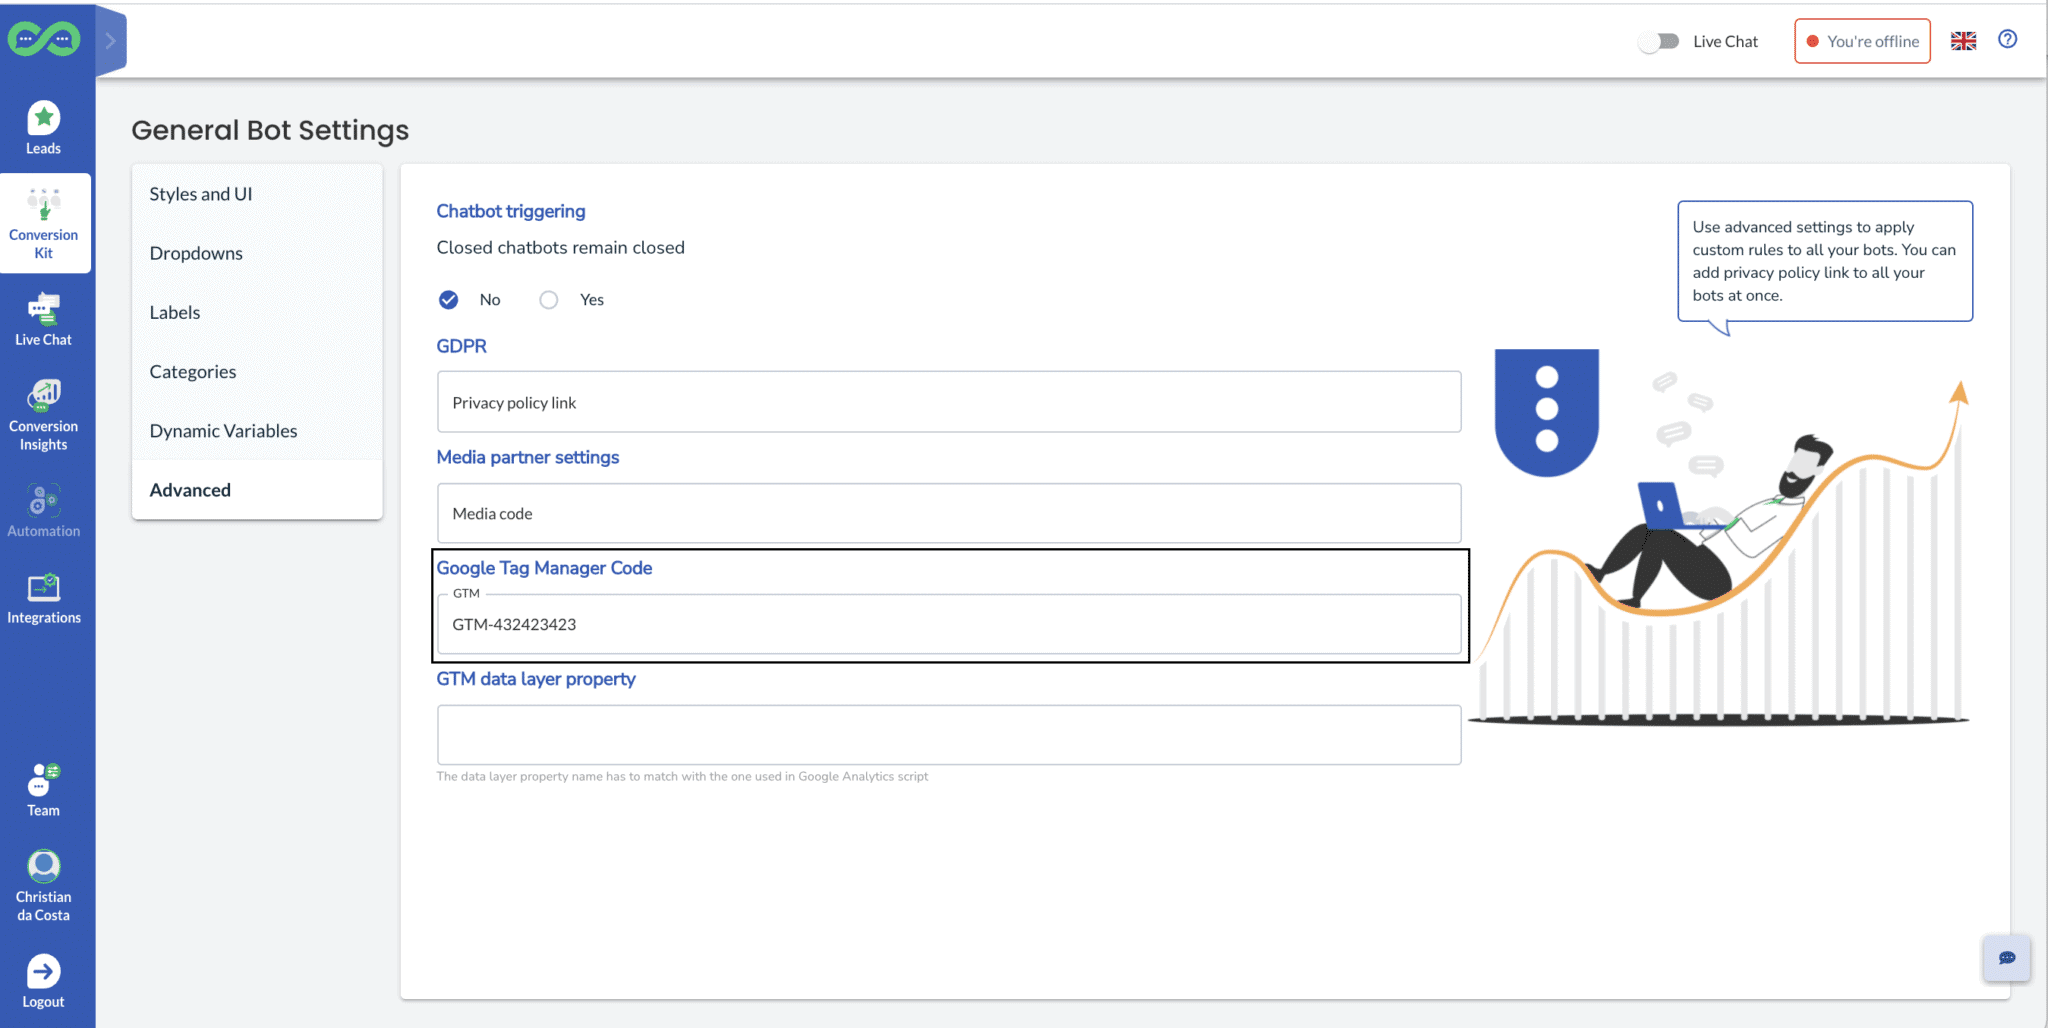 *In most cases you can leave GTM data layer property field empty.
After this has been set your bots will start sending events.


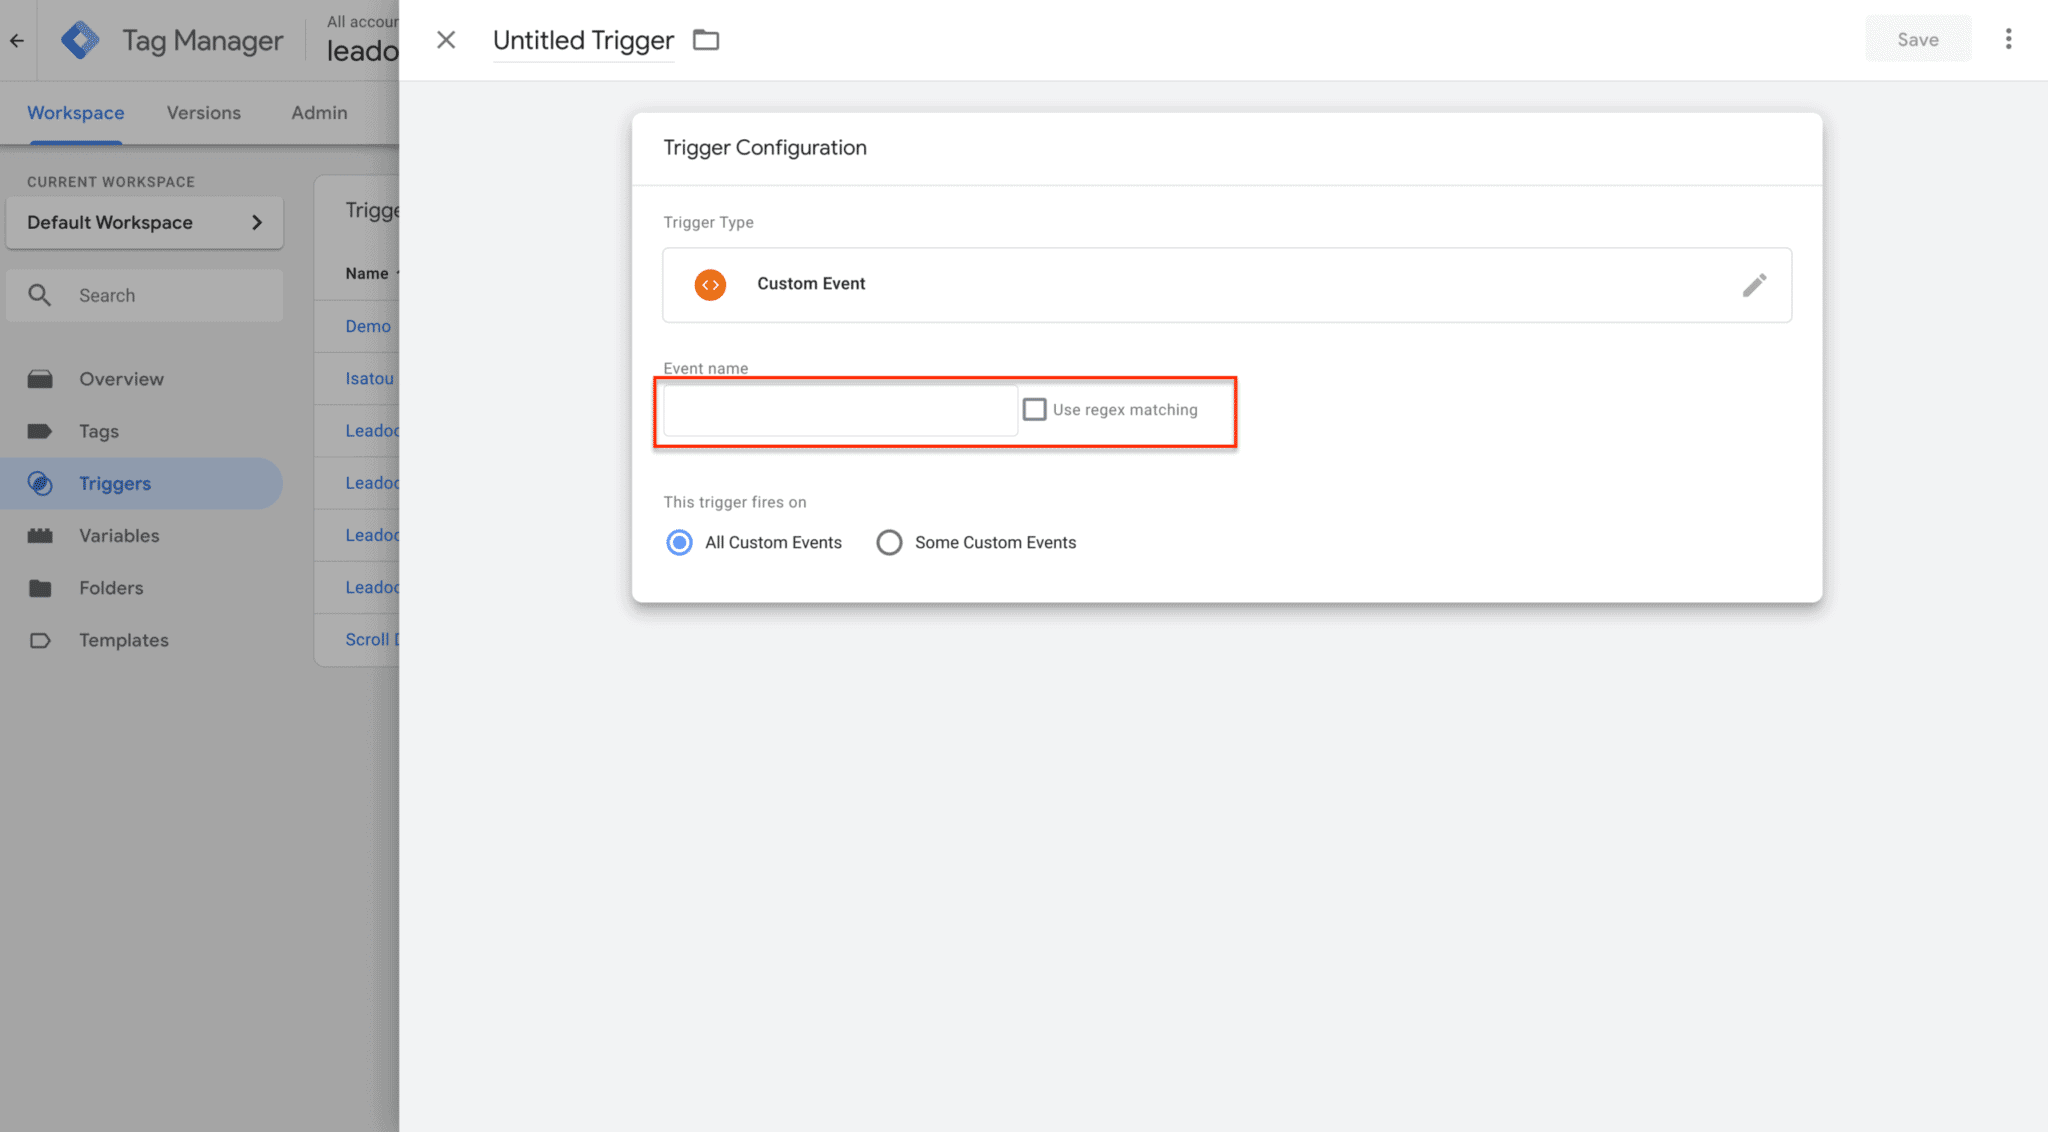
TRIGGER → This event is sent once a bot is triggered
DISCUSSION → This event is sent once a bot discussion is started
LEAD → This event is sent once a lead is converted
LC_TRIGGER → Livechat started
Multiselect options (used fe. for creating audiences for retargeting ads):
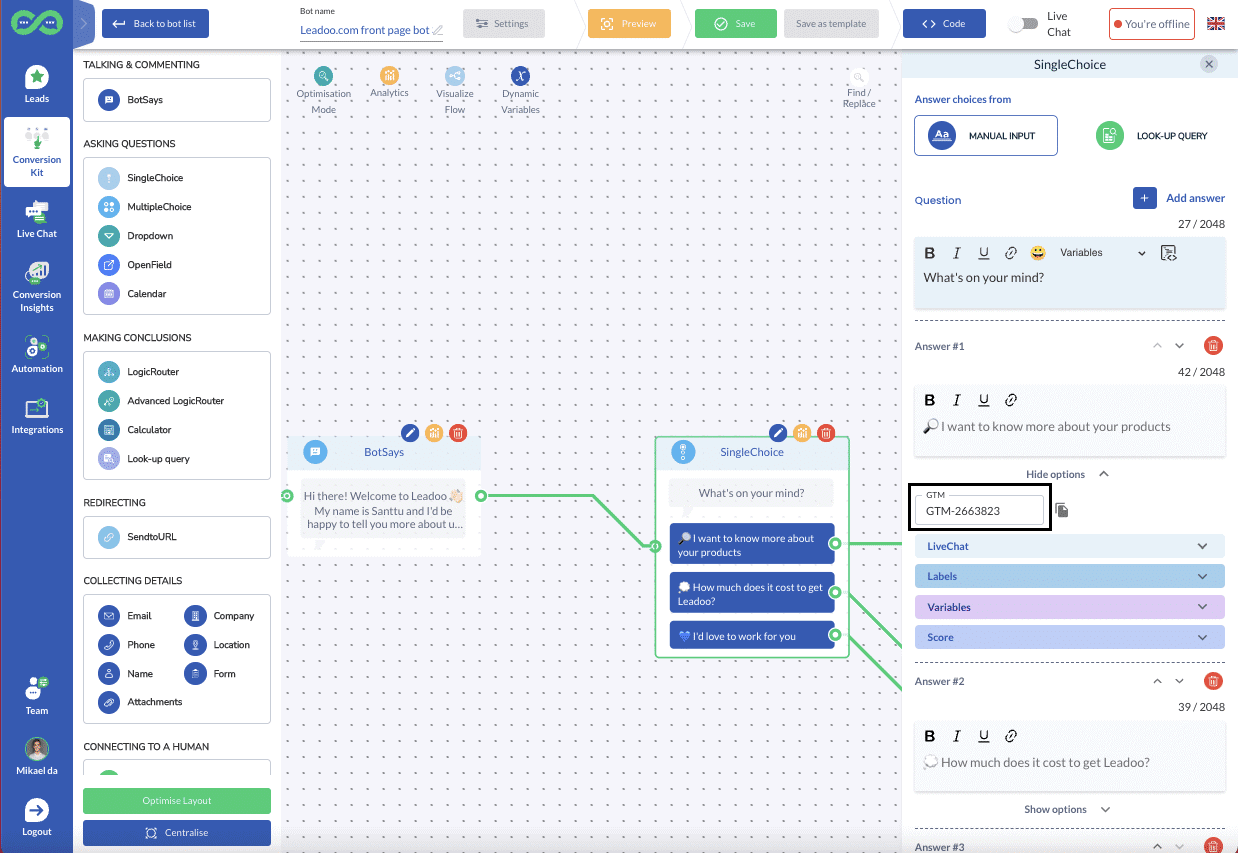
GTM-1234 → This event is sent once a button is clicked within the bot discussion
As default the event names are set such as: “GTM-2663823”, but they can be edited on the Leadoo backend.
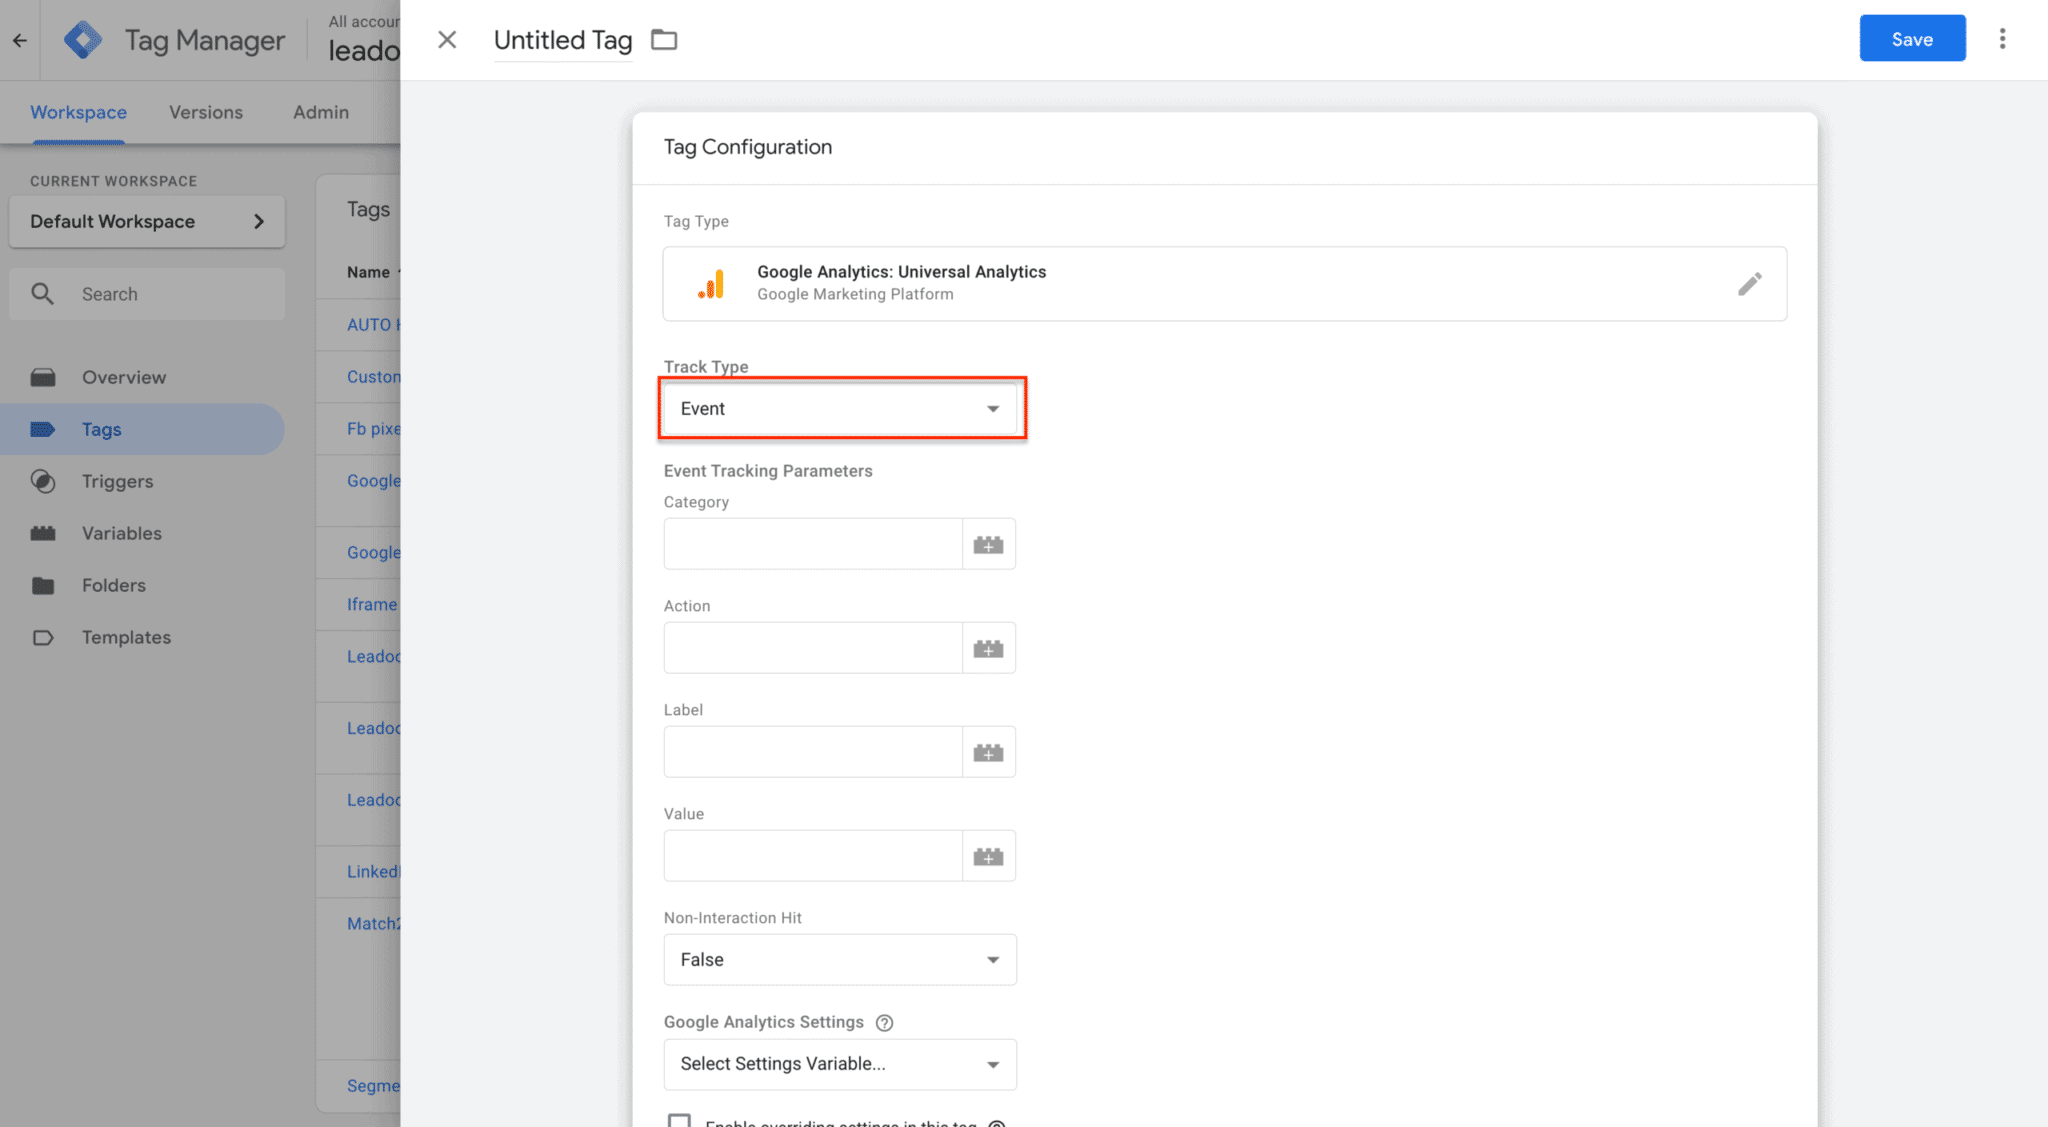
Most commonly we suggest to add the following values for basic users when measuring just leads / conversions:
Category: Leadoo
Action: Lead / Discussion / Trigger
Label: Page url variable
Now you will be able to track your Leadoo conversion in Google Analytics.
First start by configuring Your GA4 Tag In Google Tag Manager
Before creating our custom event tag, we need to first configure our GA4 tag in GTM to connect the two applications. In your GTM container, create a new tag using the following steps:
* You can find Measurement ID from GA4 under Admin -> Data Stream -> click account -> copy Measurement ID
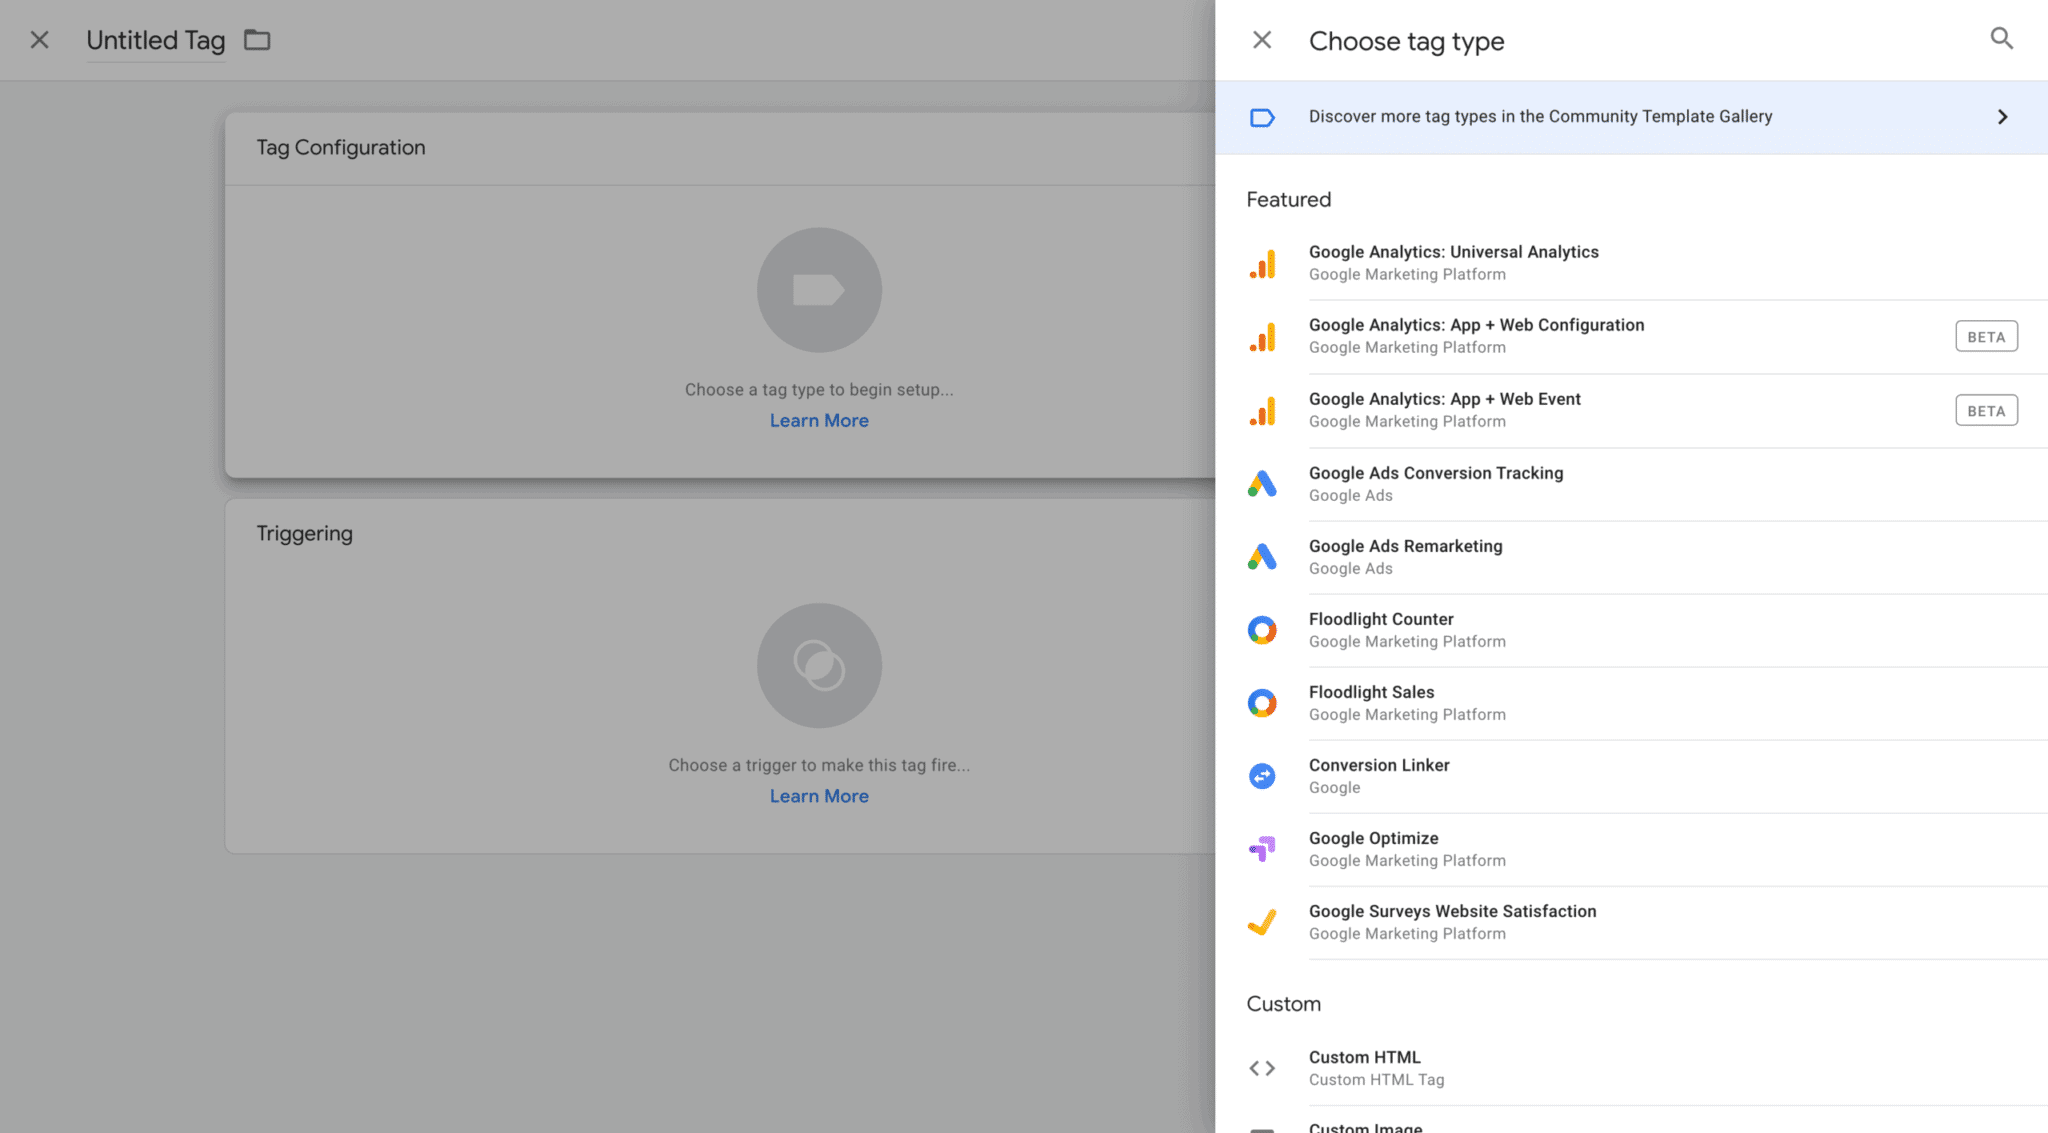
After configuring GA4, you can move to creating the tags
Example:
Choose “Tag Type” ->GA4 Event
”Event Name” -> Leadoo_Lead *
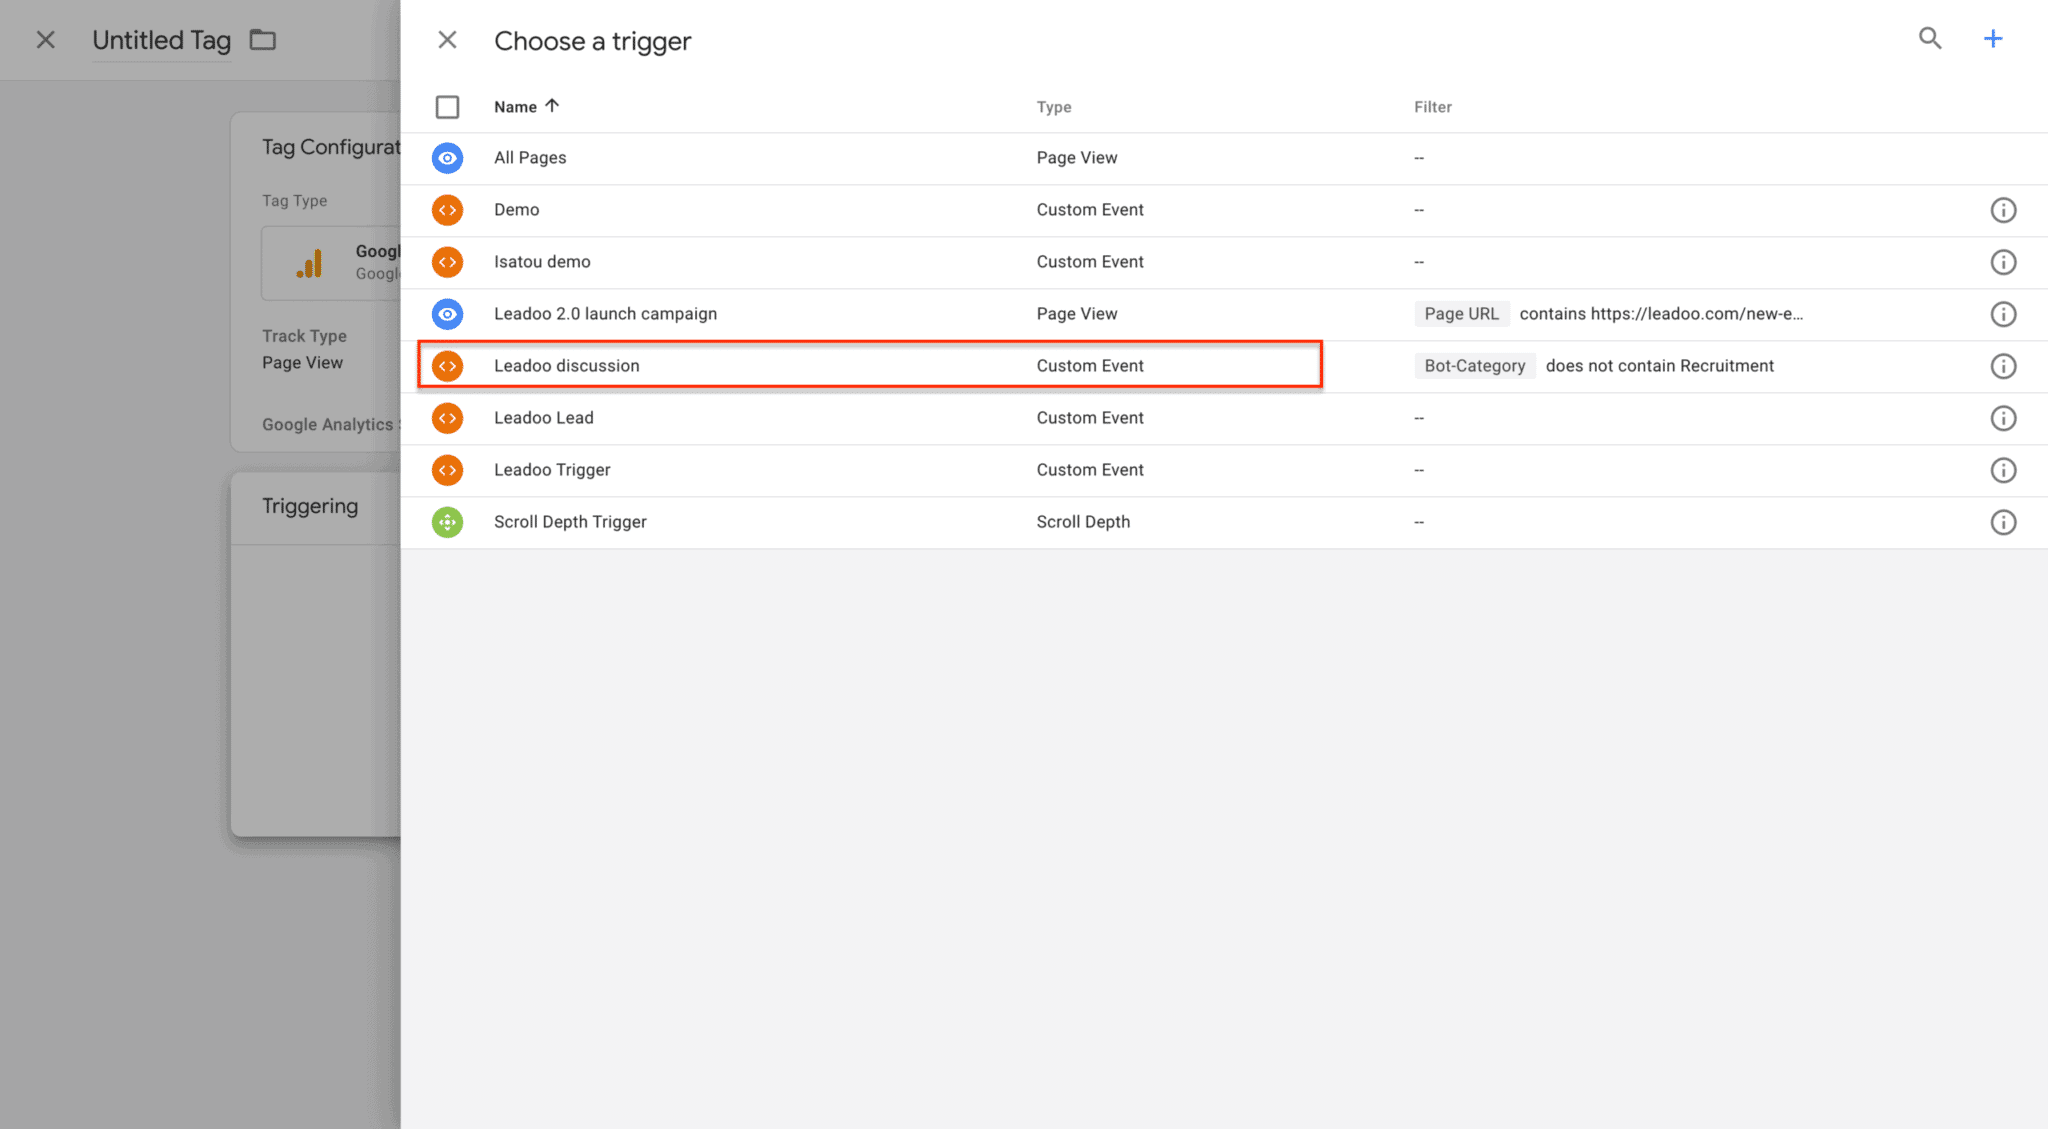
Connect this created tag to the trigger that is associated with action set in this section.
*If you want more specific information to be sent to GA4 (Bot type, Bot Category, Label etc.) you should add these to ”Event Parameter”
Fe. You want to see Labels on GA4:
Add row -> Parameter Name: Lead_type -> Value: {{Label}}
(Remember to create ie. {{Label}} variable on GTM using Data layer variable)
Now you will be able to track your Leadoo conversion in Google Analytics.
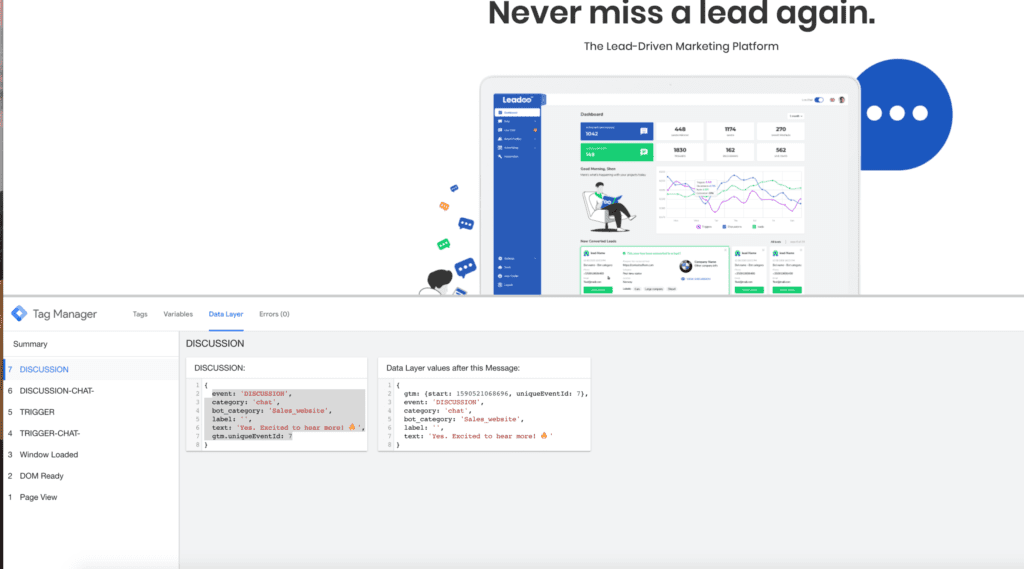
More advanced Google Tag Manager users can also leverage the information sent over on the data layer. The following details can be used to create custom variables
category <- Bot type (embed, chat, cta, modal)
bot_category <- For each bot you can set a bot category on the Leadoo backend, this allows you to create for example separate analytics for sales and recruitment bots
label <- For each multi select answer you can create custom labels. These can be for example interest type of the customer
text <- Info of what text was written on the bot.
bot_name <- Name of the bot
bot_nickname <- Name given on bot settings
Implementing Leadoo is extremely easy. Simply add the Leadoo bot script to your website header or the pages of your choice. You can also implement the chatbots to your website by using Google Tag Manager.
Adding script through a CMS (e.g. WordPress)


Alternatively, you can copy paste the script within <body> tag of each page you want the bot to appear in. The content of <body> is often accessible through the pages’ html (text) editor.
Adding script via Google Tag Manager
We advice you not to embed any Leadoo scripts through Google Tag Manager
If you embed scripts through GTM, Leadoo bots won’t be visible to those who use ad blockers. That means that third, or even half, of your visitors can’t have conversations with bots. And that of course means less conversions and smaller ROI.

3. Name & publish the tag
When you are embedding an InpageBot / VisualBot, you have multiple options to choose from to find the way to embed, that fits you best.
Both bot types are embedded similarly.
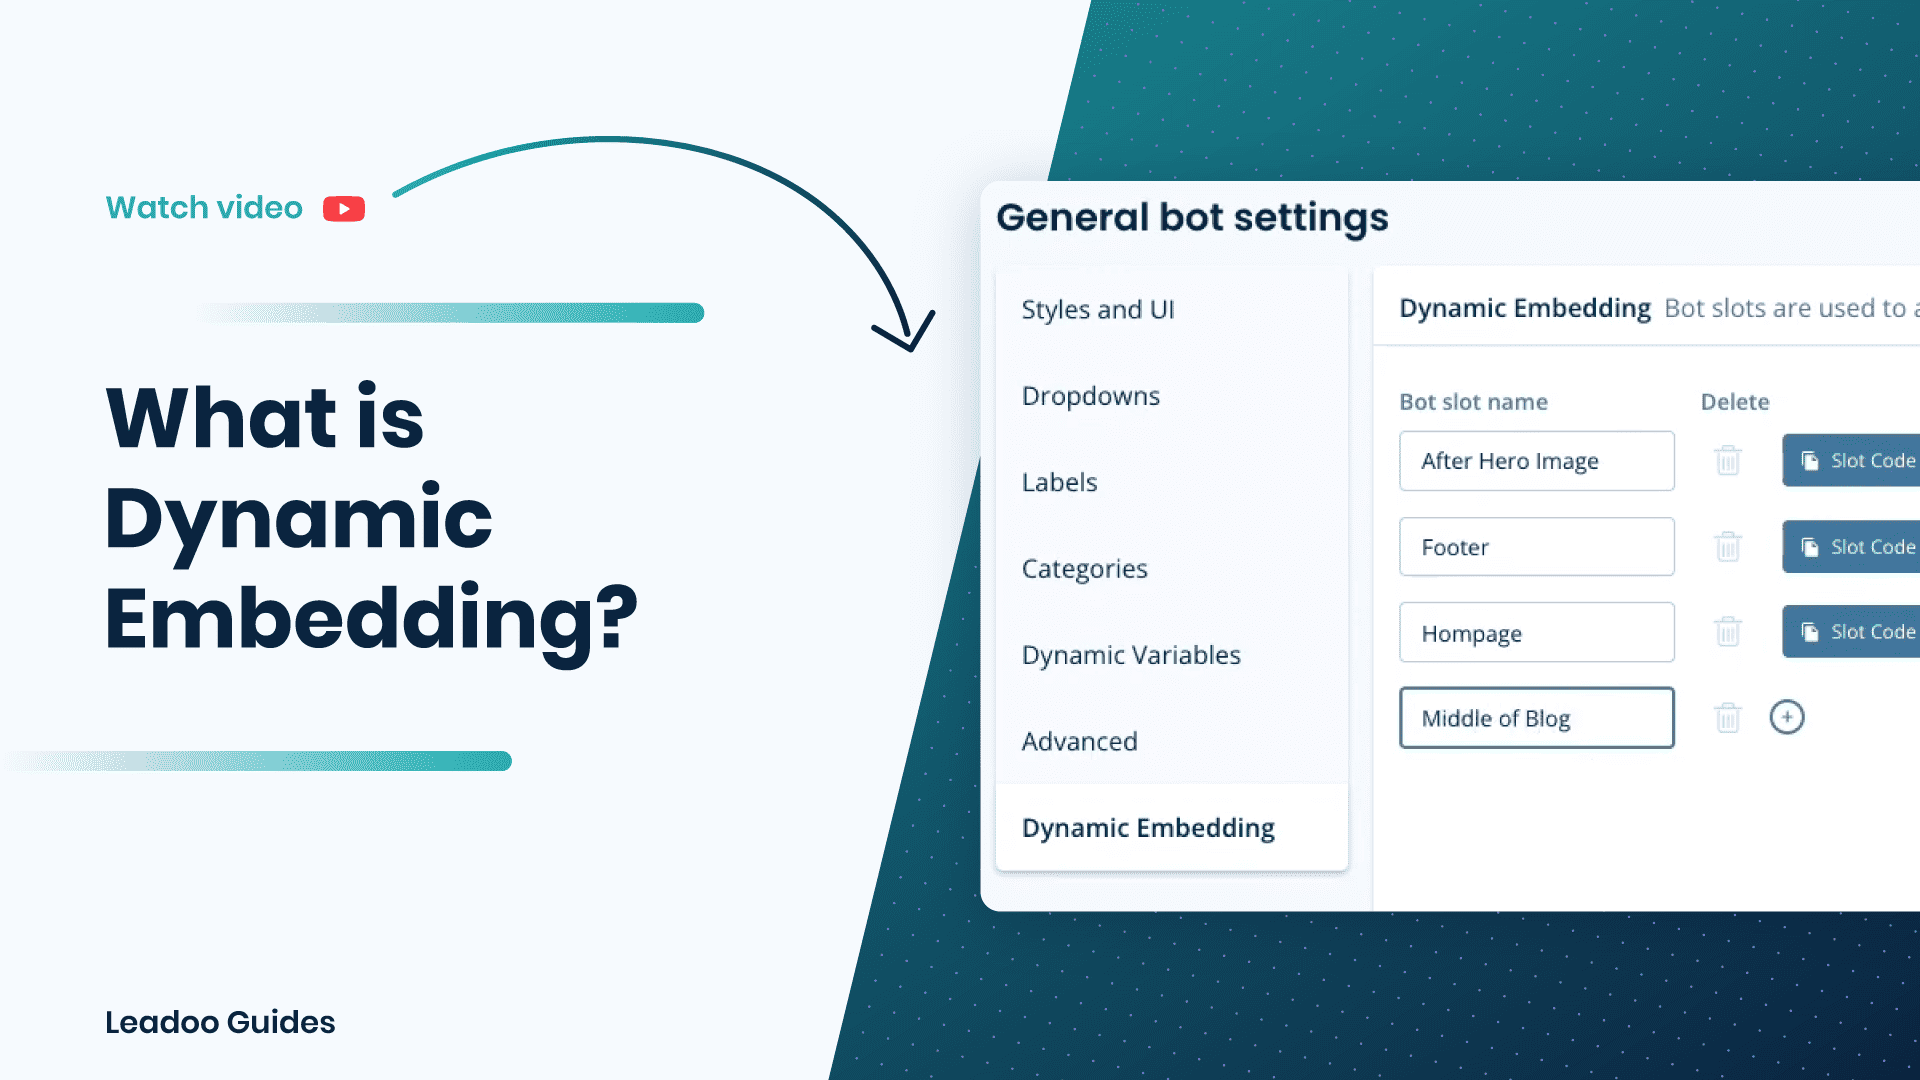
We recommend using the Dynamic Embedding method when embedding InpageBots and VisualBots. That way you can manage the bots on your website directly from Leadoo’s platform and you don’t need to access you CMS anymore every time you want to change the bots on your website.
Basically you create slots on your website (eg. Blog-post-slot & Front-page-slot-footer) and then you decide on Leadoo platform, which bot goes in to which slot. Now when you want to update all your blog post bots, you don’t have to change all those manually, but instead you just select different bot to be shown on that specific slot.
Go to Conversation Kit -> General Bot Settings -> Dynamic Embedding
To create your first bot slot, click on + Add new bot slot. Once you click save the slots will automatically sort into alphabetical order to help you find them easier.
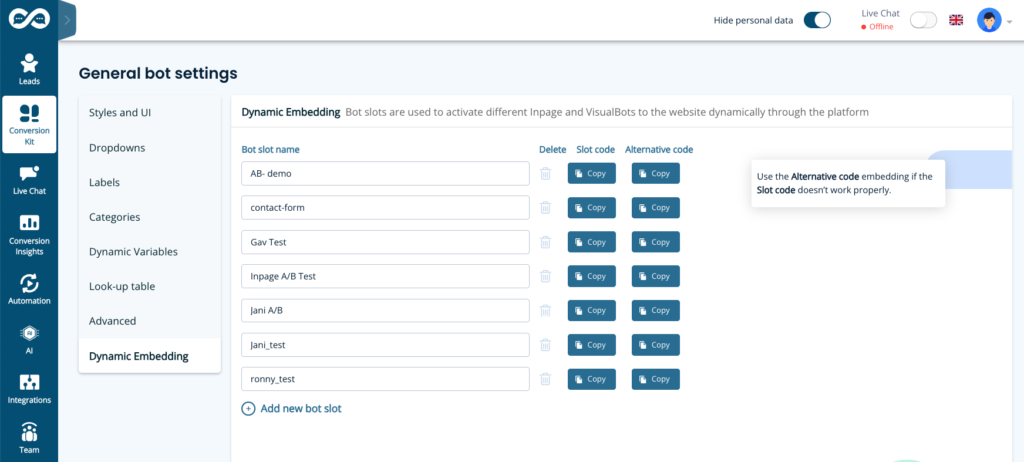
Use URLs to name the bot to make it easy to find and understand where the slot is used.
If you use bot slots on multiple pages, use the same naming logic as in chatbots (wildcards / ie. *leadoo.com/*)
Another way of naming slots is like in the picture above ie. “Front-page-header” etc.
Note! If you rename the slot, you will need to update the script on your website too. Because of this, we don’t recommend renaming them after they have been embedded on your website. If you do rename them, you can always rename them back to what they were to fix this issue.
After creating bots slots, you can assign which bot will appear in each bot slot. For example, find the bot created for blog posts, go to settings then triggers, and select the correct clot e.g. Blog-post-slot. Save, and repeat for each InpageBot and VisualBot as needed.
Note! You can only insert one bot into each slot unless you are running an A/B test.

*If you don’t see the bot slot dropdown on the Triggers page, make sure you’ve selected Dynamic Embedding as the embedding method
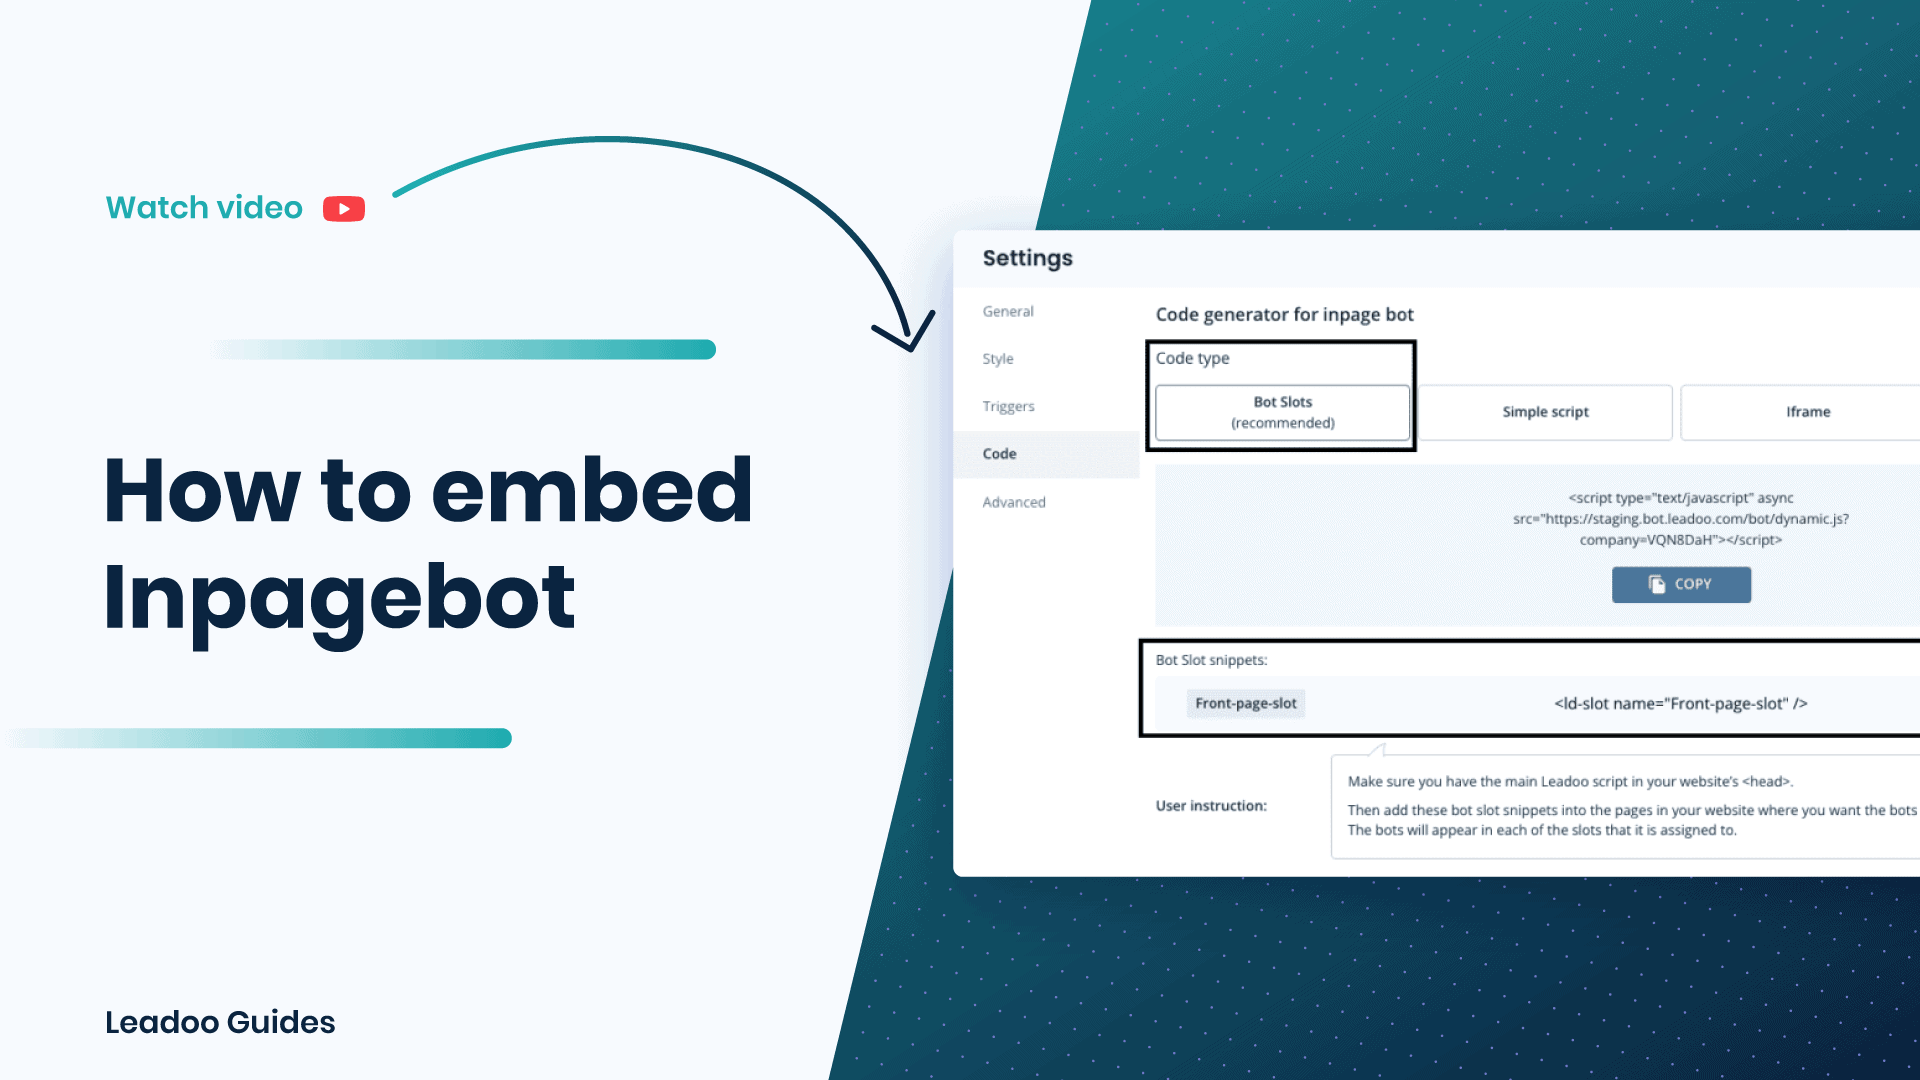
Now you can copy the slots from the Leadoo platform and add them to your CMS. (If you haven’t selected any bots to be seen on those slots yet, nothing will go live, so you can do this even before making the bots.)
Remember to add the Leadoo dynamic bot script (found in individual bot settings -> code) to your website header. This enables bot slots to work on your site.

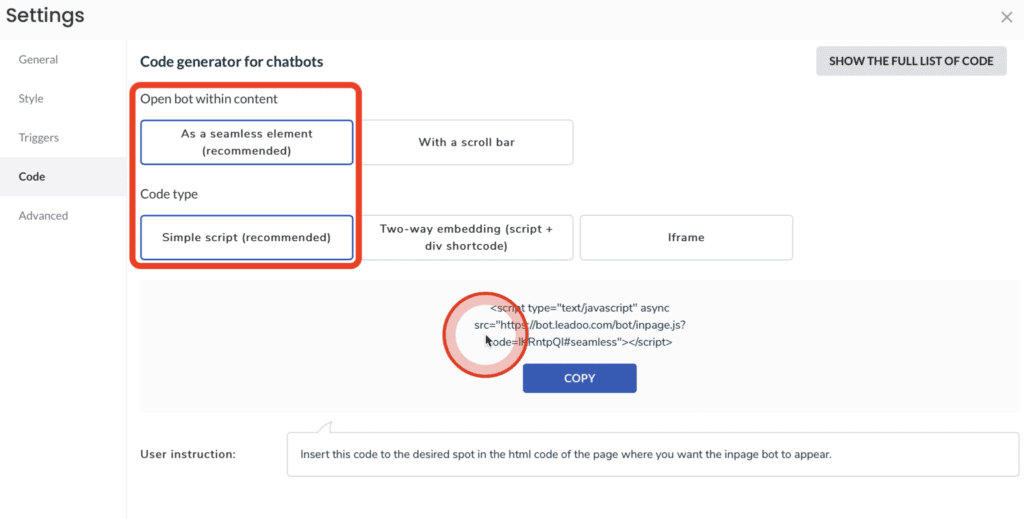
If you are a developer or advanced user, you can also click “Show the full list of code” to see all possible options available.
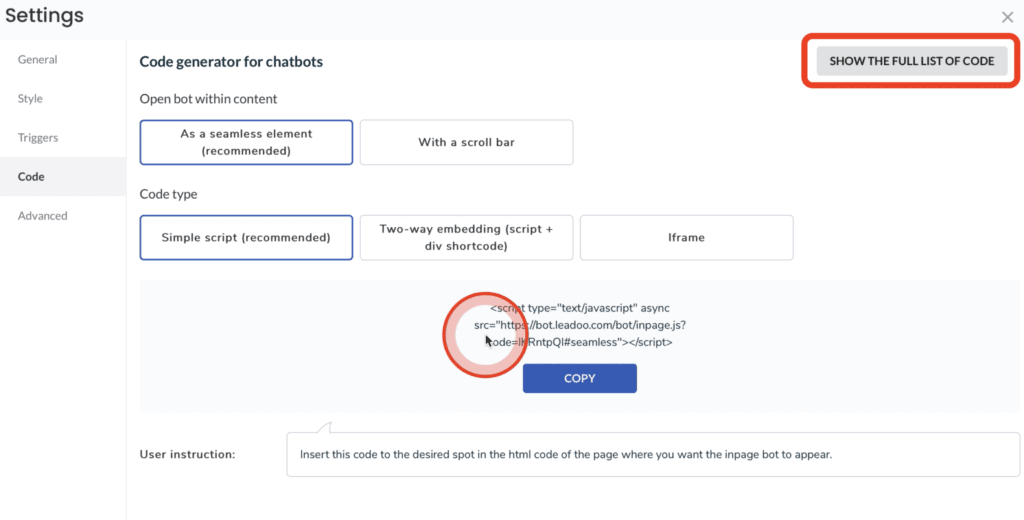
Click the “copy” icon to get the code to your clipboard.

Alternatively, you can paint the code and copy it with your keyboard. You can always find the user instruction at the end of the code generator.

Once you have the code copied, you can go to your website management. If you are using WordPress, the easiest way to embed the bot is to go to your editor. In this example we are embedding with Elementor. But this logic works for any other website management system.
Choose the section where you want to embed the bot. Click on it to open it.

In the Text Editor you can see the visual editor and the text editor. What you want to do, is to work in the Text Editor because this is a HTML site of the website and this is where the bot will go. Switch to the text site and go to the place where you want to put the Bot.

Add a little bit of space between the text and the bot code. Copy-paste the Bot to where you want it to show.
Update the page to see the end result.
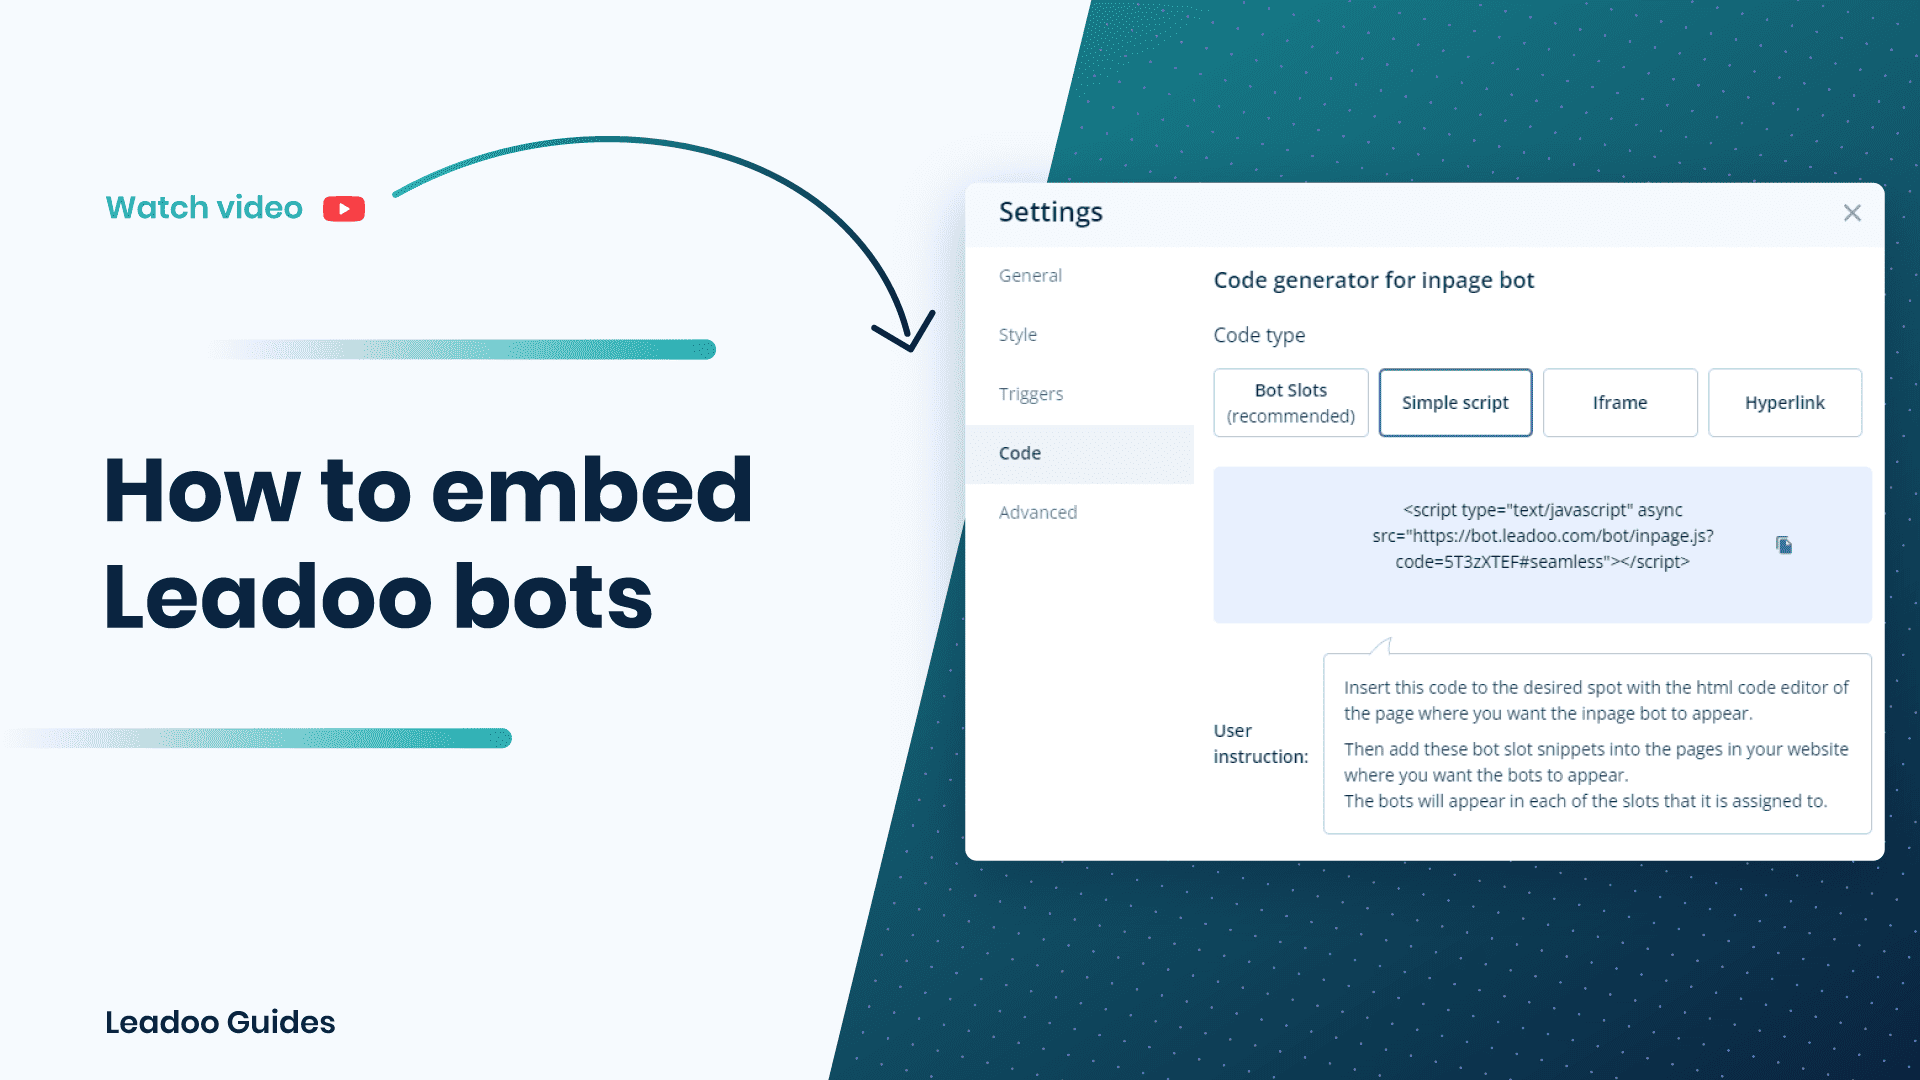
If you want to embed your Visualbots or Inpagebot using simple script, you can follow the same steps as you would with dynamic embedding. Only difference would be picking a different code. You also don’t have to create bot slots.
Click the “copy” icon to get the code to your clipboard. After this you can move on to Step 2

Leadoo bots are much smaller than many other embedded tools you may be using on your site. We take extra steps to ensure that the bots themselves are small (transfer-size wise) and don’t impact page load performance. We also ensure that our caching rules are flexible enough to allow for caching on the browser-side so that subsequent navigations through your site don’t incur extra transfer costs in downloading our bot(s) more than once.
Leadoo uses a CDN (Content Distribution Network) to store cached copies of our bots close to all of our potential users.
Due to these features, Leadoo strongly recommends against attempting to improve page performance by including third party tools or custom tweaks to improve the performance of our bots. Doing so will, in most cases, result in a less efficient setup or our bots simply failing to run.
More information can be found on https://docs.leadoo.io/docs/config-page-performance
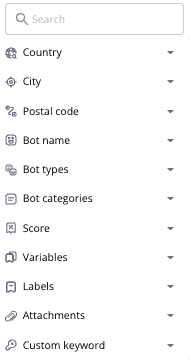
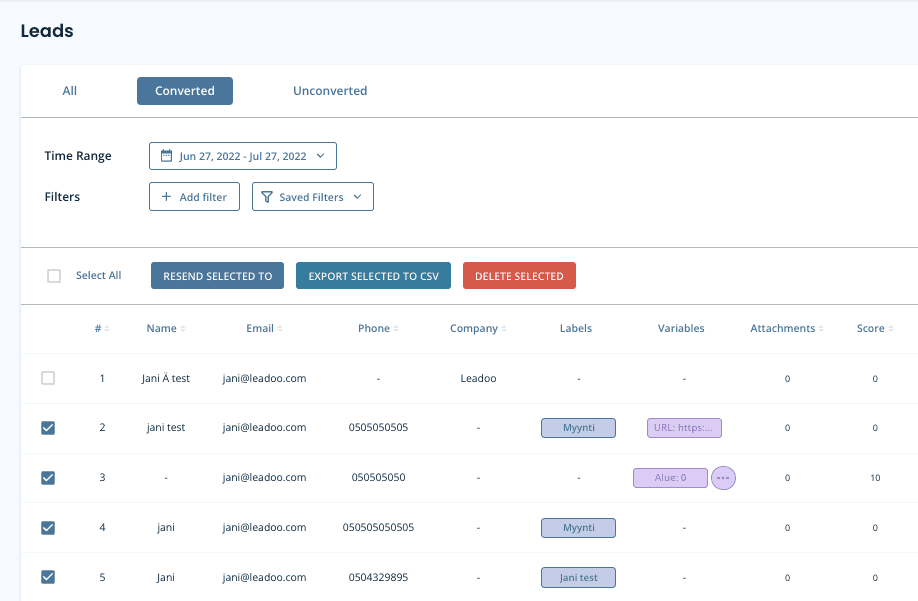
If you have set-up lead notifications on your bots, you will receive an email when a new lead is converted. All your leads are also stored on the platform under the leads tab, you can also filter them to find the exact leads you want.
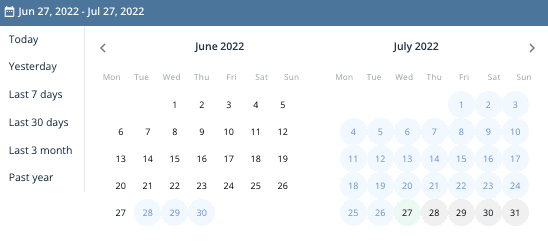
You can either view Converted leads (default), Unconverted leads or All (has all bot conversations)

First you need to select leads that you want to resend. After selecting one or multiple leads -> click ”RESEND SELECTED TO”. After that choose from these options:
Email recipients defined in the bot settings (bot specific)
New email address (you can type in the email address)
Integrations (lead is sent to the integration that has been previously set up)
First you need to select leads that you want to export. You can either select one by one or select all. You can export leads to CSV and then open up the file in excel, google sheets or some other platform. CSV has all lead details and the bot conversations in it.
First you need to select leads that you want to delete. You can either select one by one or select all. After that click ”DELETE SELECTED”*
*Note that deleted leads can’t be restored to the platform
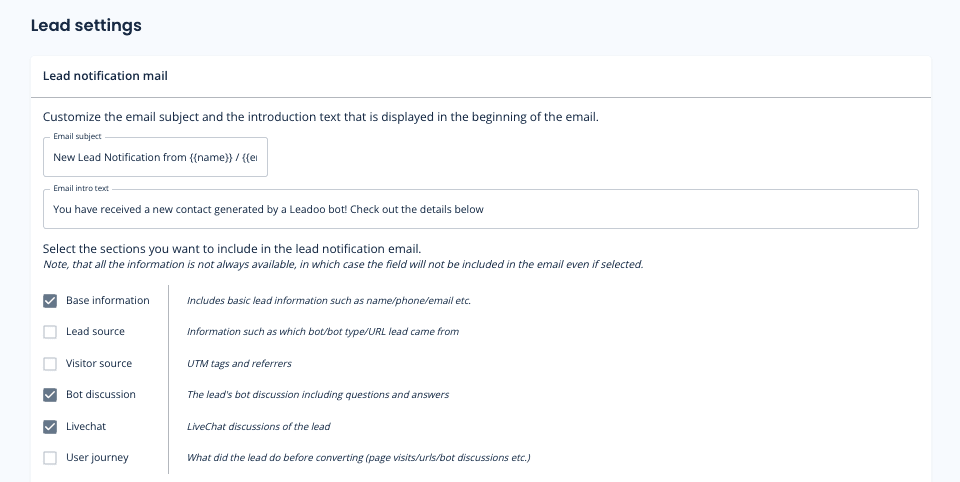
On Lead settings you can define what information you want to include on your lead emails by selecting different sections.*
*Note, that all the information is not always available, in which case the field will not be included in the email even if selected.
You can also define Email subject and intro text. That way you can make the email subject more clearer to the lead recipients. Ie. You can add the email subject to contain name and company of the person that contacted you. You can use following macros:
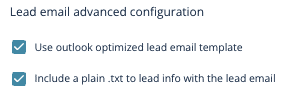
If you use outlook we recommend you to use Outlook optimized email templates.
And if you have issues copying the message from lead emails select ”Include a plain .txt to lead info with the lead email”
Questions?
Contact your Customer Success Manager at Leadoo at [email protected]
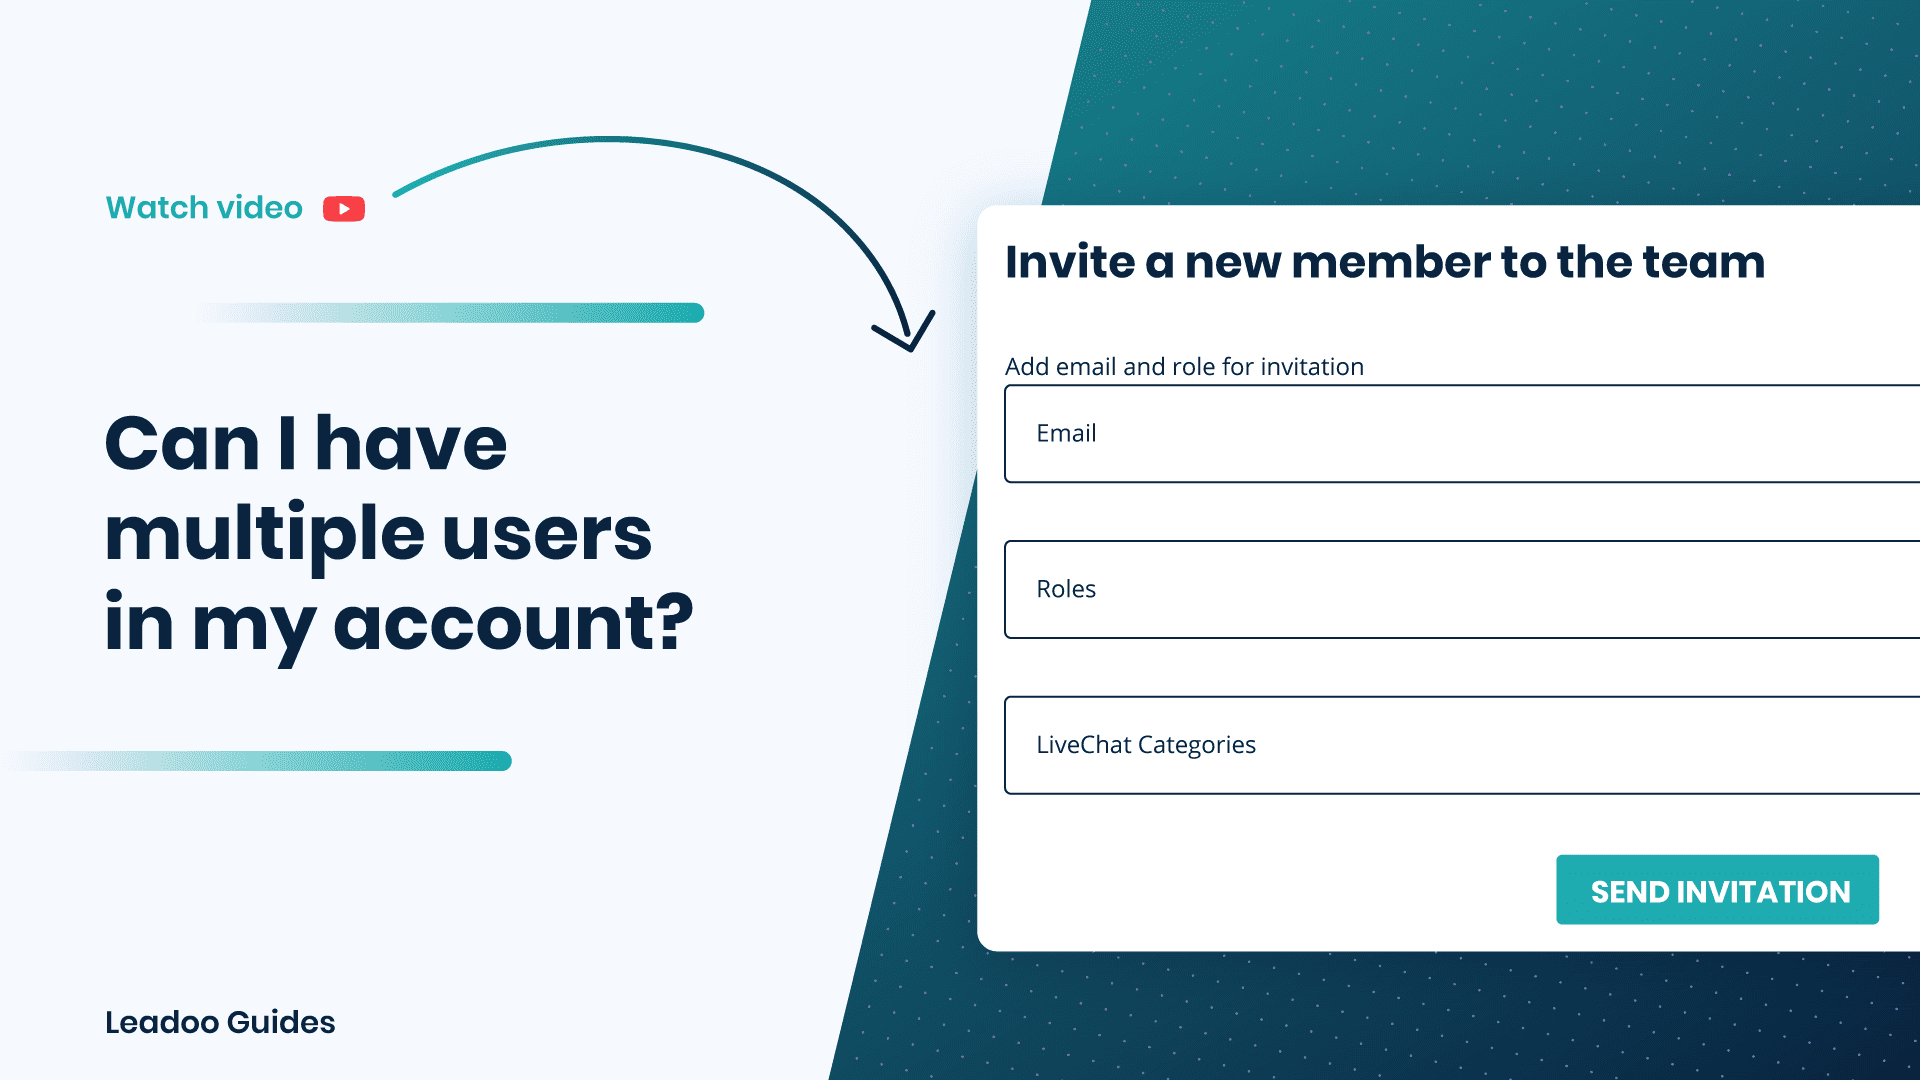
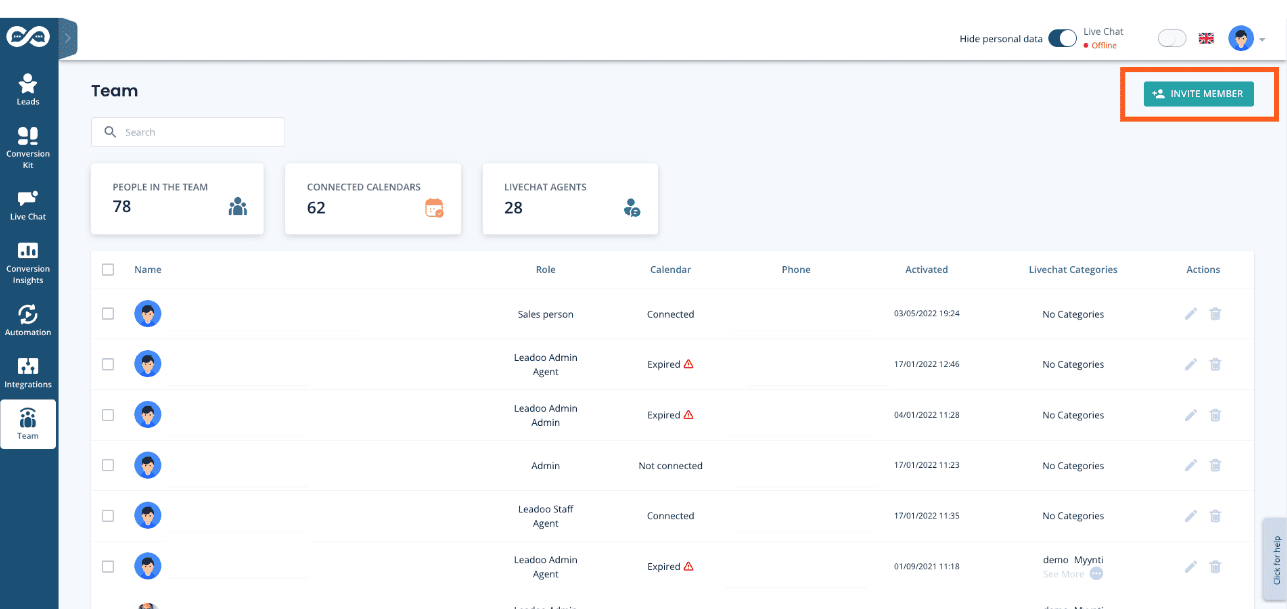
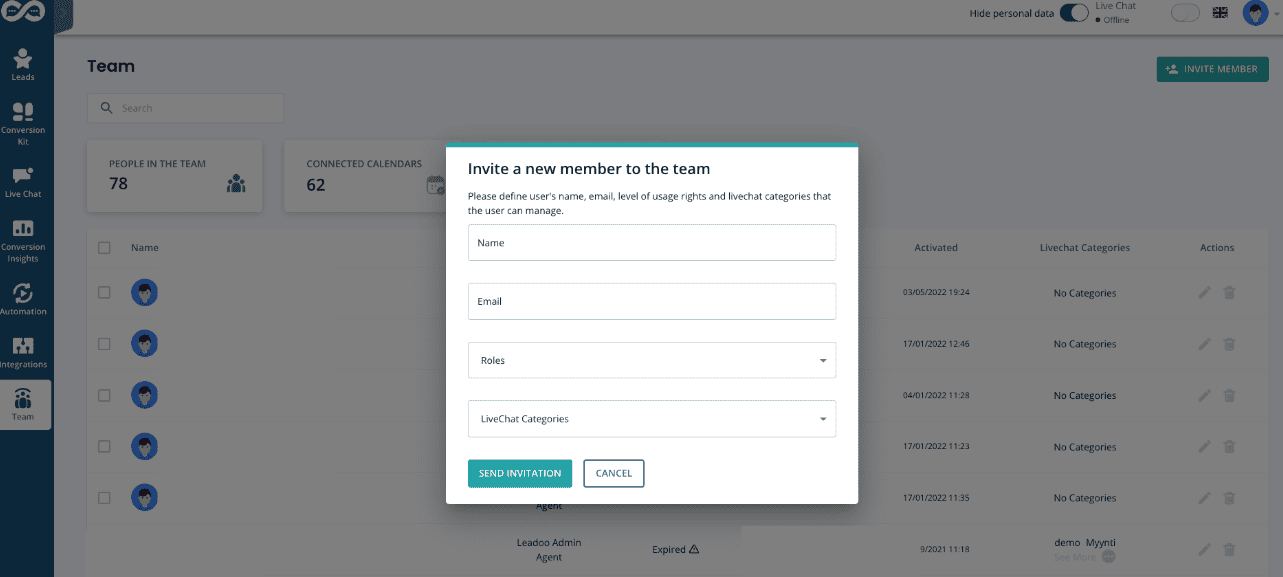
Yes, and this is very easy to do. Just go to the option bar on the left. Scroll down to ‘Team’ and then select. Then if you are an administrator you will see an ‘Invite Member’ option at the top right. Simply click on this and then fill out the information fields.
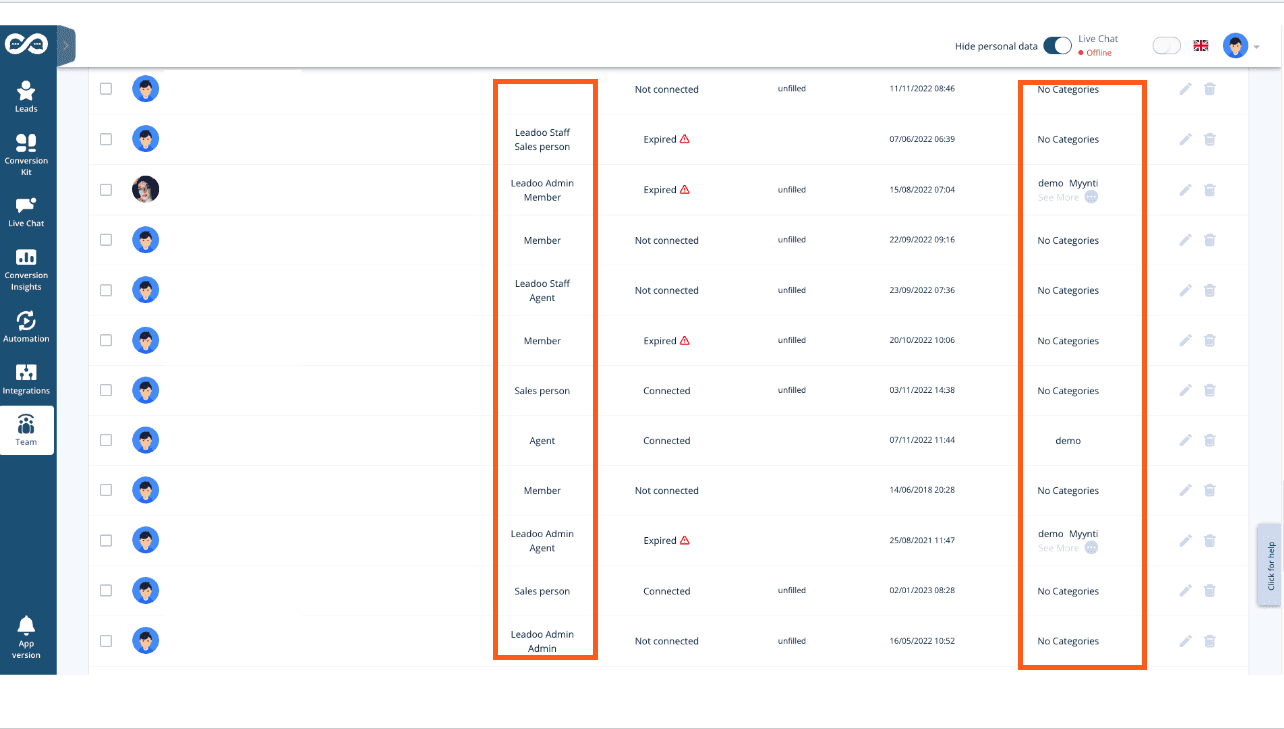
There are different access options you can allocate to new team members. Most commonly, you allow ‘Admin’ access, which allows the person to change settings. However, particularly in big teams, you may only grant ‘Member’ access, allowing them to create and manage bots, or even ‘Agent’ access, which means they can only pick up and respond to LiveChat.
After you have selected the user category then click ‘send invitation’ and your new user will receive an email invitation to your Leadoo account with instructions on how to confirm and create their own profile.
Read more about the differences of Leadoo user types here.
There can be only one owner in your Leadoo backend. This is the person who has signed your contract. This person has access to the whole platform, can view, create and edit the bots, can view all the analytics and profiles, can edit settings and bot UIs and can manage users. They can also use Live Chat.
There can be multiple admins in your Leadoo backend. They have access to the whole platform, can view, create and edit the bots, can view all the analytics and profiles, can edit settings and bot UIs and can manage users. They can also use Live Chat.
There can be multiple member-level users in your Leadoo backend. They have access to edit and create the bots and view the bot analytics. They can also use Live Chat. They cannot access platform settings, edit bot UIs or manage other users.
Conversion Insights: Access Bot insights, Company identification, Livechat insights, Source insights and Journey insights
Automation: Manage Workflows
Bots: Bot access, Basic bot management, Style management
Leads: Manage leads
AI: Manage knowledge base
Agent-level users have only access to the messaging platform (Live Chat). They cannot view or access other features of the platform.
Read this article on how to create custom user types for greater control.
It’s easy to add new members of your team on Leadoo. And the best part is that you can allocate different roles to them depending on their responsibilities! This way, you have complete flexibility to decide who gets to respond to live chats and who should focus on tasks such as chatbot development or monitoring reports.
Read this article to find out more about different user types and how to create custom roles.
How to add teammates to Leadoo?