

Defining triggering rules for a ChatBot
Did you know that the placement and triggering of a chatbot can often define the success or failure of a chatbot when it comes to results?
Follow these simple steps to find out how to engage your visitors with Leadoo Chatbot in the right place and time! 💪
Define which pages your chatbot should appear on
Once you have added the Leadoo script to your website header your chatbot visibility is controlled with settings in your Leadoo platform. Leadoo allows your chats to be displayed to the visitors based on custom URL rules. This means that you can define which chatbot you want to appear on different pages to personalise the visitor’s experience on-site.
Step 1. Open up the settings for your bot. This can either be found via the bot listing or in the editor.

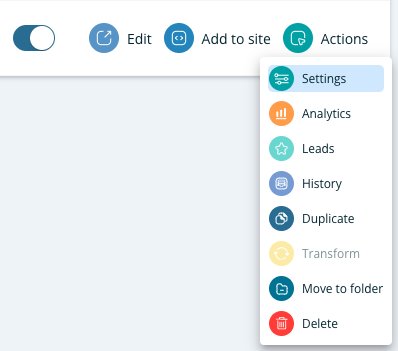
Step 2. Set the URL trigger rules.

In the example above this chatbot would only appear on leadoo.com/product/conversion-kit. If you wanted your chatbot to appear on every page on your website you would change it to leadoo.com/*. The * acts as a catch-all for all other page URLs.
You can find more page-specific setting examples below or under “See more” within settings.
Page-specific (most popular choice)
= Chat triggers when a visitor enters the exact URL address you define in the given field. You can broaden the selection by using the asterisk sign *.For example:
leadoo.com/ = the chat triggers only on the front page of leadoo.com
leadoo.com/* = the chat triggers globally on each page of leadoo.com domain
*product* = the chat triggers on pages that include the path product (like leadoo.com/product/inpagebot AND leadoo.com/product/chatbot)
You may want to use multiple chatbots across your site or even hide them on certain pages, this is where our advanced URL trigger rules come into place.
- Always when URL includes
= Chat triggers on the domain where the script is added, as long as the landing page URL contains a specified rule, e.g. certain keyword.For example:
URL includes: blog = the chat triggers on every page where the URL contains the keyword blog e.g. leadoo.com/blog/increase-conversion AND leadoo.com/blog/5-chatbot-benefits, etc. - Forbidden when URL includes
= Chat is hidden on pages where the URL contains a specified keyword. For example:
Triggers on leadoo.com/*
Forbidden when URL includes: sign-up
= the chat triggers on every page on leadoo.com except any URL that contains the keyword sign-up, like leadoo.com/sign-up.
Note! Do not add entire URLs in the advanced URL rules, only the keyword that appears in the URL.
Choose your trigger settings
We’ve given you plenty of control over what the trigger and icon look like as well as how frequently it pops up including:
- Pop-up settings – Never, immediately, at scroll %, after time or a combination.
We also allow you to reactivate this pop-up after X amount of time so it’s not hidden forever if closed. - Trigger style
- Display message
We also allow you to reactivate this message after X amount of time so it’s not hidden forever if closed. - Icon size
- Position on the page

Deactivating your chatbot
You already know how to hide your chatbot on certain pages, but what if you need to hide it everywhere temporarily? You can easily deactivate your bot within the Leadoo platform in just 1 click! Navigate to the bot type e.g. https://app.leadoo.com/conversion-kit/chat then click the toggle in the ‘Activate’ column.

Remember, no matter how awesome your dialogue is, it won’t have much effect if nobody sees it – so put some time and thought into defining your trigger settings!
If you have any technical challenges reach out to [email protected] or the team member you are currently working with.