KNOWLEDGE
Case StudiesBlogsEventsSupport & Starting
Support Articles & HubSupport Videos (Youtube)Try Leadoo Free (Leadoo Lite)Partners & Careers
PartnershipsCareersSecurity & Privacy
Security at Leadoo AIGeneral Terms & ConditionsData & GDPRKNOWLEDGE
Case StudiesBlogsEventsSupport & Starting
Support Articles & HubSupport Videos (Youtube)Try Leadoo Free (Leadoo Lite)Partners & Careers
PartnershipsCareersSecurity & Privacy
Security at Leadoo AIGeneral Terms & ConditionsData & GDPRLeadoo Sales Alerts brings you Company Identification’s incredible insights straight to you without the hassle of logging in.
Company ID tracks visitor interactions, revealing annual revenue and industry specifics. Dive into a wealth of data, including interactions, conversations, and conversion points, all at your fingertips. Save filters for pinpoint accuracy in identifying the hottest prospects.
Sales Alerts means no more logging in; receiving automatic email notifications with targeted filters in real-time. It’s your shortcut to staying ahead in capturing those hot prospects.
Not familiar with Company Identification yet? Find out all about it here.
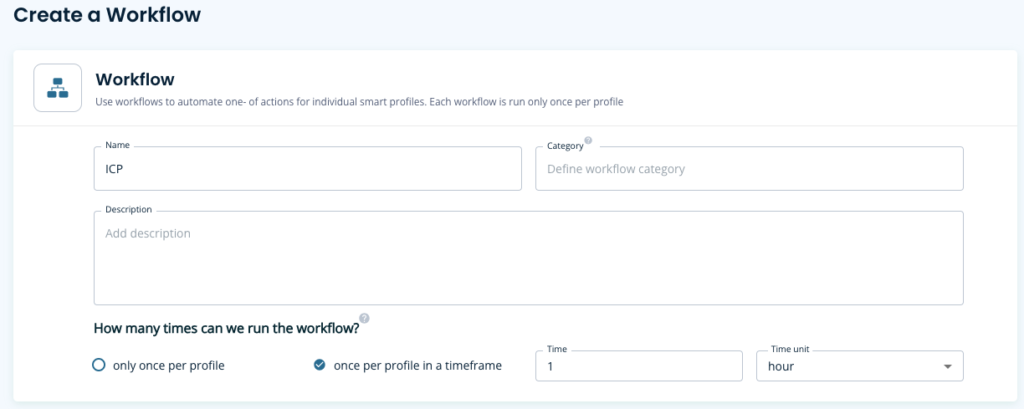
We’ve given you plenty of control to personalise exactly when and how often you can trigger an alert. But, here’s a step-by-step guide to getting started.
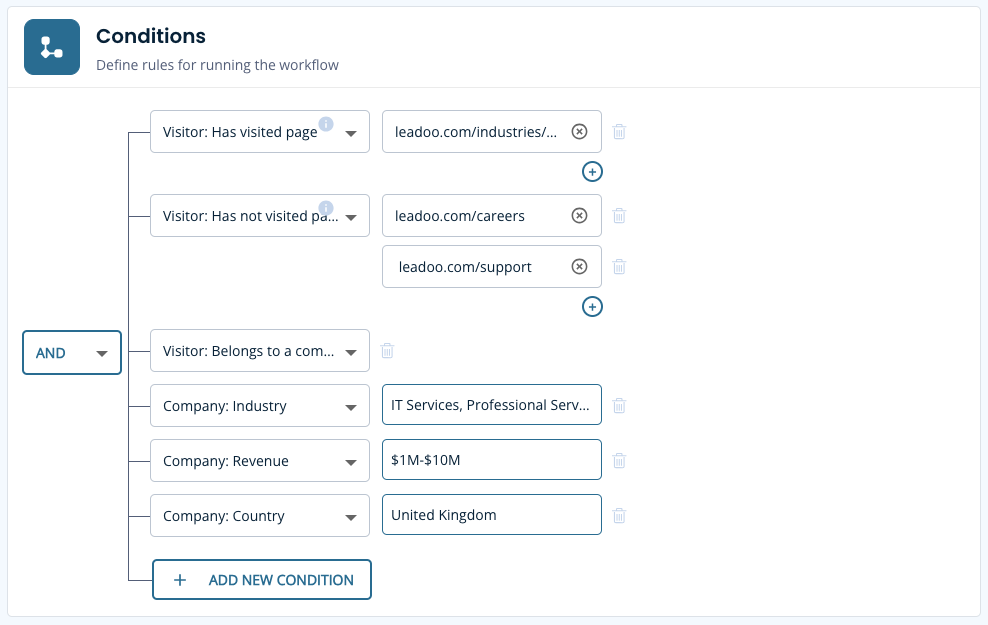
Let’s set up a workflow that alerts you when a company that meets your ICP lands on your site.
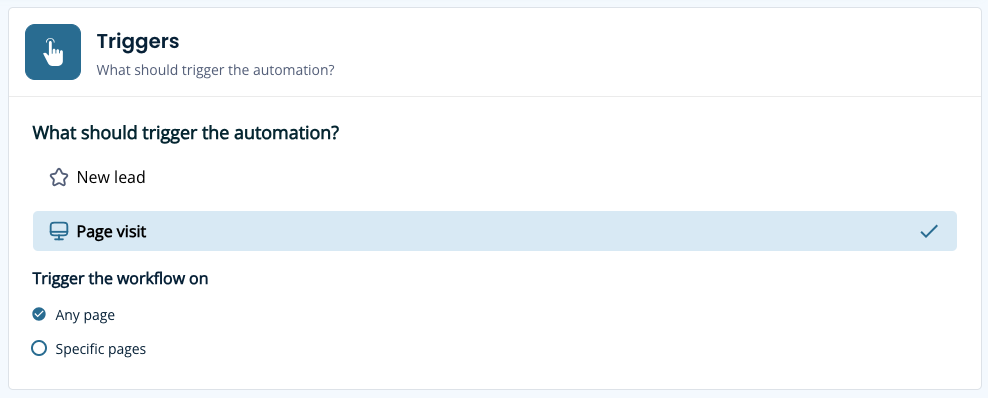
Define conditions based on visitor actions, company industry, revenue and country then, filter this against high-intent pages
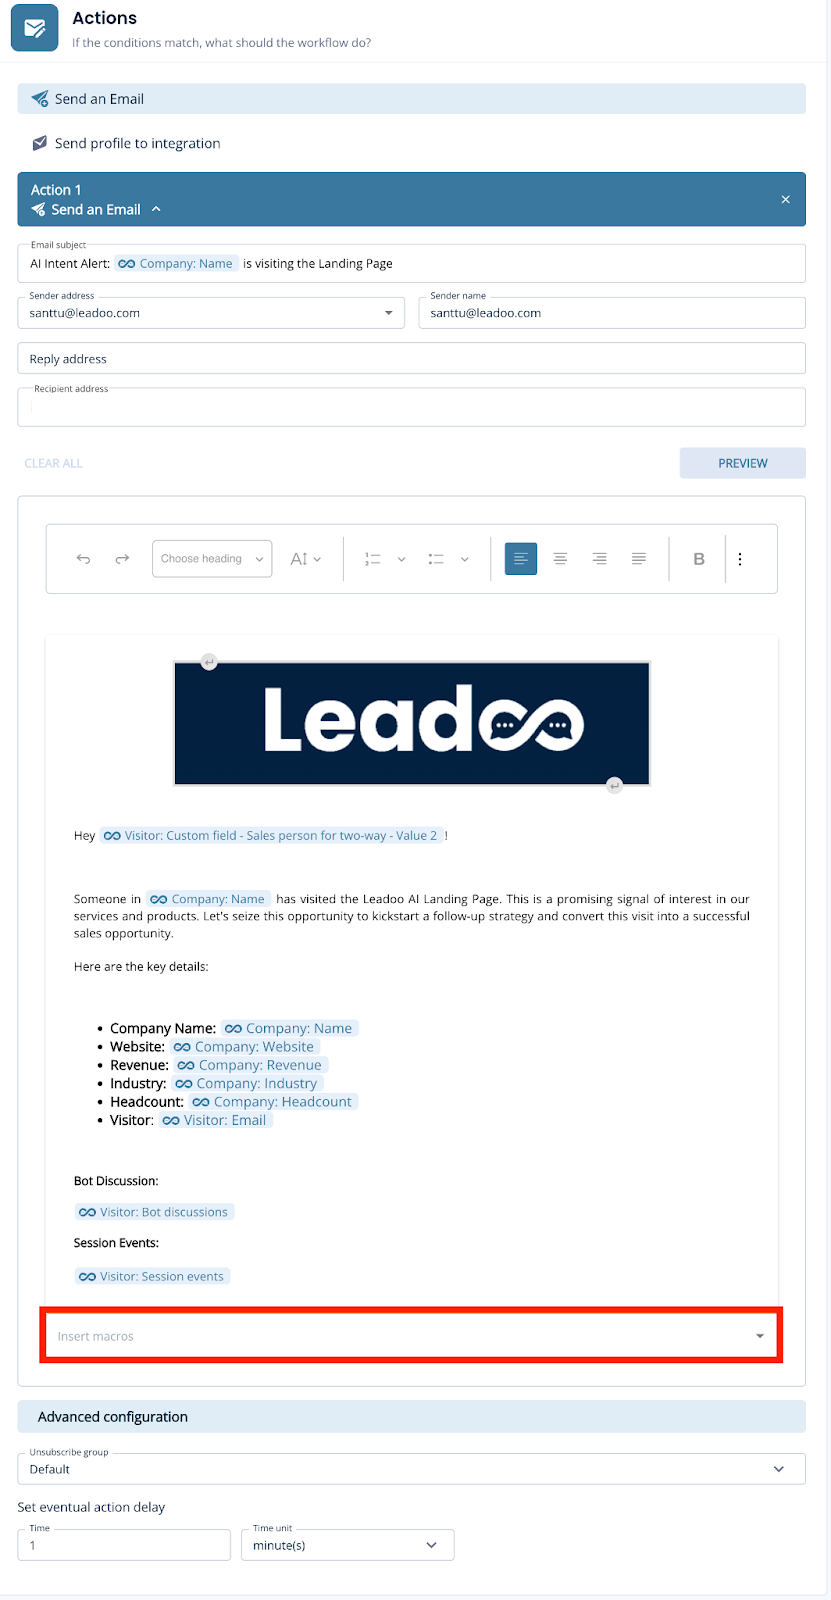
Create a notification email to any user on your account with ease. Build your email using the earlier conditions as macros for quick reference. Then you’ll be all set to receive timely email alerts whenever a prospect meets your defined conditions.
Here’s an example you can follow:
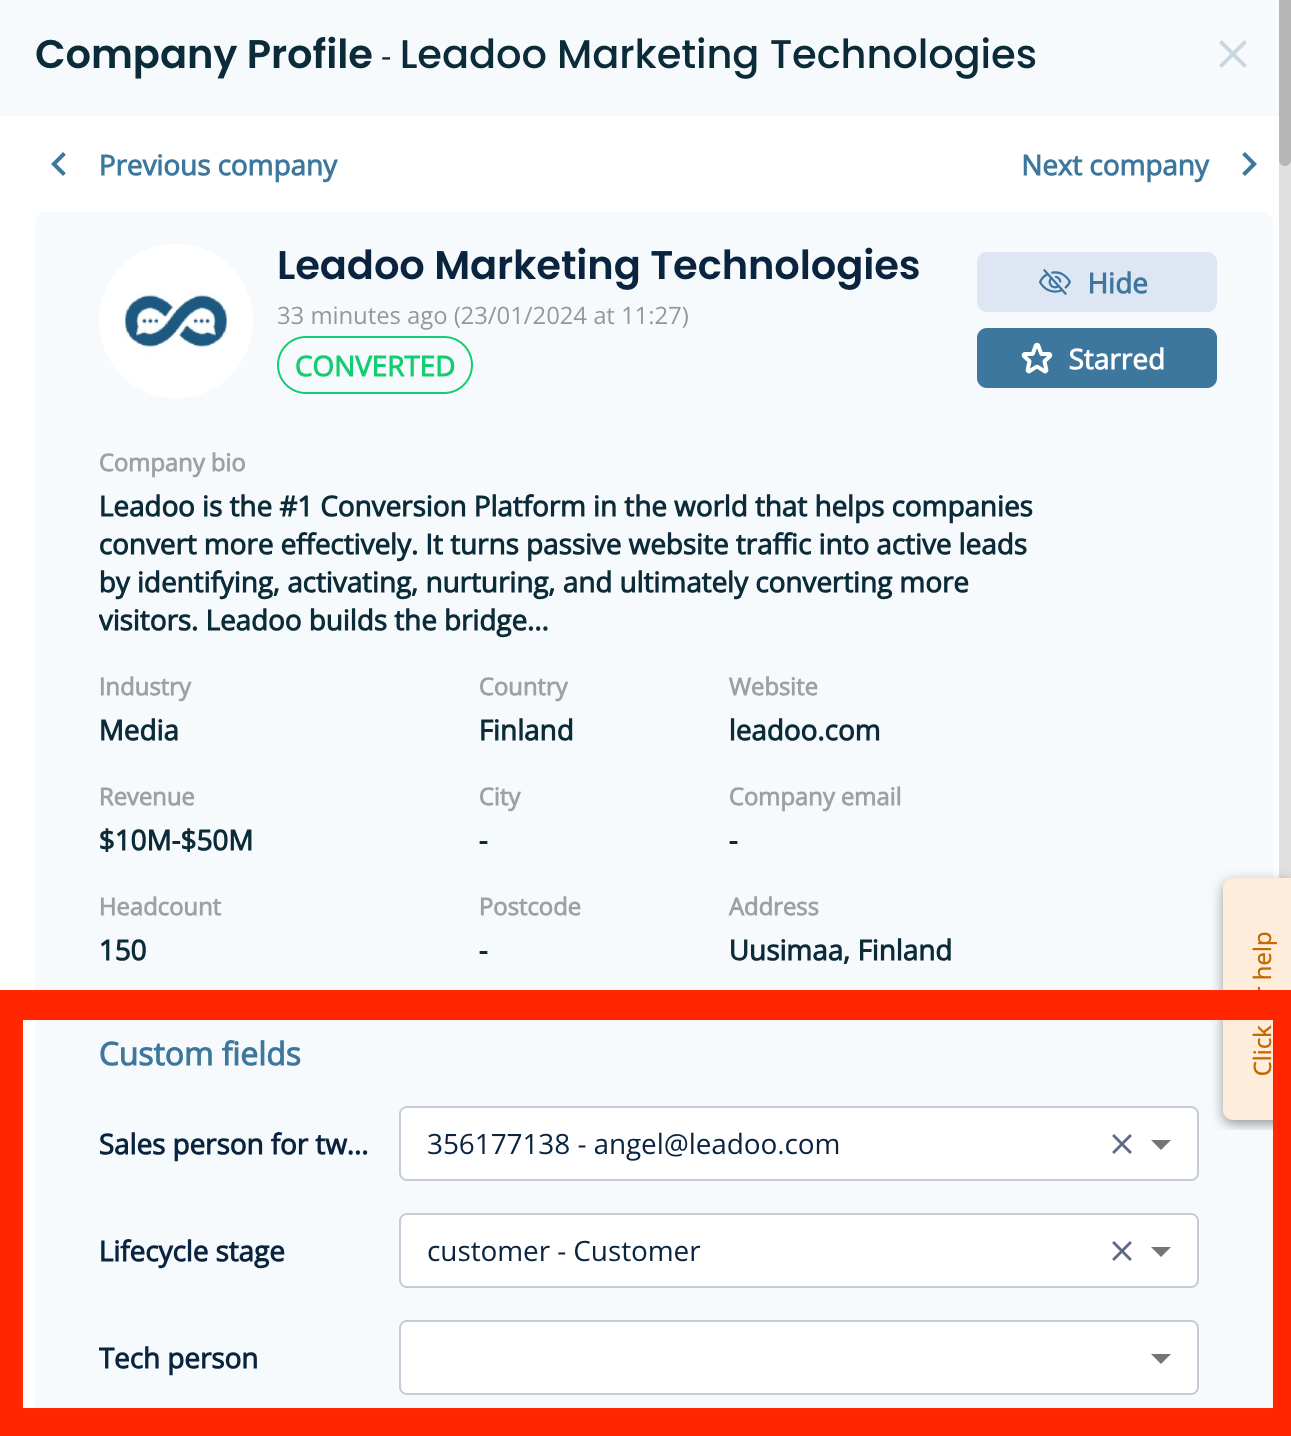
That’s where our 2-way integration comes into play and ensures seamless notifications to the right salesperson without unnecessary pings.
To do this you’ll need to have an integration already set up and be able to share additional information with us such as:
You’ll then be able to filter Sales Alert notifications more intelligently and sync the data into the platform like below.
To explore the benefits of 2-way integration, reach out to your Onboarding Manager or Customer Success Manager today.
Within your Leadoo accounts you’ll find four default user types you can choose from along with the option to create custom roles for greater flexibility and control.
By default, the owner of your account will be set as the person who signed the contract. There can only be one owner so if you need this to be updated please contact your Onboarding or Customer Success Manager.
Owners will have full admin access
You can have multiple admins on your account. They will have access to everything in the platform included in your subscription.
This will give users access to most of the platform but with limited access to update settings and add users to the account.
Conversion Insights: Access Bot insights, Company identification, Livechat insights, Source insights and Journey insights
Automation: Manage Workflows
Bots: Bot access, Basic bot management, Style management
Leads: Manage leads
AI: Manage knowledge base
This role gives users access to live chat only.
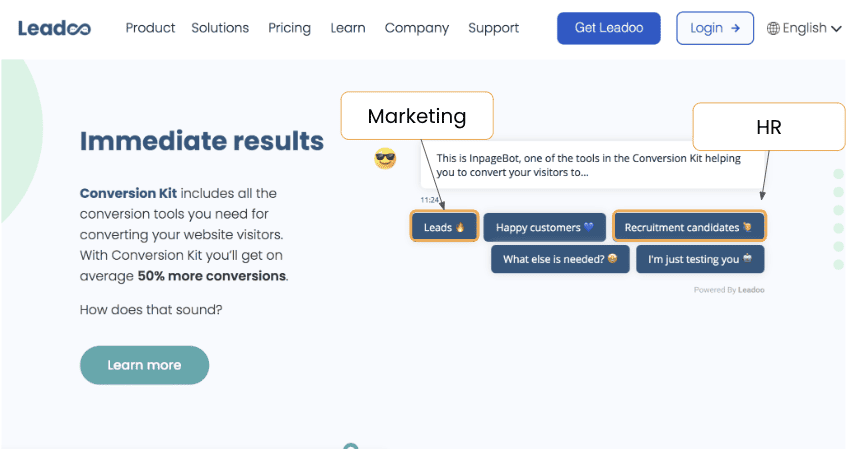
You may want to create custom roles for members of your team to give them access to the areas they need whilst restricting certain parts of the platform.
For example, you might want the sales team to have access to some of the Conversion Insights and Leads area along with Live Chat.
1. To create a custom role navigate here https://app.leadoo.com/team/roles-permissions
Don’t have access? Reach out to your Onboarding or Customer Success Manager.
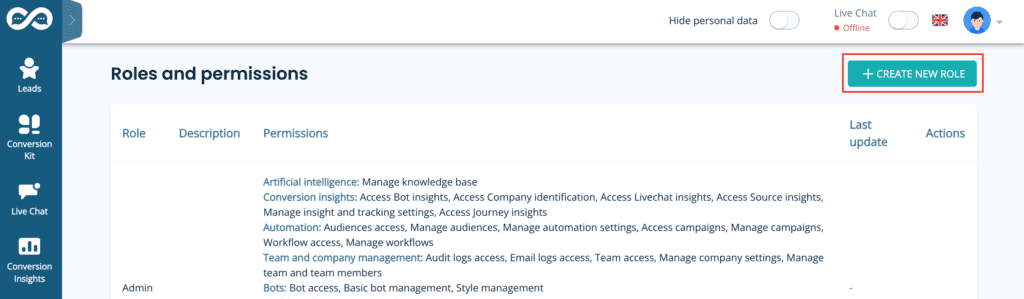
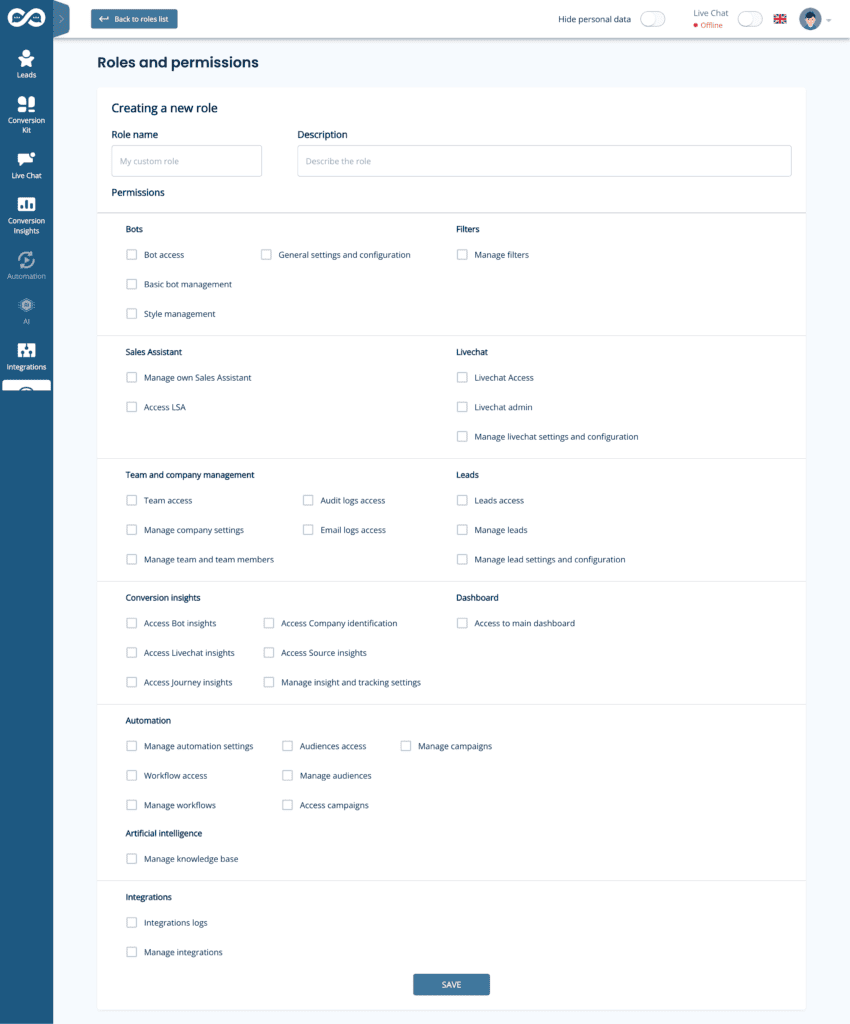
2. Select the areas you want that role to have access to.
Make sure you tick the box for “Access to main dashboard’ otherwise, the users may see a blank page when they log in.
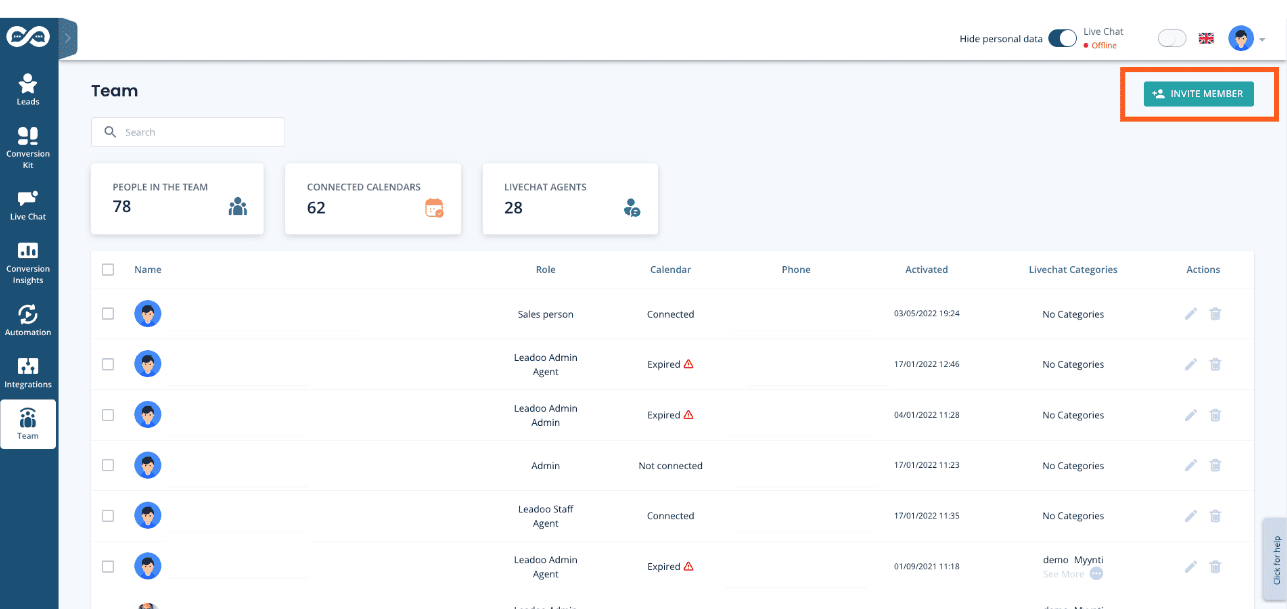
3. Go to https://app.leadoo.com/team/members to invite a new user to the account using the new role.
Click ‘Invite member’ and select your new role from the list.
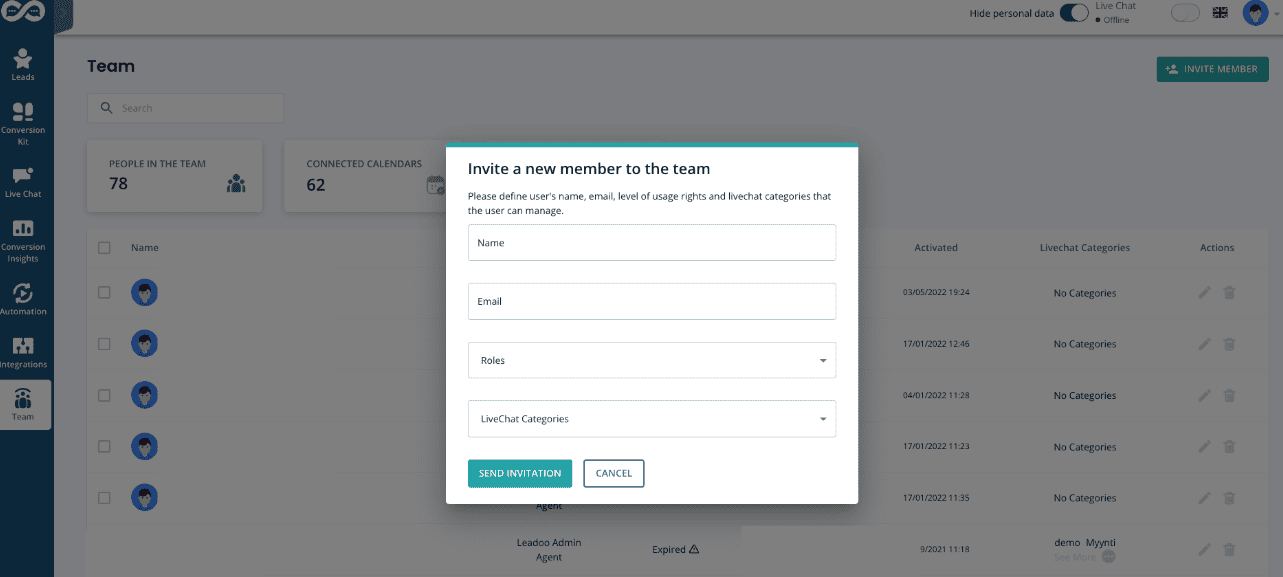
That’s it! You can update the permissions of this role at any time.
Need to set or update the lead notification settings for your bot? Read on!
Lead notifications are triggered by settings in each bot for ultimate control. Open bot settings either in the Visual Bot Builder or by clicking the actions button from the bot listing.


On the general tab, you’ll see the option to select a recipient. You can select from a list of users on your account or manually add an email address you’d like to send notifications to by typing into the box.
You can add one person or multiple people to receive lead notifications. To add more people, just click the “plus” button and select more people from the drop-down.
By default, the recipient will receive all leads. If you want to be more conditional about who receives what type of notifications, i.e. support requests go to the support team and sales enquiries to the sales team, you can use labelling. You can learn more about labels here.

Contact your Customer Success Manager at Leadoo at [email protected]
Step 1. Decide what you want to add to your audiences.
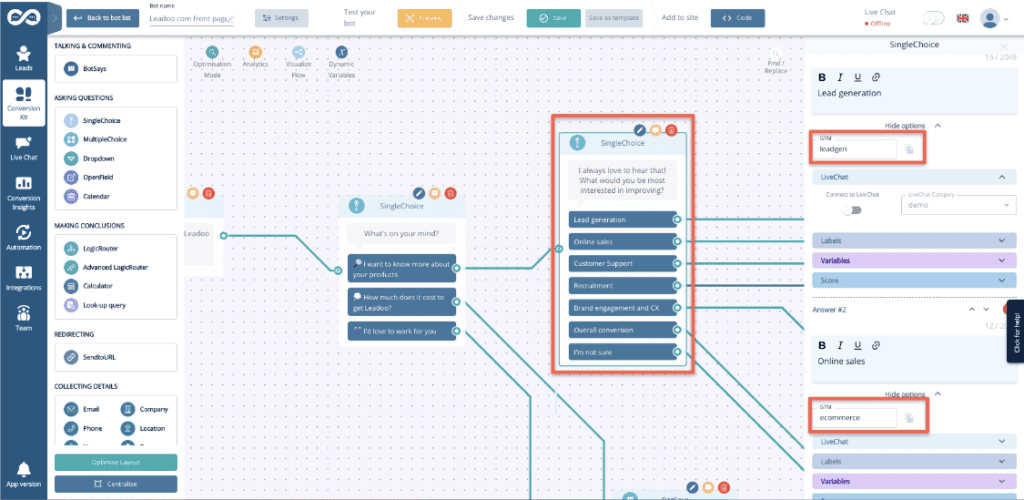
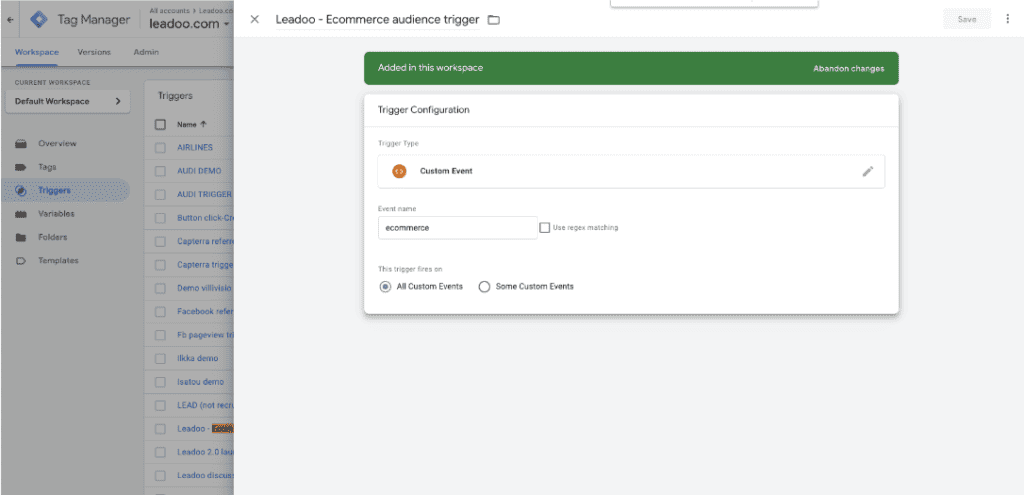
Step 2. Create triggers on GTM
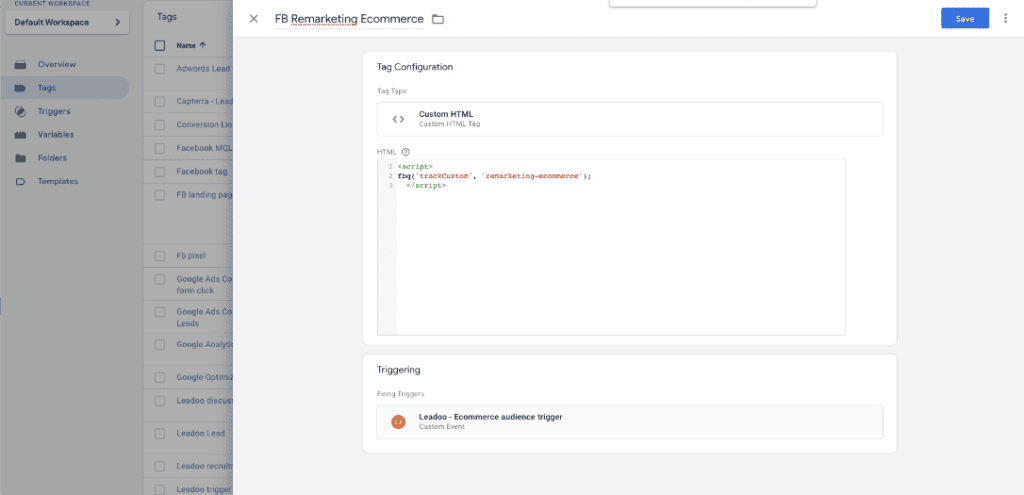
Step 3. Create tags
Facebook:
<script>
fbq(‘trackCustom’, ‘remarketing-ecommerce’);
</script>
‘remarketing-ecommerce’ <- this part of the script will be the name of the audience on your Ads Manager
Google Ads:
How Company Identification works:
Leadoo collects information about visiting companies based on the public IP address of the company. So, the visiting person’s IP address is identified -> checked if it belongs to a company. If it does, the company is shown in the company listing. If it doesn’t, the information isn’t displayed – in either case, the IP address isn’t stored anywhere.
We have a partner company called Clearbit. So, the IP address information goes there and company information comes back from their database. Visitor profiles (if in use) are then linked to these companies either via IP or according to company information given in the bot (i.e., manually filled in the company name into the bot). If there are additional questions / need for clarification, I am happy to answer.
Where Clearbit gets its data:
In short, from public sources. Clearbit probably won’t tell where they get their data but almost all such actors (for example, Leadfeeder in Finland, Lead Forensics in UK) make use of several different sources; they have people who browse the web, they use public data sources, etc. However, it’s important to note that these are not personal data, but Clearbit, Leadfeeder etc. link the company’s IP space to the company’s name and its public information. For example, if Nokia Oy owns the IP space 109.68.1.1-109.68.1.45, then whenever a visitor comes from those addresses, it is recognized that the visitor works at Nokia.
Another important thing is, from Clearbit’s point of view they never know whose sites the visitor has even visited and from your site there never goes a call to Clearbit. All traffic to them goes through Leadoo. So, they don’t know whether the person working at Nokia has visited hs.fi, leadoo.com, or etuovi.fi. They don’t even know about the existence of any of these or any information about the person.
How Visitor Tracking works:
Personal data comes from the information people leave in the bot. Before that, we can “identify” the devices that have been used to visit the sites. These people are “unknown visitors” until they leave their contact details through the bot. Identification is done based on the etag left by the device and browser (works the same way as a cookie, but different technology). So how it works: A person comes to the site -> tracking is on if cookies are accepted -> x device is identified. -> person leaves the site -> an “unknown visitor” profile is created -> The person returns to the site the next day with the same device -> the same etag is recognized, meaning the person visiting with the same device is recognized -> the information from the previous day and new information are combined under the same profile -> person leaves their own information in the bot -> “Unknown visitor” becomes an identified person based on lead information.
Tracking Options:
There is 4 different tracking options you can set up on Leadoo’s control panel.
There is also on options to override user tracking options if you want to only track companies. In that case you would choose “Never track” and in Company tracking you’d choose “Always track”.
If you want to add Leadoo tracking to your cookie acceptance but your CMP isn’t TCFv2 compliant you have to use Custom Consent Handling
How Custom Consent Handling works:
So how this should work is that Leadoo loads two types of scripts in different ways depending on whether the user accepts statistical cookies or not. So if the user does not accept statistics, the bots will load, but the analytics script will not load. As a result of this loading, cookies etc load correctly automatically. Below is how to make this work like this:
Leadoo’s bots can be loaded directly onto the website. However, Leadoo’s tracking can be put behind cookie acceptance. This happens in the following way:
From Leadoo’s tracking settings, the option “never” is activated <- tracking doesn’t automatically start. By default, Leadoo’s settings are ‘always track’, but it can be changed from Leadoo’s control panel. At the same time, the following script is added to your CMP that overrides the “never” rule after cookie acceptance and Leadoo’s tracking starts to work:
if (!window.ldanalytics) window.ldanalytics = [];
window.ldanalytics.push(function(a) {
a.toggleTracking(true, false);
});
More information here: http://docs.leadoo.io/docs/analytics-tracking#custom-consent-handling
And here’s which category each cookie falls into: https://leadoo.com/help/does-leadoo-use-cookies/. But as mentioned, with the way above, they load correctly depending on cookie acceptance.
Leadoo Website Analytics is automatically added to all existing Leadoo subscriptions and it doesn’t cost anything. You can find it from the navigation by clicking “Conversion Insights”.
To view your Leadoo Website Analytics…
1. Log into your Leadoo account (free for all existing customers)
2. Make sure to copy the Leadoo dynamic script to your website header if you haven’t already done so
3. Dive into your website analytics!
If you can’t find Leadoo Website Analytics on your Leadoo account, please contact your Customer Success Manager at Leadoo at [email protected] or [email protected]
New Release: Leadoo Website Analytics: https://leadoo.com/blog/new-release-leadoo-website-analytics/
Custom consent handling: https://docs.leadoo.io/docs/analytics-tracking#custom-consent-handling
If you are currently using our livechat application and have noticed that the sound notifications are not working properly, we would like to clarify that this is not an issue with our application. Instead, it appears to be a browser-related problem.
To resolve this issue, we recommend following the instructions provided on thetroubleshooting sound issues in Chrome for Chromebook, Mac, Windows, and Ubuntu users. By following the steps outlined in the article, you can attempt to resolve the sound issue on your browser and ensure that you receive sound notifications for our livechat application.
1. Launch Chrome
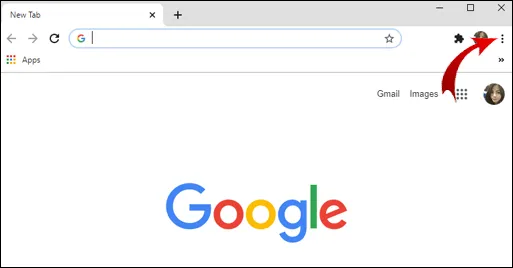
2. Click on the three dots (or three horizontal lines) in the upper right-hand corner of the browser.
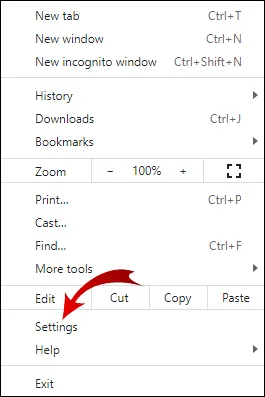
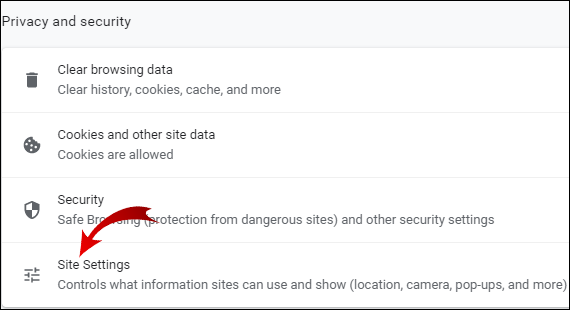
3. Go to the Settings
4. Now, under the Privacy and security tab, click on Site settings.
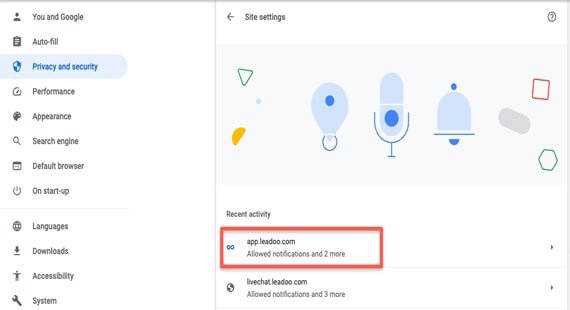
5. Find app.leadoo.com
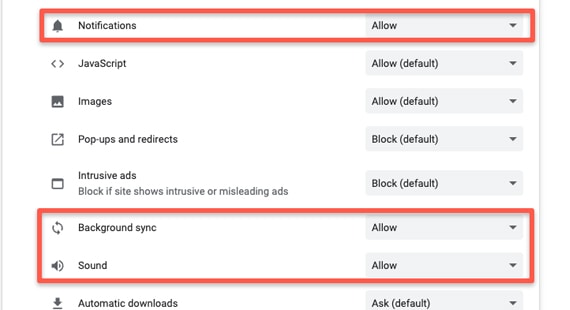
6. Find “Notifications”, “Sound” and “Background sync”. Then set all of them to “Allow”
1. Open Firefox
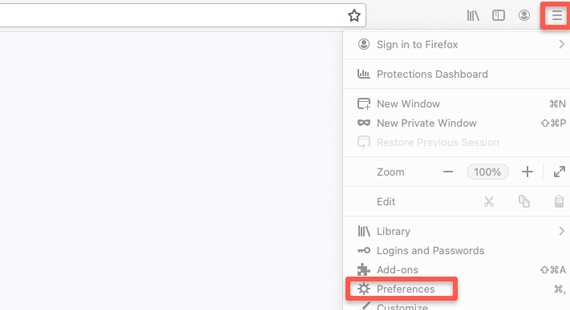
2. Select settings -> Privacy & Security
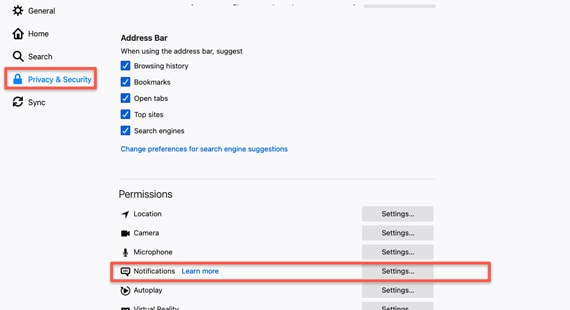
3. Search for App.leadoo.com and allow notifications

You can change your Bot Icon and Bot nickname from individual bots settings.
Navigate to the bot you want to change the icon.
When you’re in the Conversion Kit and have found the bot you want to edit click Actions and select Settings
*You can use the search field to find specific bot by searching either the bot name or the bot id found on the embedding code

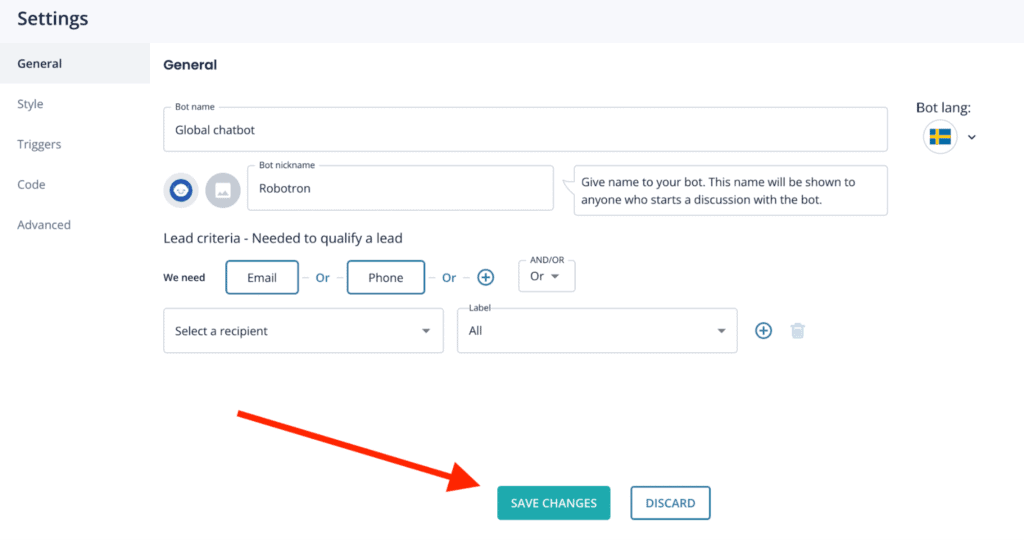
On the General tab you can see Bot Icon and Bot nickname next to each other.

You can use predefined bot icons or upload a photo from your files to use as your bot icon. Make sure that the photo you upload is a square (ie. 200px x 200px) and that the photo is .png .jpg. or .jpeg
You can also give the bot a nickname that will be visible on chatbots header. This name will be shown to anyone who starts a discussion with the bot.
Make sure to save any changes you make.
If you have any issues or need help you can contact [email protected]
Leadoo is fully integrated to Google Tag Manager, meaning that custom events can be triggered for every interaction any visitor does with Leadoo chatbots. Here’s how to implement Google Tag Manager to work with Leadoo.
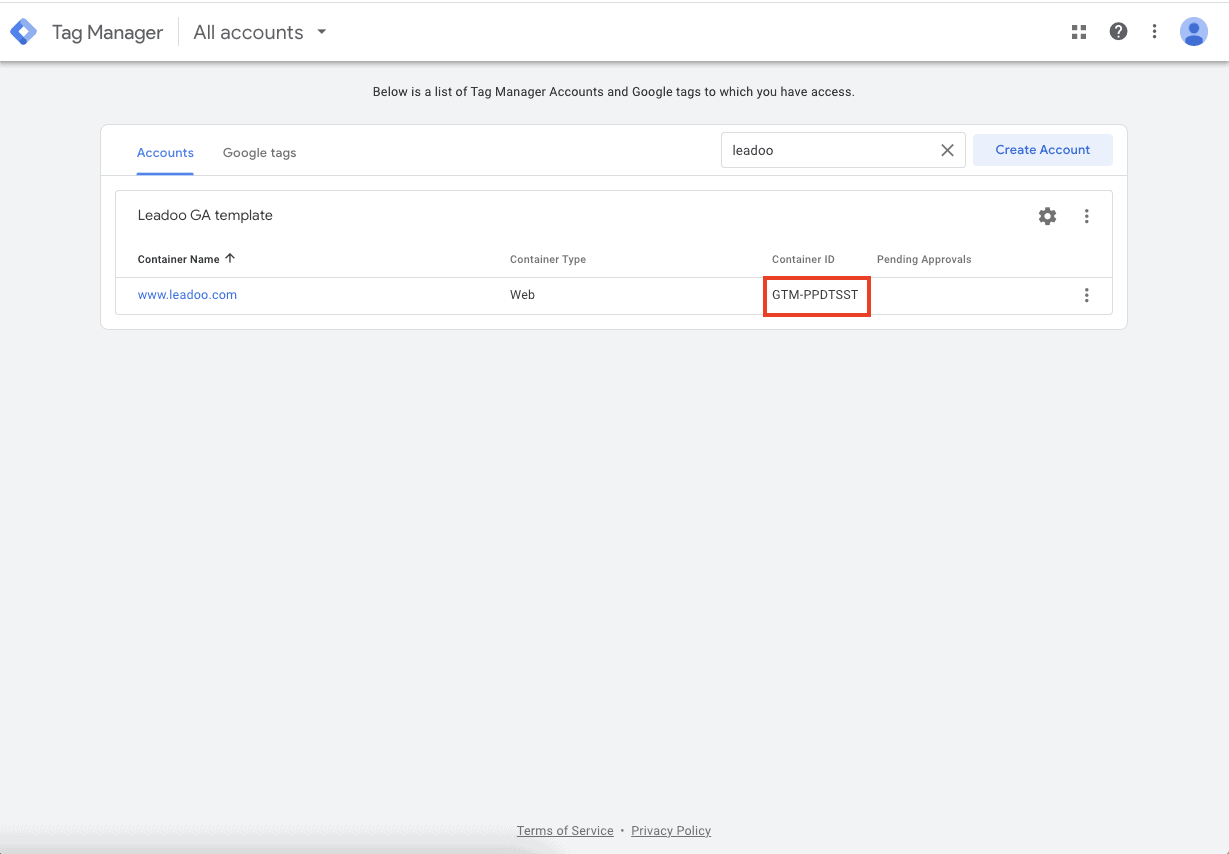
You can find your GTM container ID after logging in to Tag Manager. Copy your GTM container ID.
After that log in to app.leadoo.com/sign-in
Go to Conversion Kit -> General bot settings -> Advanced
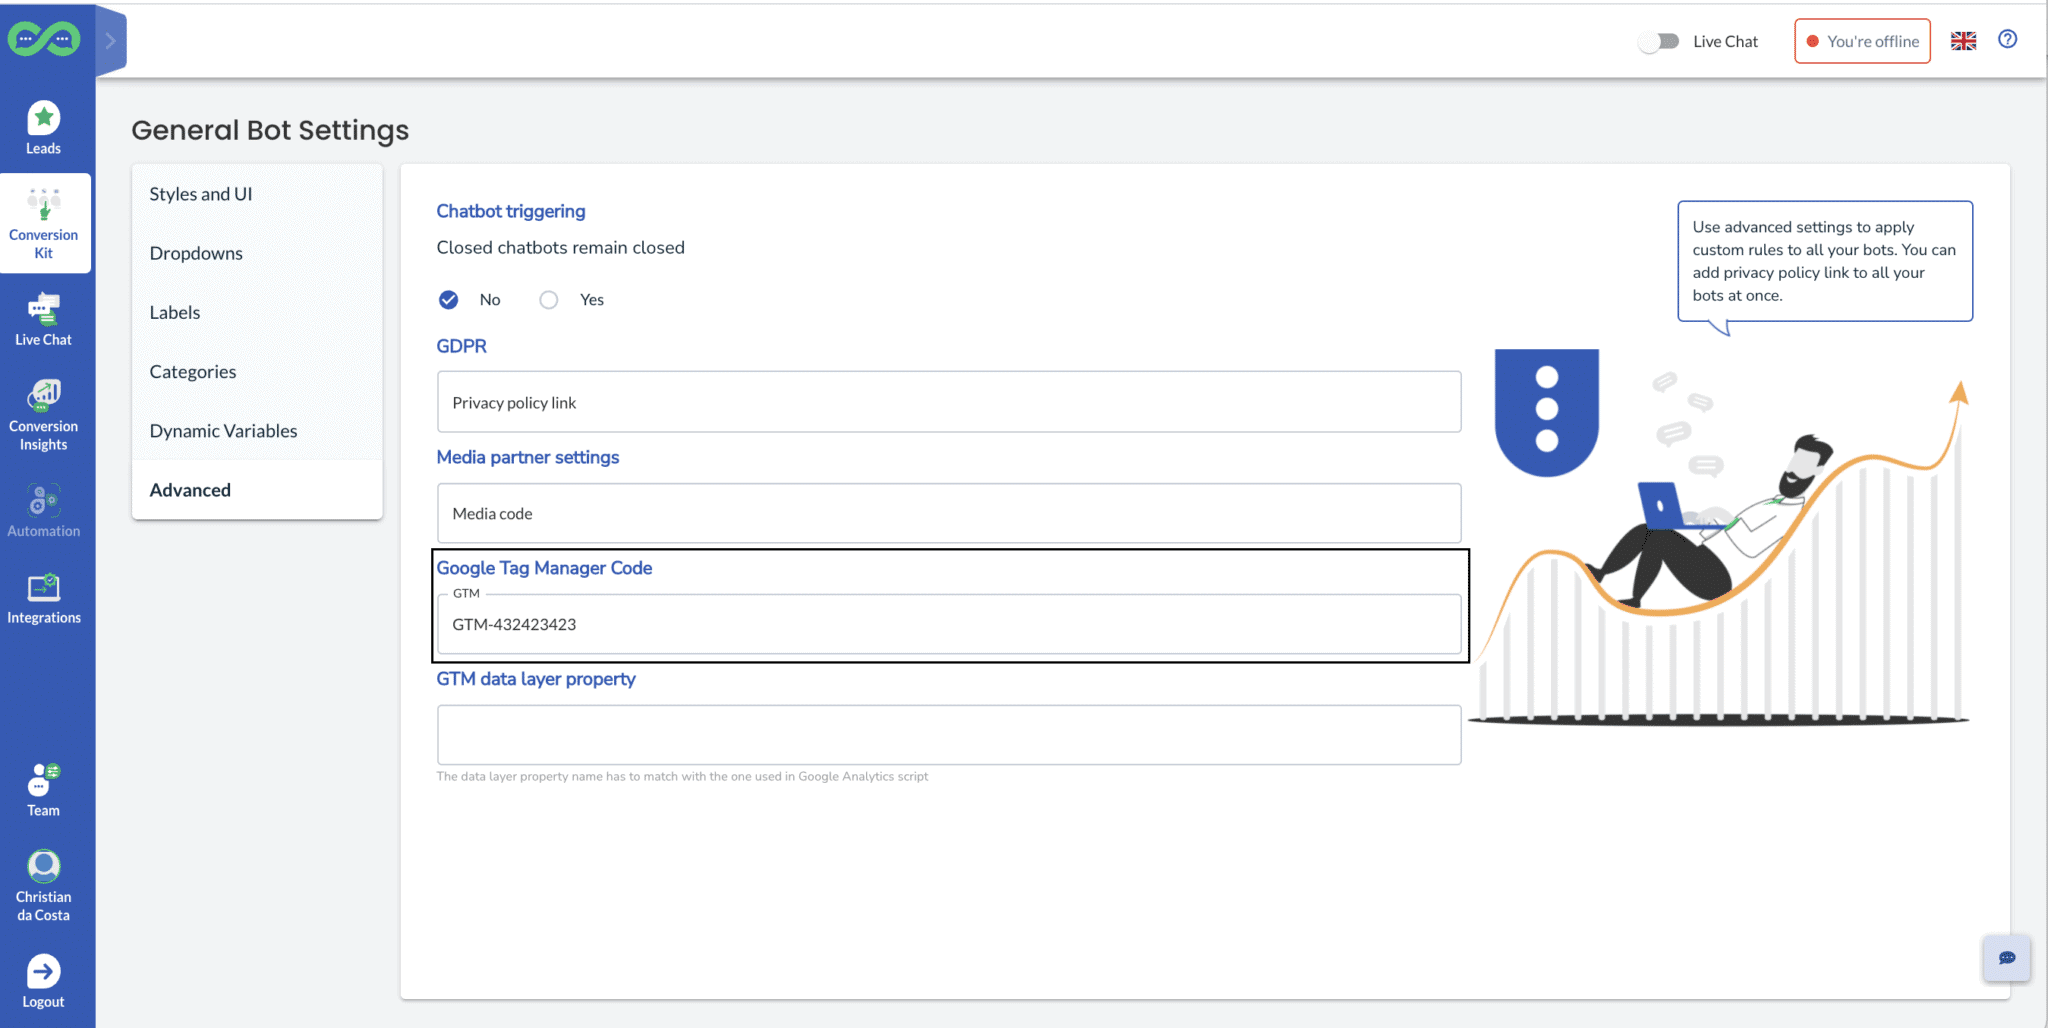
Add your GTM container ID to the Google Tag Manager Code field
*In most cases you can leave GTM data layer property field empty.
After this has been set your bots will start sending events.
Click Admin
On the right hand side open Import Container
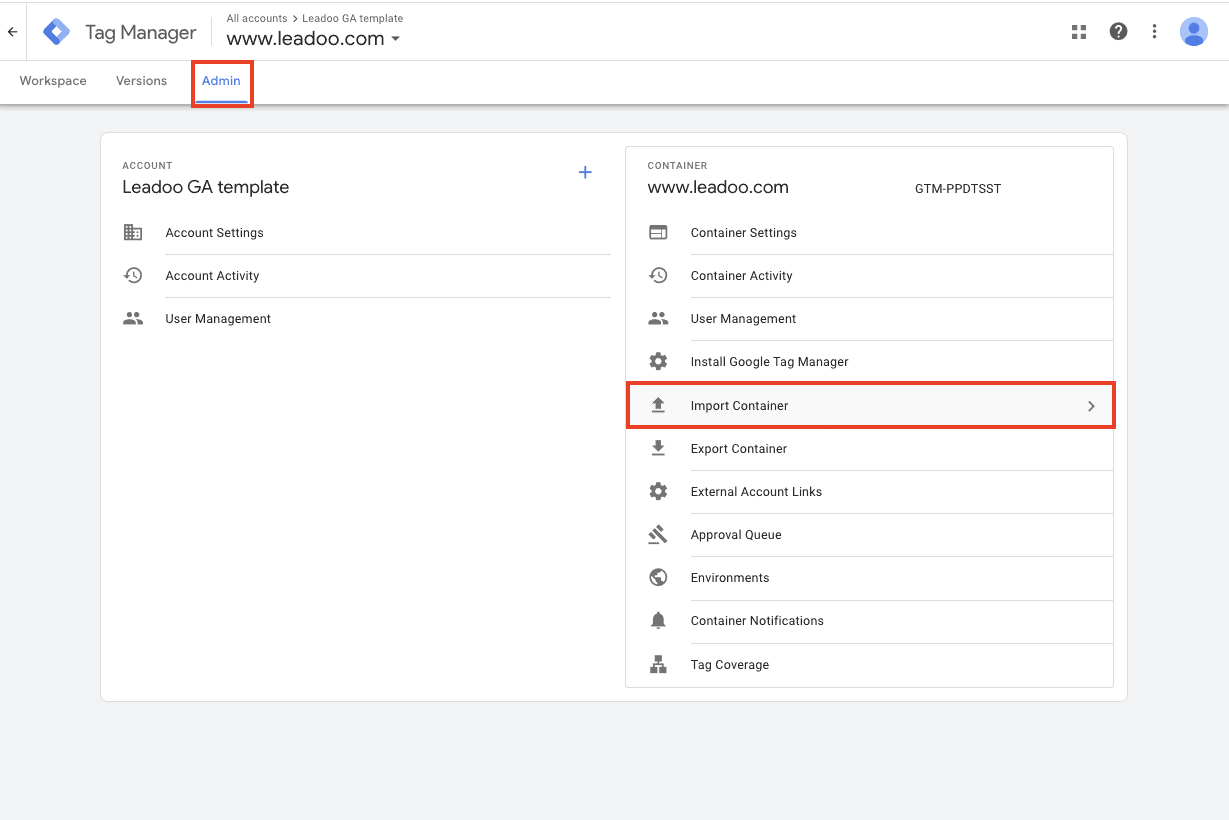
You can download the correct file from here.
Click Choose container file
Add Leadoo-FB-Qualified-lead-conversion.json file
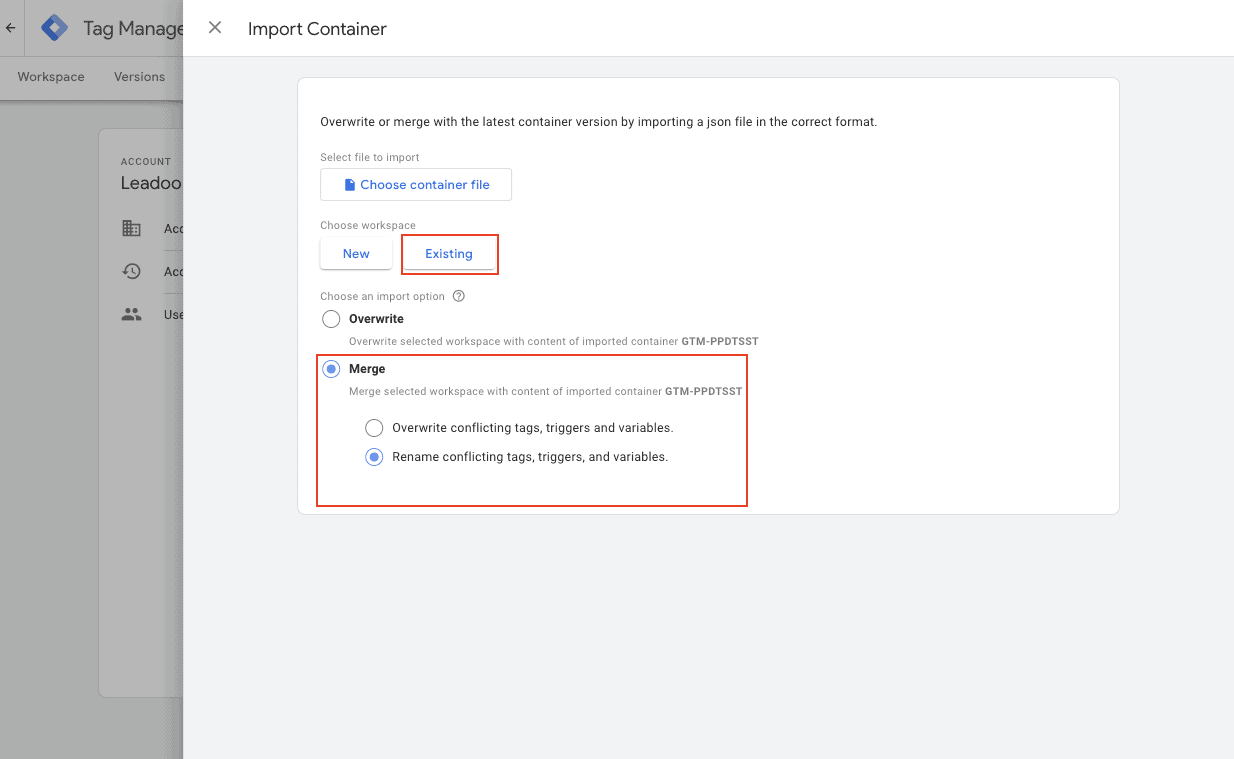
Choose existing workplace
After this choose an import option. You can merge conflicting tags, triggers and variables
Submit new tags, triggers, variables and templates
Publish changes.
You’ve now connected Leadoo to your Meta Ads Manager
*Make sure you’ve connected your GTM and your Meta Ads Manager with Facebook pixel (https://www.facebook.com/business/help/1021909254506499)
Advanced users
More advanced Google Tag Manager users can also leverage the information sent over on the data layer. The following details can be used to create custom variables
category <- Bot type (embed, chat, cta, modal)
bot_category <- For each bot you can set a bot category on the Leadoo backend, this allows you to create for example separate analytics for sales and recruitment bots
label <- For each multi select answer you can create custom labels. These can be for example interest type of the customer
text <- Info of what text was written on the bot.
bot_name <- Name of the bot
bot_nickname <- Name given on bot settings
You can use these data layer variables to create more accurate retargeting groups and lookalike audiences
If you need any help setting up the integration you can contact [email protected]
Leadoo is fully integrated to Google Tag Manager, meaning that custom events can be triggered for every interaction any visitor does with Leadoo chatbots. Here’s how to implement Google Tag Manager to work with Leadoo.
You can find your GTM container ID after logging in to Tag Manager. Copy your GTM container ID.
After that log in to app.leadoo.com/sign-in
Go to Conversion Kit -> General bot settings -> Advanced
Add your GTM container ID to the Google Tag Manager Code field
*In most cases you can leave GTM data layer property field empty.
After this has been set your bots will start sending events.
Click Admin
On the right hand side open Import Container
You can download the correct file from here.
Click Choose container file
Add Leadoo-GA-GTM-Template.json file
Choose existing workplace
After this choose an import option. You can merge conflicting tags, triggers and variables
Submit new tags, triggers, variables and templates
Go to Tags -> Add your Universal Analytics variable to the tags you’ve just created -> publish changes
You’ve now connected Leadoo to your Google Universal Analytics
If you need any help setting up the integration you can contact [email protected]