

Leadoo AI Support:
Introduction to Leadoo AI’s In-App Integration Builder
Our integration builder is designed to empower your team to seamlessly sync Leadoo AI data with your third-party systems without writing a single line of code.
By automating the flow of information from lead conversion to system action, you can focus on what matters most: growing your business. This guide will walk you through the core concepts of mapping data and managing authentications so you can get up and running with confidence.
1. Connecting Your Accounts
Most connections use a secure ‘one-time login’ process. This means you log in safely once, and Leadoo AI can then work in the background without needing you to sign in every time.
Once you have authenticated using your CRM login details the integration can:
- Create and update destination records (such as contacts, leads, or deals)—provided the authenticating user account possesses permission levels matching or exceeding the create/modify actions configured in the builder.
- Read metadata (such as objects and fields) from your system
- Access your system offline (without needing to log in and reauthenticate again)

After authenticating, some connectors will automatically fetch your software’s configuration and update the data mapping view to include any custom fields you have set up.
To begin the authentication process, simply locate your installed Connector within the Integration Builder and click Authenticate Now. A guided pop-up will lead you through the login and consent screens. Once you are redirected back to the Integration Builder, your connection is live and ready for the next step: defining your logic.
2. Choosing Triggers and Methods
The first step in setting up your integration is choosing a Trigger and a Method.
Think of the Trigger as the starting signal, it’s the event that kicks off the process. The right trigger depends on when you want your automation to run. Usually, this will be something like New Lead or New Company Profile.
The Method is the specific action you want to take next. Most methods have clear, easy-to-understand names, like Create Contact.
To create a simple connection—for example, automatically adding a new Leadoo lead into Salesforce, your setup would look like this:
New Lead => Create Lead
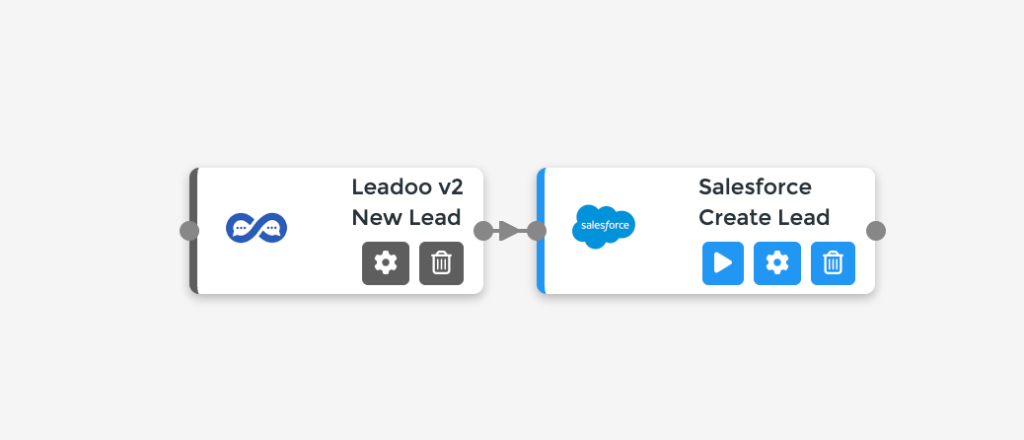
Sometimes, it is preferable to first query your system to avoid creating a duplicate of an already existing record. For Salesforce, the integration would look like this:
New Lead => Get Leads by Email => Create Lead
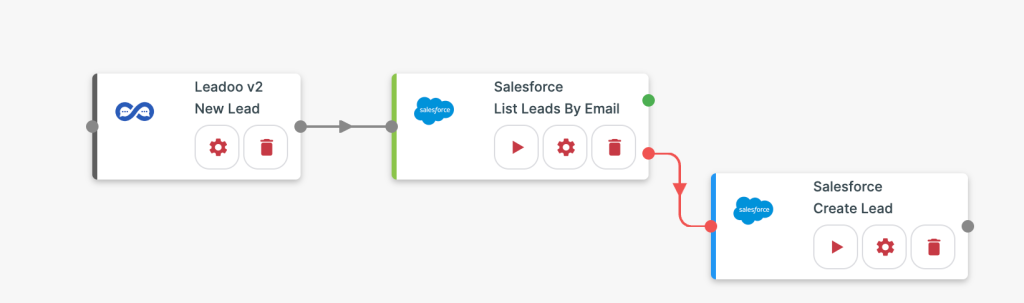
3. Mapping Data to Object Fields
Once your trigger is set, you need to tell the methods (e.g. Create Lead) where the lead data should go in your end system.
In the ‘Data Mapping’ view, you’ll need to match each data field from Leadoo to the correct field in your software.
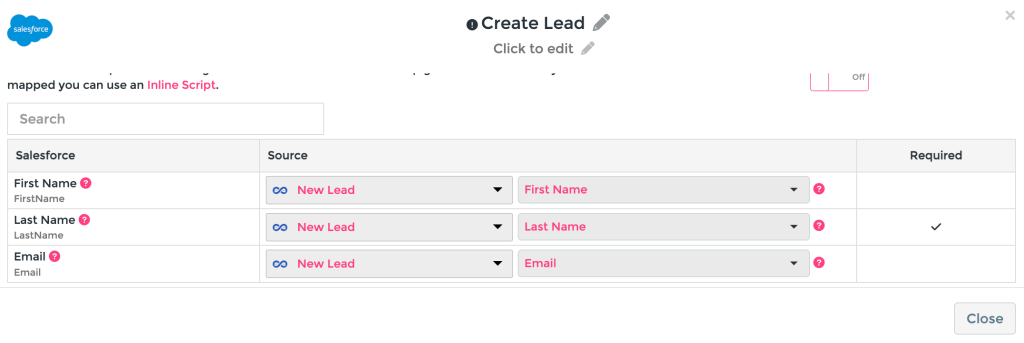
4. Understanding Leadoo’s Source Fields
You can find all the fields on Leadoo’s Lead Object {here}. The Lead’s fields fall into a few types: input from the end user’s interaction with the bot, analytics data, labels, and variable information. I’ll go over some examples below, including environment-dependent fields. Labels and variables will not be present unless you’ve added them.
| Field Name | Generated by | Type |
| End user | Contact detail | |
| First Name | End user | Contact detail |
| Last Name | End user | Contact detail |
| Phone | End user | Contact detail |
| First Touch Source | Leadoo Analytics | System value |
| Last Touch Source | Leadoo Analytics | System value |
| Budget | You (configured manually | Variable, string or number |
| Area of Interest | You (configured manually) | Label, enum/dropdown |
While standard contact fields are straightforward, you can further enhance your integration by utilising Labels (tags) and Variables (var) for more granular control. Here is how they work:
Labels (like “Area of Interest”) act as a bridge. They have two parts: the label your users see (the “display value”) and a hidden code version that your system understands (the “integration value”). This hidden value is what we send to your CRM. Just make sure every label has a valid, recognisable value.
******Leadoo bot labels (such as “Area of Interest”) map frontend choices to downstream CRM properties:
- Display Value: The user-facing text visible inside the bot conversation.
- Integration Value: The underlying value passed in the lead payload (tag_ fields) to your destination CRM.
- Validation Rule: Every active label must contain a valid integration value matching your CRM picklist options to prevent payload validation failures.
To understand more about labels, refer to this article: https://leadoo.com/blog/documentation/leadoo-labels-how-and-why-to-use-them/
Navigate to labels in the app here: https://app.leadoo.com/conversion-kit/settings/labels
Variables are flexible containers that hold whatever data you assign to them. Before you use a variable, just double-check that the data type in Leadoo (like a number or text) matches the field type in your CRM. If they don’t match, the data might not transfer correctly.
Learn more about using variables in this article:
💡 Pro-Tip for Data Integrity
Before you finalise your mapping, always double-check that the field types in your CRM match the source types in Leadoo. For instance, ensuring a “Number” variable in Leadoo is mapped to a “Numeric” field in your CRM (rather than a String) is crucial for maintaining data integrity and preventing integration errors.
In the Integration Builder, you can easily identify these elements: Labels are prefixed with “tag” and Variables with “var,” making it simple to build a robust, guided data flow for your business.
Read Next:
Setting up an integration using templates: https://leadoo.com/blog/documentation/setting-up-an-integration-to-crm-using-templates/
Read Next: https://leadoo.com/blog/documentation/setting-up-an-integration-to-crm-using-templates/
Integration Troubleshooting Guide – TBC