If youβre new to Leadoo AI jump over to this article to give you an overview of what it is and how you can use it in your Leadoo bots βΒ Leadoo AI Overview: Understanding its Features and Integrating with Your Bots
If youβre looking for a step-by-step guide on how to use AI in your Leadoo bots, this is the place to start!
A knowledge base is Leadoo AIβs library of all the information it needs to know to answer your customer queries. This is where you train the AI on all the content and information you think will be most relevant.
You can train the AI using a combination of URLs and documents, and the AI can scan and train on your content in just a few minutes, making setup quick and easy!
Think of your knowledge bases as organised βbucketsβ of information. If everything is thrown together, it can be tricky for the AI to find the most relevant answers, which can reduce response accuracy. Thatβs why Leadoo AI gives you the option to create multiple knowledge bases and use them all within one AI node for more precise results.
For instance, if you run an e-commerce business, you might set up separate knowledge bases for βProduct Details,β βShipping & Delivery,β βReturns & Exchanges,β and βAccount Help.β This way, customers get responses tailored to their specific needsβwhether theyβre looking for product specs, order tracking, or account support.
By giving each knowledge base a clear title and description, you make it easy for the AI to understand what information resides in each βbucket.β With this guidance, the AI can quickly search the right knowledge base and deliver accurate, relevant answers to your customers.
1.Β Navigate to AIΒ in the left-hand menu, then clickΒ Create an AI knowledge baseΒ in the top-right corner.

2. Provide a name and description for your knowledge base. If you have multiple knowledge bases, including a clear description is important. Leadoo AI first reviews the descriptions of each knowledge base to determine which one to use to find the answer to the userβs question. After that, it examines the content of the selected knowledge base.
For example, on our knowledge base about embedding, this is the description that accompanies it:
This knowledge base contains information about how to embed Leadooβs bots. This includes adding chatbot, CTAbot, InpageBot and VisualBot to websites.

3.Β Choose automatic rescanningΒ frequency. If your website is regularly updated, itβs best practice to enable automatic rescanning to keep the AIβs knowledge fresh.

You can add multiple data sources:
Document Scanning: Useful for content stored outside public web pages, such as PDFs or spreadsheets with product details or FAQs.
Domain Scanning: Automatically search your website by including/excluding specific keywords. This method focuses on relevant content rather than scanning the entire site.
For example, to build a knowledge base on βLeadoo Insights,β set up the search using rules the rules below.

1. Select domain as the source type
2. Add your website URL: https://leadoo.com
3. Include rules: *insights*
The asterisk (*) acts as a wildcard in this case, allowing the crawler to search all URLs on leadoo.com that contain the word βinsightsβ anywhere in the URL, regardless of what comes before or after it. If we only used *insights, the crawler would not include any URLs that had any other text after the word βinsights.β
You can add multiple include or exclude rules by clicking on the plus button. This works as an OR condition e.g. scan all pages that include insights or conversion.
4. Select the maximum number of pages you want to scan.
5. Click Scan webpages. After a few minutes, you should see pages populating in the AI knowledge base section below.
Page Scanning: Manually add specific URLs by selecting the βPageβ data source.
Text scanning: Manually input text for AI training.
As your data is scanned, sources will show statuses such asΒ Scanning, Ready to Train, or Trained.

Once trained you can review the content by clicking the status label, which will display the information that has been captured.
If, for any reason, youβre unhappy with the content that the Knowledge Base has scanned and trained you can edit this directly. Simply click on the pencil icon before the page, document etc.Β This will allow you to make any changes without the need for recanning and training content.

Your knowledge base is now ready to use within your Leadoo bot! Remember you can add and remove sources from a knowledge base at any time.
1. Ensure youβve adjusted the number of pages to scan

2. Ensure You Have a Public Sitemap
Domain scanning requires your website to have a public sitemap, which is also essential for SEO. To check if you have one, visit: https://[YOUR WEBSITE URL]/robots.txt. If this doesnβt work then contact your website developers for more information.
You should see something like this:

Try rescanning the source. Click the rescan icon on the right-hand side or, tick the box on the left-hand side of the source and clickΒ Sync Selected.

Occasionally, Leadoo AI may not capture all the content from your sources. This can occur due to certain webpage elements optimised for page speed or user experience that are incompatible with AI crawlers. These issues can also inadvertently affect your SEO. Understanding these problematic elements can help ensure that essential content remains accessible to the AI.
Elements That Can Cause Problems:
If you need help building your knowledge base, reach out to your Customer Success Manager or our support team atΒ [email protected].
If youβve already built your knowledge base itβs now time to create your prompt. If you havenβt built your knowledge base yet, refer to these articles first:
Creating the perfect AI chat experience starts with crafting the right prompts. A well-structured prompt can ensure that your AI chatbot delivers accurate, helpful responses that move visitors closer to conversion.
In this article, weβll cover tips for writing an effective AI system prompt to work in conjunction with the other AI elements including the Knowledge Base, Dynamic Suggestions, Static CTAs, and Custom Intent mapping which we cover in other articles which you can find at the bottom of the page.
If youβre familiar with interacting with an AI chat, a prompt is a question or input that you provide the AI chatbot to get a helpful, relevant response. Whether itβs answering queries about products, guiding users through services, or offering solutions quickly, the prompt sets the conversation in motion.
A system prompt is essentially the brain behind your chatbotβs responses. It defines the rules and guidelines for how the AI should interact with users, ensuring the conversation flows in line with your business goals. This includes the chatbotβs tone of voice, the format of responses, and specific ways to handle frequent queries. By shaping the AIβs behaviour, a thoughtful system prompt can turn a casual conversation into a meaningful engagement that pushes visitors toward action.
Not sure where to start? Use our system prompt template to get started: AI Prompt Template
The ideal length of a prompt is 2k characters with a maximum limit of 4k characters, utilise your doc editorβs word count tool to keep an eye on this.
Weβd also recommend keeping a master copy of your prompt on a document so you can easily review, edit and update the prompt within the Leadoo visual bot builder.
You can also build or optimise your prompt with our own GPT here: https://chatgpt.com/g/g-06v43eDwH-prompt-designer
Adding AI to your chatbot is a powerful way to improve user interactions, but it shouldnβt be your only tool for driving conversions. While an AI chat can help answer questions and guide users, it works best as part of a larger strategy to enhance user experience (UX), push people down the funnel, and ultimately convert them.
Your AI chat should complement other features in your botβsuch as automated flows and clear call-to-actions (CTAs). AI chat is particularly useful for handling unstructured or complex queries, but for predictable journeys or key conversion points, a more structured flow might be more effective. By combining the strengths of AI and other engagement tools, you can create a seamless user journey that addresses a wide range of customer needs and nudges them closer to conversion.
AI chat isnβt meant to replace your current strategies, but rather to enhance themβgiving your visitors instant, relevant information while your other tools keep them on track toward taking action.
To add AI to your bot, open it in the editor and add the AI node to your workspace in the same way you would any other node.
Donβt see the AI node available? Youβll only see this option if you have AI included in your Leadoo subscription. Reach out to your Customer Success Manager to find out how to upgrade.

Write an introductory message in the question area.
Select the Knowledge Base(s)
To ensure your website visitors receive the most accurate and relevant responses, we recommend two best practices:
Use knowledge bases at different points in the customer journey to answer questions about specific products or services, and/or
Select multiple knowledge bases for the AI to search across when retrieving information.
By using multiple, targeted knowledge bases with clear names and descriptions, you give Leadoo AI the best possible chance of delivering the right information every time. For more on setting up a knowledge base, plus our top tips, check out this article: Leadoo AI: What is a Knowledge Base and How to Build One | Leadoo β Conversion Platform
Copy and paste your system prompt
Youβll also be able to add some initial suggestions for visitors to ask the bot along with 1 or more static CTA buttons so they donβt get lost in a never-ending AI conversation!
More on that in this article β Leadoo AI: What are Initial and Dynamic Suggestions?
Test your bot!
Use the preview button at the top of the builder to see if the AI is responding in the way you want it to.
Testing is key to fine-tuning your AI chat. Use the preview button in the builder, and stress-test the bot with a wide range of potential questions. For example, a stress test might reveal that the AI struggles to handle complex product queries or misses key FAQs. By getting colleagues involved, you can spot gaps, refine your system prompt, and ensure a consistent user experience.
Fine-tuning your AI chatbotβs system prompt can transform your website interactions and lead to higher conversion rates. If you have any questions or need assistance in setting up or optimising your system prompt, donβt hesitate to reach out to your Customer Success Manager or our Support Team at [email protected] βweβre here to help you succeed!
In this guide, weβll walk you through the Leadoo AI dashboard, helping you navigate the essential features of the platform with ease.
To start, hereβs a short video on what youβll find on the dashboard homepage:
Letβs dive into the details!
The dashboard menu provides quick access to all the main tools and insights. Hereβs what each section offers:
Youβll receive an email notification each time a lead is captured, and if youβve integrated with your CRM, a new contact will be created there as well. All leads are stored in this section, where you can view full conversation details and apply filters to locate specific leads.
This is where you can find and build all your bots, including:
Find key analytics in pre-built dashboards, covering the following:
Bot Triggers
Bot triggers are similar to impressions or page viewsβthis figure represents how often a bot was displayed to website visitors.
Bot Discussions
Consider these engagements. Every time a visitor starts an interaction with a bot, itβs counted as a discussion.
Leads Per Day
This figure is based on the lead criteria set within your bots. For instance, if youβve set it to require a name and email, a lead is counted once both fields are captured.
Identified Companies
This is based on data captured by the Company Identification tool, which identifies companies that have visited your site. Learn more about it here.
User Intent Identified
This metric shows the number of visitors who have engaged with a bot but have not yet convertedβthese are your potential future conversions!
You can adjust the date range on the right-hand side to view these metrics over different periods.
There are two options to enable Leadooβs tracking:
In the dashboard, youβll find a snapshot of referral sources for your Leadoo AI conversions, along with an aggregated view of the customer journey. Delve deeper by filtering data by campaign, URL, or company details such as industry and location. This data is available under Source Insights, included with our Engage & Elite packages, or as an add-on with other subscriptions.
For more on Source Insights, see the below video:
At the bottom of the dashboard, youβll find a snapshot of companies identified as having visited your site, highlighting key companies that havenβt yet converted. Company Identification is available to all users and provides access to a targeted list of engaged prospects, complete with extensive filters so you can refine your visitor insights.
Learn more about Company Identification here.
Ready for more? Find more videos and guides in our Knowledge Base.
The Visual Bot Builder is your all-in-one workspace for building Chatbots, InpageBots, and VisualBots. Using drag-and-drop features, along with convenient keyboard shortcuts and quick tools, you can effortlessly create and customise decision trees to guide user interactions.
In this article, weβll walk you through the essentials of building your first bot, so youβll have a solid foundation to get started. For a breakdown of each node type, check out our guide here.
Watch Senior Technical Account Manager Gavin and Onboarding Development Manager Helen share expert insights in the on-demand webinar below, or continue reading for a step-by-step guide.
For quick tips and time-saving shortcuts in bot editing, simply watch the video below:
Select Your Bot Type
Decide if you want to build a Chatbot, InpageBot, or VisualBot. Navigate to Conversion Kit > InpageBot/Chatbot or VisualBot on the left-hand menu.
Build Your Bot
Click + Build new bot > Build from scratch to access a blank workspace. Start by naming your bot.


If you’re using a laptop you can use your usual trackpad gestures to move around and zoom in and out. If you are using a keyboard & mouse here are two essential shortcuts you need to know about.
There are a few methods to add nodes:
1. Drag & Drop
Simply drag a node from the menu on the left into your workspace.

2. Quick-Add
Click and hold the circle on the right of any node, drag it to an open space, and release to open a node menu. Choose the desired node type, which will connect automatically to the starting node.

1. Get Inspiration
Start by exploring pre-built bots for ideas. Check out the Tips & Tricks video above to learn how to copy+paste nodes from one bot to another or even duplicate entire bots.
2. Plan Your Conversation Flow
Use the Bot Says node for introductions, and connect it to a Single Choice node to guide users. Offer varied options to serve different user needs. For example:

3. Avoid Dead Ends
Always provide multiple choices and avoid abrupt stops. If asking, βAre you ready to book a demo?β provide options like βYes, Iβd like to book a demoβ and βNot yet, tell me more about Leadoo Insights.β Including an Ask a question option also encourages customers to reach out.
4. Add Value
Design conversations that go beyond your websiteβs content. Make information easier to find or offer downloadable resources in exchange for contact details.
Leadoo offers flexible options for capturing visitor details. Start with essential fields, like Name and Email, to secure key information without overwhelming visitors. For more qualified leads, gradually collect additional data by splitting questions across nodes. This keeps the experience smooth and prevents form fatigue, helping you gather necessary information while maintaining visitor engagement.
Consider collecting only whatβs essential to follow up, creating a frictionless path for conversions and improving the overall lead experience.


Leadoo bots donβt autosave, so remember to save manually by clicking Save at the top of the page. Exiting without saving will trigger a reminder pop-up.

For further settings and embedding instructions, check out Bot Settings, Bot Styles and Embedding Bots.

When we launched Leadoo AI, we wanted customers to be able to leverage the power of AI to drive conversions, and make their websites more conversational to visitors worldwide.
Since then, weβve been optimising Leadoo AI to make it even more powerful. Weβve added support to new LLM models (Claude 3.5 and GPT4o) to improve answer accuracy; improved the Knowledge Base system to allow direct content editing and multi-knowledge base support; and improved lookups to products and website URLs.
Changes like these have upgraded Leadoo AI over time. To the point where it has become a touchpoint in up to 90% of website leads for some customers.

Now though, weβre launching two major updates to Leadoo AI. Introducing Custom Intent Fields and Real-time API calls. All Leadoo AI users can benefit from these, but eCommerce customers should be particularly interested – as weβll lay out here.
Any website selling products can be supercharged by our new API calls within Leadoo AI. Because it syncs in real-time with your eCommerce platform, to display relevant and available products to users.
Layered with our existing AI capabilities, this creates a powerful combination. Where our conversational tools not only make recommendations based on user requests and preferences, but also display those recommendations visually within the bots.

As shown here, the API connection enables a phone seller to sync with their Shopify store, and display only available phones within the users designated budget of β¬900.
When displaying multiple options this takes a carousal format as shown. Where users can cycle through relevant product recommendations, which can include:
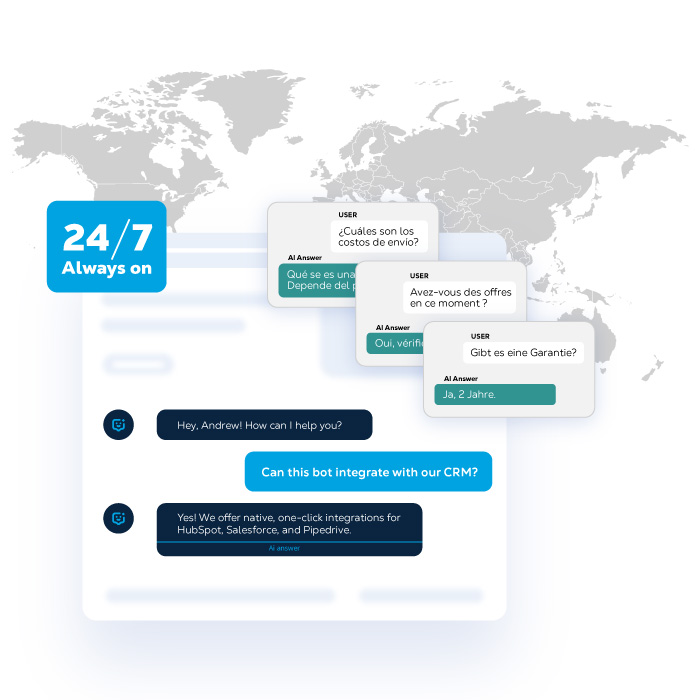
Think of an in-store customer assistant. Except faster and able to operate 24/7 on your digital storefront. As itβs Leadoo AI, it also speaks 40+ languages, so can serve customers all over the world!

Setting up these API connections can all be done within the Leadoo platform, and our Conversion Experts are on hand to make that happen for you. We can connect to any eCom platform with a Rest API, but have tested integrations ready to deploy for:

Custom Intent Fields are our way of detecting user intent, and directing the conversation to certain pathways based on that intent.
This can be done by tweaking the prompts of your Leadoo AI bots manually. However, prompt testing is time consuming, and can result in long and complicated prompts trying to cover every eventuality.
So instead of having to type βIf user asks about X, direct them to Yβ into your Leadoo AI prompts, you can now use Custom Intent Fields.

In our phone example, a user naturally might need help finding the right model for them. Any number of factors could go into this. Brand preference, budget, camera requirements, battery life, etc, etc.
So we create a Custom Intent called βPhone Recommendationsβ. This will kick in if the AI determines that our guidance of βTry to recognise user intent for purchasing or looking for information about phones. To give recommendations, we need to ask for budget and brand preferencesβ has been met.
To help it recognise this, we enable you to give βExample Utterancesβ to follow – like βi need a new phoneβ ; βmy phone brokeβ ; or βi can spend up toβ. If a user says something along these lines, our Custom Intent will kick in.
Within this Custom Intent, you can also specify what information should be collected by the AI. For example, to give recommendations it will be essential to know the userβs budget. So we create a mandatory βMeta Fieldβ of what info is required for the Custom Intent pathway to continue.
This could be anything from whether or not they are an existing customer; to how much they want to spend; to if they have a favourite brand. Meta Fields can be mandatory or non-mandatory. Often they will be helpful, but not essential for the AI to make a suggestion. For example, what colour a customer is looking for.
Once youβve set your Example Utterances and Meta Fields, your Custom Intent is ready to be applied to any Leadoo AI bots, as shown below.

You can add up to 10 Custom Intent Fields. Which will serve as advanced routers within your AI bot setup – e.g. βif user shows intent about X, do Y.β
The end result? More relevant and satisfactory interactions for the user – based on what they actually wanted the bot to show them. As well as less prompting and maintenance needed in the backend of your Leadoo AI.
Better, more relevant UX. Combined with less setup for you. An example of AI truly making everyoneβs lives easier!
With 3.0 bots we’ve updated our bots UI. Here’s how you can edit the new style settings and what you can edit!
Navigate to the bot whose style you want to change. Click either “edit” or “actions” next to the bot, and then select “settings.” After that, go to the “Style” section.
Under style settings, you can choose an existing style or modify the current one. If you modify the current style, you can either update the changes or save it as a new style. The new style will appear in the dropdown menu, and you can apply it.

You can compare the changes node by node and preview them on mobile or desktop. β¨

Style customization:

Advanced settings:
Under Advanced settings, you’ll find more detailed options. These allow you to fine-tune specific elements not covered in the general settings.
The Advanced settings are divided into five different categories:


If you have any issues with your style settings you can contact your Leadoo contact person or [email protected]

Account-Based Marketing (ABM) is a focused business strategy where marketing and sales teams work together to target a specific set of high-value accounts.
This could be because they are geographically important accounts, leaders within their space, or because a company has had success with similar customers in the past. The defining factor of ABM though is specificity β targeting individual businesses based on specific criteria.
This is unlike traditional marketing, which casts a wide net. To continue that analogy, think of a marketer as a fisherman. Often they are simply casting out the biggest possible net to try and catch as many fish (accounts) as possible. ABM though is a fisherman knowing what waters have bigger fish, and using bait (messaging) specifically designed to reel them in.
Accordingly, ABM requires a more targeted approach, with personalised touchpoints.

Desirable Customers:Β Whether itβs because of their size, geography, prestige or use case for your solution β you have ideal customers. In a world where personlisation is increasingly expected, ABM is the most efficient way to ensure you have a chance of bringing them on board. And more like them in future.
Increased ROI:Β By focusing resources on high-value accounts, companies can often achieve better returns than traditional marketing. For example, in a PPC context, it is undoubtedly cheaper and more effective to run re-marketing adverts to visitors who viewed a webpage about Software Recruitment, than it is to run adverts to an audience interested in either Software & Recruitment.
Alignment of Sales and Marketing:Β ABM fosters better communication and collaboration between sales and marketing teams. Because they are working towards a common and well-defined goal (list of accounts).Β It also requires distinct sales and marketing touchpoints to work well.
Streamlined Sales Cycle:Β ABM allows for highly tailored marketing strategies that resonate more effectively with target audiences. Not only does this reflect well on your brand, and start you on good footing with buyers, but ABM has been proven to shorten sales cycles.
ABM begins by identifying key accounts. Generally this would be done by commercial teams through a CRM system. Then, sales and marketing teams ideally work together to create personalised messaging and content that address the specific needs and pain points of each account.

Leadoo AI is uniquely well positioned for ABM strategies, whether it is for New Business teams or Account Growth teams. Thatβs because the key principles of identifying visitors, activating them with bespoke messaging, and measuring their journeys, can all be done through our platform.Β
You have a CRM full of prospects, plus lists of target accounts. Hereβs how you can utilise Leadoo to close those must-win logos:
You need to know how customers are engaging with your brand, and if they show intent about new features or services. With Leadoo you can:
You can make the most of your video content and create dynamic conversation by inserting videos directly into your bots. As the videos are not hosted natively, this won’t negatively impact any page load speeds.
We support embedded videos from YouTube, Vimeo. If you need to embed videos from any other source, contact your Customer Success Manager for support.
How to add an image
1. Open up your bot in the editor
2. Choose the node you want to add it to and open it to edit
3. At the top of the node, you’ll see the option to add an image or video. Click to expand.
3. To add an image, click to open your image library and add the image you wish to use and change the settings as you wish for the location and size.

In VisualBots, you can already easily add images to answers, but you can use the same method above to add images above the answers with a few more options for location and size.

How to add a video
1. Select the video tab
2. Copy and paste the URL of the video from YouTube or Vimeo
3. Select the size, location and start point settings you wish to use


1. Click the share button below the YouTube video you want to use

2. Select the embed option, copy this code and paste it into the Question area of a BotSays, SingleChoice or MultipleChoice node.
3. Highlight your text and convert it to a code block by clicking the icon in the top-right corner of the box. You’ll notice that the text will now be in a grey box with an HTML tag in the corner.
4. Change the width to 100% and the height to auto. This will ensure your video resizes dynamically.

1. Either click “Copy embed code” from the pop-up menu under the 3 dots in your library or, click the embed button at the top of the page.
2. Follow steps 2-4 from the YouTube instructions.
Embedding videos from Wistia is a little trickier than YouTube and Vimeo as you can’t use the embed code produced from the platform but an iframe code as mentioned in their article here – https://support.wistia.com/en/articles/8233354-embedding-and-sharing-media.
1. Find the code for your video from the link URL which will look something like this: https://wistia.com?wvideo=pj1mryf8bi or https://acmeinc.wistia.com/medias/pj1mryf8bi
2. Use this code and replace the highlighted video ID with yours:
<iframe src="https://acmeinc.wistia.com/medias/pj1mryf8bi?seo=true&videoFoam=false" allow="autoplay; fullscreen" allowtransparency="true" frameborder="0" scrolling="no" class="wistia_embed" name="wistia_embed" msallowfullscreen="" width="100%" height="auto"></iframe>
3. Follow steps 2-4 from the YouTube instructions.
Embedding a video in a visualbot is much the same as adding them to an InpageBot or ChatBot but to ensure the video always scales correctly you need to add some extra information to the code you are using.
1. Copy the URL or video ID of your video from YouTube, Vimeo or Wistia as above so that would be:
– YouTube: https://www.youtube.com/embed/e9lxFPrccfY?si=qW4IYfZPwp4UrQQX
– Vimeo: https://player.vimeo.com/video/812054001?badge=0&autopause=0&player_id=0&app_id=58479
– Wistia: https://acmeinc.wistia.com/medias/pj1mryf8bi?seo=true&videoFoam=false
2. Replace the Video URL in the code below and follow steps 2-4 from the YouTube instructions.
<div class="embed-container" style=" position: relative; padding-bottom: 56.25%; height: 0; overflow: hidden; max-width: 100%; width: 800px;"><iframe src="https://www.youtube.com/embed/e9lxFPrccfY?si=qW4IYfZPwp4UrQQX" frameborder="0" allowfullscreen="" style="position: absolute; top: 0; left: 0; width: 100%; height: 100%; "></iframe></div>
If you need help, please reach out to your Customer Success Manager.
Ever wanted to see Leadoo under the hood? Now you can through a live demo!
Our sales team will walk you through the key features of our platform and how they work. Not just on the front end of a website, but in the back-end the platform itself. You’ll get a look at features including:
βοΈ Conversion Kit: The tools that raise conversion rates and improve UX on websites. Inpage, visual and chatbots that embed organically in websites to make them more conversational, interactive and relevant. While also making Conversion journeys easier and lowering barriers to leads.
π Conversion Insights: The data stored within Leadoo that informs Conversion decisions. What companies have been visiting your site, what do individual conversion journeys look like over their lifetime, and how is traffic from different sources interacting with Conversion tools to ultimately drive sales.
π― Personaliser: How you can combine the Conversion Kit and Conversion Insights to create personalised journeys for different users and audience groups. Therefore making Leadoo and essential part of your ABM strategy, and better serving specific audiences onsite.
π€ Leadoo AI: Leveraging of the power of AI to drive even more leads through our Conversion Kit. How you can use Leadoo’s AI to answer user questions 24/7, in realtime and in different languages.
At Leadoo, we pride ourselves on the service we provide to customers.
If you become one, our team of Conversion Experts will be there to help you integrate, setup and optimize our technology to get you the best results possible.
We know that our platform and our people help customers achieve amazing results. But donβt take our word for it. Read our review profiles for yourself below to see how!


Leadoo builds the bridge between your visitors’ needs and what you offer. This improved onsite customer experience leads to conversion rate increases of up to 74% on average. Check out customers success stories of exactly this here.


[lgxlogoslider id=”110125″]