Pricing Get a demo

In today’s competitive digital landscape, businesses need more than just a website to generate quality leads. They need engaging, interactive, and personalized experiences.

So if you’re looking to improve your lead generation strategy, you’re in the right place. Here we explore best practices for digital lead generation, as well as how you can boost lead generation specifically using Leadoo’s unique solutions.

Understanding Lead Generation: What It Means for Your Business

Lead generation is the process of attracting interest from, or providing value to, people. To the point where they are willing to give you their information.

Once you have their contact information, you have a lead! This process is crucial because it is the first step in turning a website visitor into a potential customer. If you can’t capture their information (first party data), you can’t register their interest, and can’t put them into your sales process.

Inbound vs Outbound Lead Generation

There are several methods for generating leads. These generally fall into two categories: Inbound or Outbound.

Inbound leads literally come in to you. This could for example be someone calling you up or walking into a store to ask questions. But most commonly in the digital age, it means leaving their information via your digital channels. Examples can include:

To drive these kind of actions on a website, marketers use inbound strategies like Content marketing, PPC advertising, and Social Media marketing to generate interest and drive visitors to their website. Hoping they take these desired Conversion actions. And then convert into Inbound leads.

Businesses also use Outbound strategies to generate leads though. Cold email or call outreach, direct mail, or physically approaching people (say at Events) all constitute Outbound lead generation strategies. Wherever a lead comes from, it should ideally be logged in a CRM system so that you can keep track of it, but also evaluate over time how quickly different types of leads develop – and what needs to go into that.

Whether you are generating Inbound or Outbound leads though, the challenge lies in generating quality leads — those who are more likely to ultimate convert into customers.

The Importance of Quality Leads

Not all leads are created equal. While traffic and quantity are important, focusing on quality leads – those who show genuine interest in your offering and are in a position to act on that – is what drives real business growth.

Leadoo’s approach is to enhance the user experience on your website through conversational marketing tools. This achieves two things. Firstly it raises conversion rates – so that more users convert into leads. But crucially it also allows you that pre-qualify leads more effectively and move them down the funnel faster.

As businesses grow and scale, making sure that sales teams aren’t wasting time on non-viable leads becomes increasingly important. Time is money. And the more money you need to make, the less time you have to spend on leads that don’t have a chance of becoming customers.

Leadoo’s Unique Approach to Lead Generation

Leadoo offers a suite of conversational tools, including chatbots, quizzes, and lead magnets that help businesses capture, qualify, and convert leads in a highly engaging way. Here’s how Leadoo sets itself apart from traditional lead generation methods:

Modern Lead Generation Methods:

Step-by-Step Guide to Using Leadoo for Lead Generation

Here’s a practical guide on how to use Leadoo’s tools to enhance your lead generation strategy:

Proven Benefits of Using Leadoo for Lead Generation

Companies using Leadoo’s solutions have reported remarkable improvements in their lead generation efforts. Here are some of the key benefits:

Ready to Transform Your Lead Generation Strategy?

If you’re ready to take your lead generation strategy to the next level, Leadoo is here to help. Our tools are designed to fit seamlessly into your existing marketing stack, providing a better user experience and delivering qualified leads that drive growth.

Try Leadoo Lite today and see how our conversational marketing tools can turn your website into a lead generation machine.

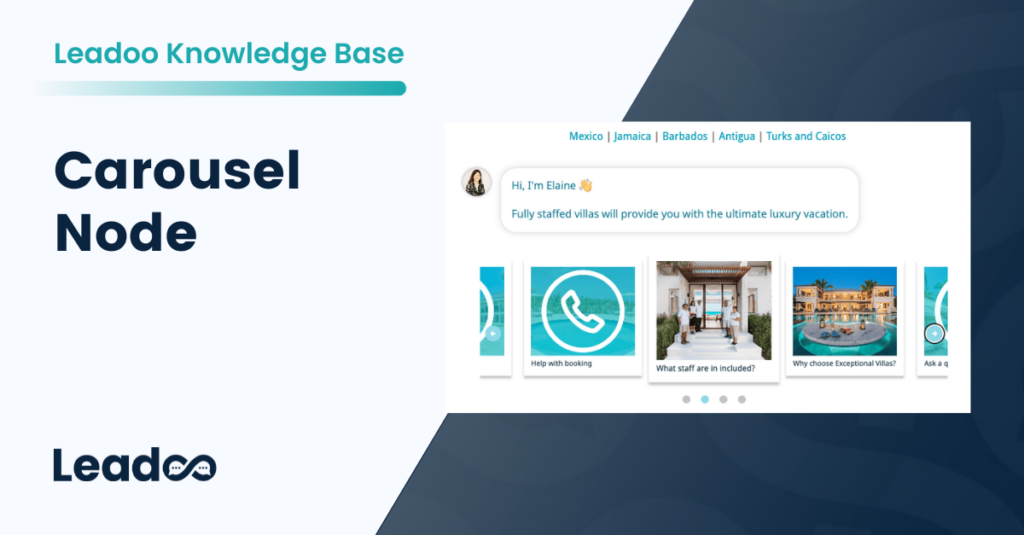
We’ve added a new node for Inpage and Chatbots to help highlight your products and services and also engage visitors better by using all the lovely imagery you’ll have at hand!

Don’t worry if you don’t have the images or even if you would prefer a text based slider type node, there’s a few different variations to choose from:

Text card – This allows you to use a carousel style picker with only text. It’s great for listing services and giving a little more detail about them.

Visual card – The visual excels when you’re trying to convey a product/service with a stunning image. But that’s not all, it can also be used for selecting locations and product selectors where you don’t need as much text.
Product card – With the product card you can add images and lots of product information. Great for listing product features and pricing.

Let’s get building!

Now you know what each type can do, let’s look at how to create your own carousel node. There are a few common options across all nodes, so let’s cover them first.

Question: Similar to a single or multiple choice node, you’ll need to start off with a question.

Single vs multiple choice: Allow users to select more than one option before continuing.

Card template: Choose between text, visual and product cards. You can swap this at any time, however it will remove all your current cards and start with a blank slate.

Number of cards: Choose the number of cards you’d like to display to your visitors.

Exit action: This is an option for users to not select any of the answers and move on. It’s great for adding an ‘I’m not sure’, or ‘Speak to a specialist’ call to action here.

Each textbox will perform in a similar way to the other nodes you’re used to in Leadoo, so you can add a send to URL option, labels and variables etc. Now we’ve covered the basics, we can move on to each card type. Starting with the text card

Building a Text Card Carousel Node

Once you’ve decided on the text card and how many cards you’d like to use, it’s time to add your content. 

You’ll have two text boxes to use. Text #1 would be used as a header and Text #2 would be the subheader. In the example below we’re asking the visitor to choose which service they would like and we’ve used the text boxes to give the name of the feature and a brief description of what it does.

Once you’re happy with the cards you can then choose the next step in the customer’s journey. 

Building a Visual Card Carousel Node

The visual card is very similar to the text card but now we can add some lovely imagery to help support the text. You’ll still have the header and subheader text boxes but you can either upload an image (recommend dimensions are 482x300px) or you can add a URL and it will pull in the image from there, this is a great option if your image is hosted online rather than as a file.

Building a Product Card Carousel Node

Moving on the product card is where things can get a bit more advanced because you have more text options to choose from to help give visitors more information about your product or service. In the example below we’re using the Leadoo pricing options to show you how it works.

Text #1: Great for displaying the product name.

Text #2: This could be used for listing the price or creating urgency by listing the amount left in stock.

Text #3: Can be used for additional information about the product, similar to a subheader

Text #4: Another area to add more product information.

Button: The main call to action, make this clear and compelling!

Not all of these fields are required, you only need Text #1 to create your product card.

Customising the look of your Carousel Node

You’ll have access to a robust style editor when creating your carousel node. Simply open up the style settings and click on the Card option to get started. From here you can edit every aspect of the card, including:

Hope you found this useful and are now ready to start building your own carousel nodes! If you need any assistance please get in touch with your Account Manager!

You can make the most of your video content and create dynamic conversation by inserting videos directly into your bots. As the videos are not hosted natively, this won’t negatively impact any page load speeds.

We support embedded videos from YouTube, Vimeo. If you need to embed videos from any other source, contact your Customer Success Manager for support.

Embedding an image or video into a ChatBot, InpageBot or VisualBot

How to add an image

1. Open up your bot in the editor
2. Choose the node you want to add it to and open it to edit
3. At the top of the node, you’ll see the option to add an image or video. Click to expand.

3. To add an image, click to open your image library and add the image you wish to use and change the settings as you wish for the location and size.

In VisualBots, you can already easily add images to answers, but you can use the same method above to add images above the answers with a few more options for location and size.

How to add a video
1. Select the video tab
2. Copy and paste the URL of the video from YouTube or Vimeo
3. Select the size, location and start point settings you wish to use

Adding a video in ChatBot or InpageBot
Addind a video in VisualBot

How to add images and videos with greater control

From YouTube

1. Click the share button below the YouTube video you want to use

YouTube Share button

2. Select the embed option, copy this code and paste it into the Question area of a BotSays, SingleChoice or MultipleChoice node.

3. Highlight your text and convert it to a code block by clicking the icon in the top-right corner of the box. You’ll notice that the text will now be in a grey box with an HTML tag in the corner.

4. Change the width to 100% and the height to auto. This will ensure your video resizes dynamically.

From Vimeo

1. Either click “Copy embed code” from the pop-up menu under the 3 dots in your library or, click the embed button at the top of the page.

2. Follow steps 2-4 from the YouTube instructions.

From Wistia

Embedding videos from Wistia is a little trickier than YouTube and Vimeo as you can’t use the embed code produced from the platform but an iframe code as mentioned in their article here – https://support.wistia.com/en/articles/8233354-embedding-and-sharing-media.

1. Find the code for your video from the link URL which will look something like this: https://wistia.com?wvideo=pj1mryf8bi or https://acmeinc.wistia.com/medias/pj1mryf8bi

2. Use this code and replace the highlighted video ID with yours:

<iframe src="https://acmeinc.wistia.com/medias/pj1mryf8bi?seo=true&videoFoam=false" allow="autoplay; fullscreen" allowtransparency="true" frameborder="0" scrolling="no" class="wistia_embed" name="wistia_embed" msallowfullscreen="" width="100%" height="auto"></iframe>

3. Follow steps 2-4 from the YouTube instructions.

Embedding a video in a VisualBot

Embedding a video in a visualbot is much the same as adding them to an InpageBot or ChatBot but to ensure the video always scales correctly you need to add some extra information to the code you are using.

1. Copy the URL or video ID of your video from YouTube, Vimeo or Wistia as above so that would be:
– YouTube: https://www.youtube.com/embed/e9lxFPrccfY?si=qW4IYfZPwp4UrQQX
– Vimeo: https://player.vimeo.com/video/812054001?badge=0&autopause=0&player_id=0&app_id=58479
– Wistia: https://acmeinc.wistia.com/medias/pj1mryf8bi?seo=true&videoFoam=false

2. Replace the Video URL in the code below and follow steps 2-4 from the YouTube instructions.

<div class="embed-container" style=" position: relative; padding-bottom: 56.25%; height: 0; overflow: hidden; max-width: 100%; width: 800px;"><iframe src="https://www.youtube.com/embed/e9lxFPrccfY?si=qW4IYfZPwp4UrQQX" frameborder="0" allowfullscreen="" style="position: absolute; top: 0; left: 0; width: 100%; height: 100%; "></iframe></div>


If you need help, please reach out to your Customer Success Manager.

Within your Leadoo accounts you’ll find four default user types you can choose from along with the option to create custom roles for greater flexibility and control.

Owner

By default, the owner of your account will be set as the person who signed the contract. There can only be one owner so if you need this to be updated please contact your Onboarding or Customer Success Manager.

Owners will have full admin access

Admin

You can have multiple admins on your account. They will have access to everything in the platform included in your subscription.

Member

This will give users access to most of the platform but with limited access to update settings and add users to the account.

This includes:

Conversion Insights: Access Bot insights, Company identification, Livechat insights, Source insights and Journey insights

Automation: Manage Workflows

Bots: Bot access, Basic bot management, Style management

Leads: Manage leads

AI: Manage knowledge base

Agent

This role gives users access to live chat only.

How to create a custom role

You may want to create custom roles for members of your team to give them access to the areas they need whilst restricting certain parts of the platform. 

For example, you might want the sales team to have access to some of the Conversion Insights and Leads area along with Live Chat. 

1. To create a custom role navigate here https://app.leadoo.com/team/roles-permissions
Don’t have access? Reach out to your Onboarding or Customer Success Manager.

How to create a custom role

2. Select the areas you want that role to have access to. 
Make sure you tick the box for “Access to main dashboard’ otherwise, the users may see a blank page when they log in.

Setting custom permissions

3. Go to https://app.leadoo.com/team/members to invite a new user to the account using the new role.

Click ‘Invite member’ and select your new role from the list.

How to add a team member
How to add a team member step 3

That’s it! You can update the permissions of this role at any time. 

If they can create simple online journeys selling those, so can anyone!

And it’s essential that even niche B2B providers do. Research shows that more than 4 out of 5 B2B buyers want to make buying decisions online. Even for things as complex as solar panels or statistical analysis. Simplifying digital buying journeys has become essential, whatever you sell.