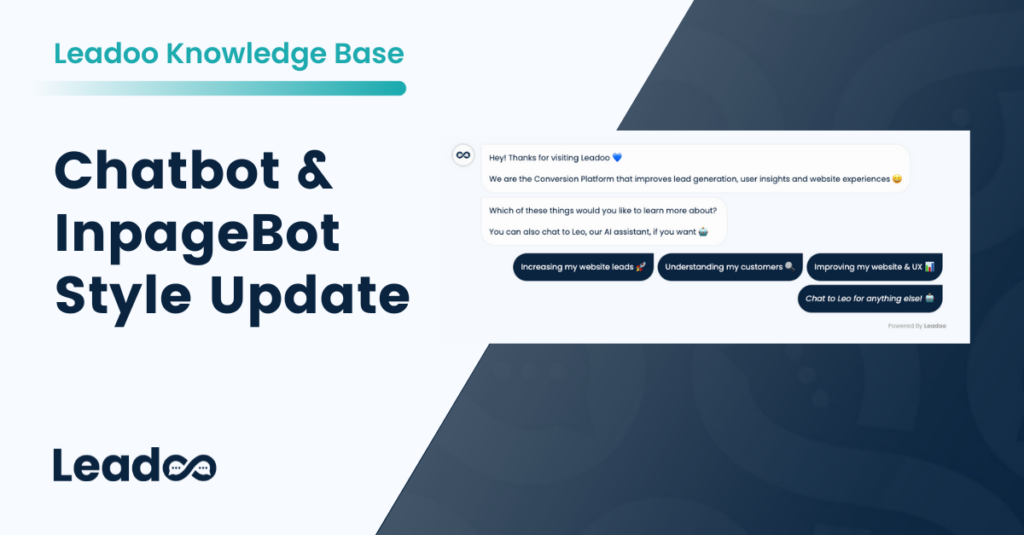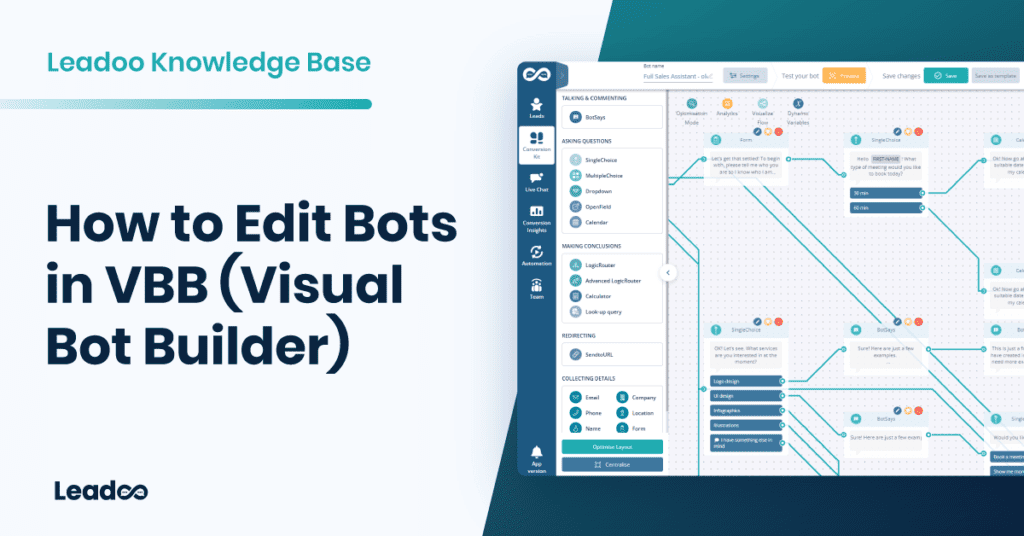
Here’s how you can edit the new style settings and what you can edit!
Navigate to the bot whose style you want to change. Click either “edit” or “actions” next to the bot, and then select “settings.” After that, go to the “Style” section.
Under style settings, you can choose an existing style or modify the current one. If you modify the current style, you can either update the changes or save it as a new style. The new style will appear in the dropdown menu, and you can apply it.

You can compare the changes node by node and preview them on mobile or desktop.

Basic Settings:
Under “Basic settings,” you’ll find the bot’s general style options, such as main colors, fonts, and font sizes. Most changes can be made under the “General” section.

Under Advanced settings, you’ll find more detailed options. These allow you to fine-tune specific elements not covered in the general settings.
The Advanced settings are divided into five different categories:
Bot Frame:
You can manage the background of the bot, border shapes and with chatbot the header area.

Bot Message:
With this you can manage the message that the bot sends to the website visitor. It includes font, font size, font color, shadow colors and button shapes.

Answer Message:
Similar to the bot message but this is for the buttons that the website visitors click on during the bot discussion.

Card:
Only relevant If you’re using the Carousel node. You can edit the card shapes, fonts, font colors and other visual effects.

Bot Trigger:

If you have any issues with your style settings you can contact your Leadoo contact person or [email protected]
You can make the most of your video content and create dynamic conversation by inserting videos directly into your bots. As the videos are not hosted natively, this won’t negatively impact any page load speeds.
We support embedded videos from YouTube, Vimeo. If you need to embed videos from any other source, contact your Customer Success Manager for support.
How to add an image:
1. Open up your bot in the editor
2. Choose the node you want to add it to and open it to edit
3. At the top of the node, you’ll see the option to add an image or video. Click to expand.

4. To add an image, click to open your image library and add the image you wish to use and change the settings as you wish for the location and size.

In VisualBots, you can already easily add images to answers, but you can use the same method above to add images above the answers with a few more options for location and size.

How to add a video:
1. Select the video tab
2. Copy and paste the URL of the video from YouTube or Vimeo
3. Select the size, location and start point settings you wish to use


1. Click the share button below the YouTube video you want to use
2. Select the embed option, copy this code and paste it into the Question area of a BotSays, SingleChoice or MultipleChoice node.
3. Highlight your text and convert it to a code block by clicking the icon in the top-right corner of the box. You’ll notice that the text will now be in a grey box with an HTML tag in the corner.
4. Change the width to 100% and the height to auto. This will ensure your video resizes dynamically.
1. Either click “Copy embed code” from the pop-up menu under the 3 dots in your library or, click the embed button at the top of the page.
2. Follow steps 2-4 from the YouTube instructions.
Embedding videos from Wistia is a little trickier than YouTube and Vimeo as you can’t use the embed code produced from the platform but an iframe code as mentioned in their article here – https://support.wistia.com/en/articles/8233354-embedding-and-sharing-media.
1. Find the code for your video from the link URL which will look something like this: https://wistia.com?wvideo=pj1mryf8bi or https://acmeinc.wistia.com/medias/pj1mryf8bi
2. Use this code and replace the highlighted video ID with yours:
3. Follow steps 2-4 from the YouTube instructions.
Embedding a video in a VisualBot is much the same as adding them to an InpageBot or ChatBot but to ensure the video always scales correctly you need to add some extra information to the code you are using.
1. Copy the URL or video ID of your video from YouTube, Vimeo or Wistia as above so that would be:
– YouTube: https://www.youtube.com/embed/e9lxFPrccfY?si=qW4IYfZPwp4UrQQX
– Vimeo: https://player.vimeo.com/video/812054001?badge=0&autopause=0&player_id=0&app_id=58479
– Wistia: https://acmeinc.wistia.com/medias/pj1mryf8bi?seo=true&videoFoam=false
2. Replace the Video URL in the code below and follow steps 2-4 from the YouTube instructions.
If you need help, please reach out to your Customer Success Manager.
Step 1. Decide what you want to add to your audiences.


Step 2. Create triggers on GTM

Step 3. Create tags
Facebook:
<script>
fbq(‘trackCustom’, ‘remarketing-ecommerce’);
</script>
‘remarketing-ecommerce’ <- this part of the script will be the name of the audience on your Ads Manager

Google Ads:

Leadoo AI collects information about visiting companies based on the public IP address of the company.
So, the visiting person’s IP address is identified and then checked if it belongs to a company. If it does, the company is shown in the company listing. If it doesn’t, the information isn’t displayed. In either case, the IP address isn’t stored anywhere.
We have a partner company called Clearbit. So, the IP address information goes there and company information comes back from their database. Visitor profiles (if in use) are then linked to these companies either via IP or according to company information given in the bot (i.e., manually filled in the company name into the bot). If there are additional questions / need for clarification, I am happy to answer.
In short, from public sources. Clearbit probably won’t tell where they get their data but almost all such actors (for example, Leadfeeder in Finland, Lead Forensics in UK) make use of several different sources; they have people who browse the web, they use public data sources, etc. However, it’s important to note that these are not personal data, but Clearbit, Leadfeeder etc. link the company’s IP space to the company’s name and its public information. For example, if Nokia Oy owns the IP space 109.68.1.1-109.68.1.45, then whenever a visitor comes from those addresses, it is recognized that the visitor works at Nokia.
Another important thing is, from Clearbit’s point of view they never know whose sites the visitor has even visited and from your site there never goes a call to Clearbit. All traffic to them goes through Leadoo. So, they don’t know whether the person working at Nokia has visited hs.fi, leadoo.com, or etuovi.fi. They don’t even know about the existence of any of these or any information about the person.
Personal data comes from the information people leave in the bot. Before that, we can “identify” the devices that have been used to visit the sites. These people are “unknown visitors” until they leave their contact details through the bot. Identification is done based on the etag left by the device and browser (works the same way as a cookie, but different technology). So how it works: A person comes to the site -> tracking is on if cookies are accepted -> x device is identified. -> person leaves the site -> an “unknown visitor” profile is created -> The person returns to the site the next day with the same device -> the same etag is recognized, meaning the person visiting with the same device is recognized -> the information from the previous day and new information are combined under the same profile -> person leaves their own information in the bot -> “Unknown visitor” becomes an identified person based on lead information.
There are 4 different tracking options you can set up on Leadoo AI’s control panel.
If you want to only track companies, you would choose “Never track” and in Company tracking you’d choose “Always track”.
If you want to add Leadoo tracking to your cookie acceptance but your CMP isn’t TCFv2 compliant you have to use Custom Consent Handling.
So how this should work is that Leadoo AI loads two types of scripts in different ways depending on whether the user accepts statistical cookies or not. So if the user does not accept statistics, the bots will load, but the analytics script will not load. As a result of this loading, cookies etc load correctly automatically. Below is how to make this work like this:
Leadoo AI’s bots can be loaded directly onto the website. However, Leadoo AI’s tracking can be put behind cookie acceptance. This happens in the following way:
From Leadoo AI’s tracking settings, the option “never” is activated <- tracking doesn’t automatically start. By default, Leadoo’s settings are ‘always track’, but it can be changed from Leadoo’s control panel. At the same time, the following script is added to your CMP that overrides the “never” rule after cookie acceptance and Leadoo’s tracking starts to work:
if (!window.ldanalytics) window.ldanalytics = [];
window.ldanalytics.push(function(a) {
a.toggleTracking(true, false);
});
More information here: http://docs.leadoo.io/docs/analytics-tracking#custom-consent-handling
And here’s which category each cookie falls into: https://leadoo.com/help/does-leadoo-use-cookies/. But as mentioned, with the way above, they load correctly depending on cookie acceptance.

There’s a good chance that you or your colleagues have had some less-than-ideal experiences buying and onboarding a new Martech platform.
Unfortunately it’s a common problem for marketers. So how is Leadoo AI different than other Martech tools and SaaS platforms in this regard? Time to find out with our onboarding overview guide!
Our secret sauce in delivering a great experience from the get-go is that we will never just dump our tech on you and hope for the best.
If you’ve signed up for one of our Engage, Expand or Elite packages, our Onboarding and Customer Success teams will be on hand to help you setup and achieve success quickly!
Leadoo AI’s onboarding service is an integral part of our customer experience. This means that our experts will assist you in setting up Leadoo from day one – including defining goals, sorting out technical details and creating the first set of bot designs with you. Our customers agree that it’s worth the fee. Some even claim that it’s one of the best parts of choosing Leadoo AI.
Here’s a guide for what to expect when getting started with us. However, depending on your subscription and needs our onboarding team will adjust where necessary to make sure we launch successfully!
Within 1-2 days of signing the contract, you’ll be contacted by the Leadoo team to schedule a time for a 30-60 minute kickoff call. In this call, your Leadoo AI onboarding representative will consult and plan out a solution tailored to your conversion goals.
The kickoff call will cover subjects such as:
1️⃣ The target pages and conversion types on your website to enhance with conversational experiences
2️⃣ CTAs, messaging and content to include within the conversational pathways
3️⃣ Your metrics for success, both from a marketing and wider business point of view
Your onboarding rep will provide you with a full list of subjects to be covered ahead of time, so you’ll have time to prepare. In this call, we’ll also schedule follow-up sessions as needed such as feedback and training sessions
After the kickoff call, we’ll roll up our sleeves and start implementing the planned bot solution (depending on which package you’ve selected this could be up to 3, 6 or 9 Leadoo bots).
That’s right, our conversational marketing specialists will build your first bots for you. This is good news since each member of our expert team has built hundreds of bots for a range of companies in different industries. So you’ll get their best practice expertise, and can build upon their templates in future iterations of your bots.
The timeline for this varies depending on revisions and requirements, but we aim to have your bot complete and live within a week if you are able to help us with feedback and sign-off!
Once your holistic bot solution is done, we’ll send our work your way for review and feedback. If needed, we’ll make necessary adjustments based on your comments. When you’re happy with the outcome, we’ll show you how to get the bots on your website.
Most of our subscriptions include the option to send your leads straight into your CRM system for easier lead management and marketing tracking.
Set-up and testing takes around 1-2 weeks depending on the complexity. Read more about what integrations we can setup here.
Get personal training for you and your team on what you need to know including Leadoo AI platform overview, viewing analytics & insights, editing bots and live chat.
The final step of the onboarding process is to publish the bots on your website. Adding Leadoo to your website is included in our service – and you’ll get it done faster if you do it through us instead of a third party. If you opt for us to do this for you, be prepared that we will need admin-level access to your content management system or Google Tag Manager.
Once Leadoo AI is up and running on your website, as standard we’ll book you a review session for 4-6 weeks after the bots are published with one of our Customer Success team members.
Our Customer Success team will take over to make sure you are happy with our service and that Leadoo AI keeps generating results now and in the future. You can set the frequency of review meetings based on your preferences, and the Conversion Expert hours in your Leadoo package. Your Customer Success Manager will always come with ideas and show you how to make the most of the platform in between your sessions together.
Click your profile image in the top right navigation open your profile menu. In the menu, select “My account” to open the profile.

Scroll down the page to find the section called “Calendar sync“.

If you want to use Google Hangouts conferencing links in your meetings → use a Google account email.
If you want to use Teams conferencing links in your meetings → use a Microsoft account email.

*The system prefills the email field with the address you use in your Leadoo account.
If you want to use another email, replace the prefilled text with the preferred email address.
Also make sure your calendar is not in read-only mode! (Only publicly available calendars can be synced)
If you are unable to edit your email address or click on the Sign with XX ask your Customer Success Manager to check that the feature is enabled for you 👇

Select sign in button depending on the type of calendar service your email uses.
Google Calendar → Sign in with Google
Outlook calendar→ Sign in with Microsoft personal calendars
Office 365 → Sign in with Microsoft business calendars
Allow Leadoo AI to manage your calendar
A separate third-party popup will open to finalize the sync.
In order for the calendar sync to succeed, make sure to check all boxes to give Leadoo full permissions to read and modify your calendar, i.e. handle meeting bookings for you.
Leadoo AI will not use these rights to anything else than making incoming bookings through bots that have booking node where your calendar is linked. Leadoo will not e.g. in any circumstance delete any meetings from your calendar.
When you see this or similar view, your calendar sync was successful. If this doesn’t appear or you get error messages, the sync has failed.

Some reasons why sync might fail:
After the calendar shows synced choose to which hours in the day, how far in future and in what intervals calendar bookings can be made to your calendar.

Availability allows you to choose your time zone and the hours within which calendar bookings can be made each day. Ie. Always from 9am to 12pm and 1pm to 5pm (if you want to block bookings over lunch) or Mondays from 10pm to 5pm so you can start your week by emails and planning.
Remember that despite these availability hours the existing bookings in your calendar will also block anyone from scheduling overlapping meetings. Ie if you have a recurring team meeting every Monday morning this will automatically be unavailable in your calendar.

Allow scheduling
Here you can decide how far in future your calendar can be viewed and meetings scheduled.
Buffer time
This comes handy if you want to always have a short break in between meetings so that meetings cannot be booked back to back in your calendar.
Don’t allow scheduling
If you want to make sure there will be no surprise meetings for the same day or no new meetings for next X hours or days. With this rule your calendar can only be viewed and booked starting after the set time. This is also the minimum time that you will have for preparing for the meeting.
Once a meeting has been scheduled from your calendar both you and the scheduler will get an calendar invite. In default meeting details you can choose what will this calendar invitation state.
Google Calendar → Select Google Meet
Outlook calendar→ Select Teams
Office 365 → Select Teams

NB!
If you have included the scheduling of different meeting types you can also set the meeting details per bot or dialogue branch within the bot editor.
Once the setup is complete your Leadoo Customer SUccess Manager will add you to receive any leads that come through your own personal calendar integration. This way you will both get the calendar invitation as well as the bot dialogue and other lead details collected on the bot.
Once the setup is complete your Leadoo Customer Success Manager will add you to receive any leads that come through your own personal calendar integration.
This way you will both get the calendar invitation as well as the bot dialogue and other lead details collected on the bot.
As third-party cookies are being phased out by most browsers (iOS already blocked them in 2020 and Chrome looking to do so in 2022) we no longer rely on them. In addition, it’s also common for users to periodically empty their browser’s cache.
3rd party cookies are thus very unreliable even today. Even if you had a cookie popup and your customers clicked “I approve” their iPhone would not install the 3rd party cookie – and you wouldn’t be able to follow them. Even if they approved it. Cookies are dead.
Leadoo is however future proof, for the time after cookies, as we use HTTP header ETags to identify a user. And much like pretty much all other technologies, Leadoo also uses session storage and local storage. Technically this is a more robust way when browser cookies are iffy already today. In terms of user compliance for tracking them, the same is required by eTags as is required for cookies for instance by ePrivacy regulations: You always need to ask for consent before starting to track somebody – regardless of technology.
ETags are a way to track different browsers, similar to how cookies are used. Technically the implementation details are a bit different. ETags are built for recognizing if the web browser already has an asset (such as an image or video) so that the server doesn’t need to send it over the wire again.
In practice, eTags are used in a similar way to cookies to fingerprint a user and to know that a browser that visits the site right now is the same one that visited the site a week ago.
Here is a list of ways Leadoo’s bots and technologies track you if you give consent.
Leadoo Browser Storage Usage
FUNCTIONAL
session storage “ld_session_origin“ –ID for session origin.
session storage “ld_al_exp” – Session expiry timestamp.
local storage “ld_bot_consent” – Set after the user has interacted with the bot. After this Leadoo Analytics may be activated.
ld_BOTID_open_time where BOTID is the numerical ID of a bot (used for tracking open visual bot modals were opened)
session storage “ld_env“ – storing UTM parameters and referrer, for the purpose of managing referrals across pages.
ANALYTICAL
Etag “iapi.leadoo.com” – eTags is used for connecting one visitor session with the next. (Technically all websites always use “hundreds” of etags)
local storage “Id_id” – Set by Leadoo Analytics for detecting device being used
session storage “ld_co” – unique id of the company profile identified by analytics script (for the current session only).
session storage “ld_cinf” – Basic information about the company, without identifiable data, resolved during company identification process.
session storage “ld_session_id” – Application session to distinguish client server connections from each other.
Other
You may encounter other cookies and such as well like
cookie “__cfduid” –This relates to content delivery network called Cloudflare. See Understanding the Cloudflare Cookies
Cookie “ga” and similarly – See Google Analytics and how they use cookies.
Leadoo’s bot conversations are build with different nodes. With these nodes you can use to personalize your conversations. In this article we explain what are the different node types and how you can use them.
There are 18 different node types which you can use to personalize your conversations.
Bot Says – For when you want to ‘say something’ without offering an option and will load the next part of the conversation straight afterwards.

Single Choice – When you want the visitor to select only one choice which can then branch off to different pathways or the same.

Multiple Choice – When you want the visitor to select multiple options and continue down one path afterwards.

Dropdown – This is useful when you have a long list of options for the visitor to choose from such as location. To use this you must have already created and saved a dropdown list.
Find out how to add dropdown lists here.

Open field – Adds a box with an open text field for the visitor to complete

Calendar (Date & time picker) – Visitor can choose the date and time freely from the calendar. The time slot they picked won’t be synchronized to any calendar, so this node is just for picking a time.

Calendar (Calendar booking) – Visitor can book a meeting straight from your calendar that has been integrated and synchronized with Leadoo. Calendar Booking makes sure to check you calendar and only shows time slots that are available.
You can read more from here: How to sync your calendar with Leadoo
Logic Router – Use this to determine what option the visitor gets based on their previous responses. This could be via a scoring method or by label.
Using scoring – You will need to add a score to each answer from previous single choice nodes to determine the result here, then set the score you want to determine which result.
e.g. If visitor scored 1-10 they get answer #1, if the score 11-20 they get answer #2.
You can use this to decide if a candidate gets through to the end of an application, or if you want to give a suggestion based on a visitors preferences.
Using labelling – You can also determine a result depending on what labels were most chosen on the single choice options beforehand.
e.g. Visitor selects 3 answers from previous questions, 2/3 of those had the label ‘red’ so they will then see the calculator result for red.
Learn how to set-up labelling here.

Advanced Logic Router – More info here: Cheat sheet: Advanced Logic Router Operations
Calculator – More info here: Creating Dynamic Variables for Calculator and Advanced Logic Router Nodes
Send To URL – The same as Single Choice but allows you to hyperlink a button to another URL
External URL – is where you want the hyperlink to open
New tab = open in new tab
Current tab = open in the same tab

Standard contact nodes include: Name, Email, Company name & Phone number
Grouped contact nodes
Contact – You can collect all your visitors details in one go and select from: name, email address, phone number, company name, country, city, street address, zip code and an additional message.

Location– Select which options you want including: country, city, street address & zip code

Attachments – Use this to allow visitors to upload documents or images. E.g. a CV or supporting information for IT support.

Live Chat – Leadoo live chat can be initiated through single choice options but if you want to add other messaging options too (WhatsApp & Facebook Messenger), you can use the live chat node instead.
TIP – Make sure you still have automated dialogue too so that if there are no agents online your visitor can still get in touch.
Find out how to set-up and use live chat here